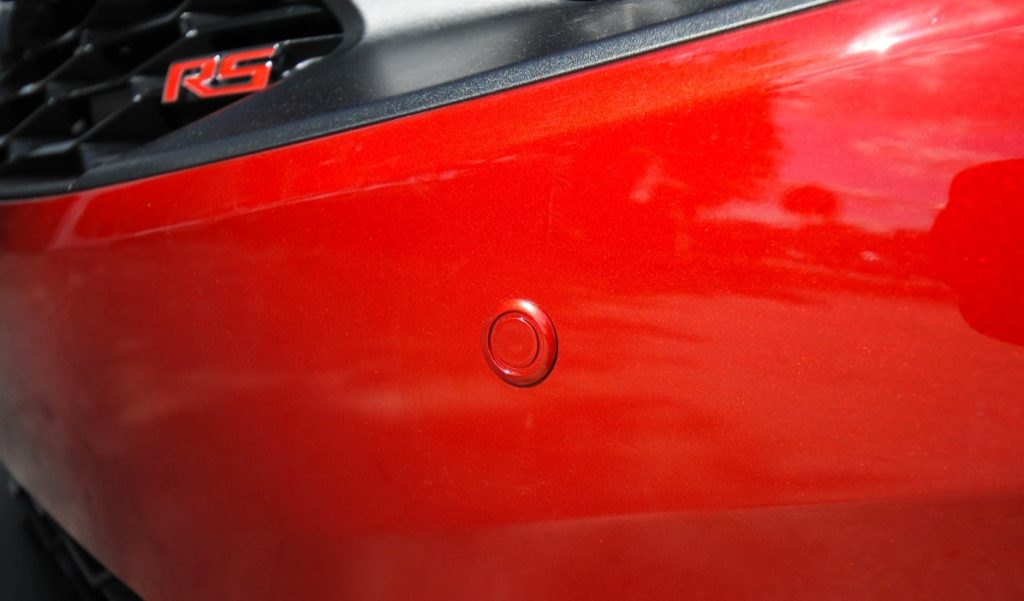
Driving a car is not just about getting from point A to B; it’s an experience, a statement of personal style. For car enthusiasts, the desire to customize and personalize their vehicles is an intrinsic part of the journey. One common consideration is the possibility of painting parking sensors. But can you really paint these essential safety features without compromising their functionality? In this comprehensive guide, we’ll take a closer look at the ins and outs of painting parking sensors, providing you with valuable insights and tips to ensure a flawless finish that adds a personalized touch to your ride.
Understanding Parking Sensors
Parking sensors have become an integral part of modern vehicles, serving as a crucial aid in parking and avoiding collisions. These sensors use advanced technologies such as ultrasonics or electromagnetics to detect obstacles around your vehicle. Installed discreetly in the front and rear bumpers, they provide real-time feedback through audible alerts or visual indicators, making parking in tight spaces a less stressful endeavor.
The Craving for Personalization
In a world where individuality is celebrated, car owners often seek ways to make their vehicles stand out. Personalizing a car goes beyond choosing a unique color or adding custom rims—it’s about making a statement that reflects your personality. Painting parking sensors is one such avenue for personalization, but it’s crucial to approach this task with care to avoid unintended consequences.
Can You Really Paint Parking Sensors? The Step-by-Step Process
Painting parking sensors requires a delicate balance between personalization and functionality. Let’s break down the process into detailed steps to help you achieve a professional and aesthetically pleasing result.
1. Choosing the Right Paint
When it comes to painting parking sensors, the type of paint you choose matters. Opt for a high-quality automotive paint designed for use on plastic and metal surfaces. Ensure the selected paint is weather-resistant and can withstand the varied conditions your vehicle may encounter.
2. Removing the Sensors
For a seamless paint job, consider removing the parking sensors before starting the process. Consult your vehicle’s manual for guidance or seek professional assistance to ensure a safe and damage-free removal.
3. Thorough Cleaning
Before applying any paint, thorough cleaning is essential. Remove dirt, grime, and grease from the sensors using a mild detergent or automotive cleaning solution. A clean surface ensures better paint adhesion and a smoother finish.
4. Masking Off Surrounding Areas
To protect adjacent surfaces from unintended paint overspray, use painter’s tape to carefully mask off the areas surrounding the sensors. This step is crucial for achieving a clean and professional look.
5. Applying Primer
Priming is a crucial step that should not be overlooked. Apply a thin layer of automotive primer to the sensors, as it enhances paint adhesion and contributes to a more durable finish.
6. Painting with Precision
When it’s time to paint, use even and light strokes. Multiple thin coats are preferable to a single thick coat, as they contribute to a more even and professional finish. Allow each coat to dry completely before applying the next.
7. Finishing with a Clear Coat
For an added layer of protection and a polished appearance, finish the painting process with a clear coat. This final step shields the sensors from environmental elements and enhances the overall durability of the paint job.
Potential Challenges and Considerations
While the prospect of painting parking sensors is exciting, it’s essential to be aware of potential challenges and considerations that may arise during the process.
1. Warranty Implications
Modifying or painting original equipment in your vehicle could potentially void the manufacturer’s warranty. Before proceeding, carefully review your warranty terms to understand any implications. (See Also: Can You Spray Rhino Liner on Plastic? A Comprehensive Guide)
2. Impact on Sensor Performance
Inaccurate paint application or the use of the wrong type of paint may affect sensor performance. It’s crucial to ensure that the chosen paint does not interfere with the sensors’ ability to detect obstacles accurately.
3. Seeking Professional Assistance
If you find yourself unsure about the process or concerned about potential risks, consider seeking professional assistance. Automotive experts can provide guidance, ensuring a seamless paint job without compromising the functionality of your parking sensors.
Expert Tips for Painting Parking Sensors: Elevate Your Customization Game
So, you’ve decided to take the plunge and add a personal touch to your vehicle by painting the parking sensors. While the idea is exciting, it’s essential to approach the process with precision to ensure both aesthetics and functionality. Here are some expert tips to guide you through the painting journey:
1. Choose Quality Over Quantity
Invest in high-quality automotive paint specifically designed for plastic and metal surfaces. While it might be tempting to cut costs, using subpar paint can compromise both the appearance and functionality of your parking sensors.
2. Mindful Removal Process
If you opt to remove the sensors for painting, do so with care. Follow the manufacturer’s guidelines or seek professional assistance to prevent damage during removal. A smooth detachment ensures a seamless reinstallation.
3. Thorough Cleaning is Key
Before applying any paint, ensure the sensors are spotless. Clean them thoroughly to remove dirt, grime, and grease. A clean surface is crucial for optimal paint adhesion and a polished finish.
4. Precise Masking Saves Hassle
Take the time to mask off the surrounding areas with painter’s tape. This precision prevents unintended overspray, ensuring a clean and professional look without affecting other parts of your vehicle.
5. Primer: The Foundation of Excellence
Don’t underestimate the power of a good primer. Apply a thin, even layer to enhance paint adhesion and contribute to a more durable and long-lasting finish on your parking sensors.
6. Master the Art of Even Strokes
When applying the paint, use even and light strokes. Multiple thin coats result in a more even finish compared to a single thick coat. Patience in this step pays off in the final aesthetic appeal.
7. Clear Coat for the Win
Finish the process with a clear coat. This not only adds a layer of protection but also gives your parking sensors a polished appearance. The clear coat is your secret weapon for a professional-looking finish.
8. Check Warranty Terms
Before diving into customization, review your vehicle’s warranty terms. Modifying original equipment may have implications, so it’s essential to understand any potential impact on your warranty.
9. Test for Sensor Performance
After painting, test the sensors thoroughly to ensure they function as intended. Look out for any inconsistencies in their ability to detect obstacles. If issues arise, revisit the painting process or seek professional assistance.
10. Consider Professional Help
If you’re uncertain about any aspect of the process or if you want a flawless finish without the DIY hassle, consider seeking professional assistance. Automotive experts bring experience and precision to the table. (See Also: What happens if you paint over epoxy? A Comprehensive Guide?)
11. Weather Matters
Choose a suitable day for painting—preferably a dry day with moderate temperatures. Extreme weather conditions can affect the paint’s adherence and overall quality of the finish.
12. Patience is a Virtue
Rome wasn’t built in a day, and neither is a perfectly painted set of parking sensors. Allow each coat to dry completely before proceeding to the next step. Patience ensures a polished and professional outcome.
13. Maintenance is Key
After the painting process, maintain your parking sensors regularly. Clean them gently, avoiding abrasive materials, to preserve both the paint job and the functionality of the sensors.
14. Embrace Your Unique Style
While following guidelines is crucial, don’t be afraid to inject a bit of your personality into the process. Choose colors that resonate with you and reflect your unique style.
15. Share Your Experience
Lastly, share your experience with fellow car enthusiasts. Whether it’s a success story or a lesson learned, your journey in painting parking sensors can benefit others embarking on a similar customization adventure.
By incorporating these expert tips into your painting process, you can elevate your customization game and achieve a personalized, professional look for your parking sensors. Remember, the goal is to strike the perfect balance between aesthetics and functionality for a truly customized driving experience.
Frequently Asked Questions About Painting Parking Sensors
Adding a personalized touch to your vehicle by painting parking sensors can be an exciting venture. However, it’s natural to have questions about the process, potential challenges, and the impact on sensor functionality. In this FAQ section, we’ll address some common queries to guide you through the customization journey.
Q1: Can I Paint Parking Sensors Without Removing Them?
A: While it’s technically possible, removing the sensors before painting is highly recommended for a more professional finish. It allows for thorough cleaning, precise masking, and avoids unintentional overspray on adjacent areas.
Q2: What Type of Paint Should I Use for Parking Sensors?
A: Opt for high-quality automotive paint designed for plastic and metal surfaces. Ensure the paint is weather-resistant and compatible with outdoor exposure to withstand varying weather conditions.
Q3: Will Painting Parking Sensors Void My Car’s Warranty?
A: Modifying original equipment may have warranty implications. It’s crucial to review your vehicle’s warranty terms before painting parking sensors to understand any potential impact on warranty coverage.
Q4: Can I Test the Sensors After Painting?
A: Yes, it’s recommended to test the sensors thoroughly after painting to ensure they function as intended. Check for any inconsistencies in their ability to detect obstacles and address any issues promptly.
Q5: Should I Seek Professional Help for Painting Parking Sensors?
A: If you’re uncertain about the process or want a flawless finish without the DIY hassle, considering professional assistance is a wise choice. Automotive experts can provide guidance and ensure a seamless paint job. (See Also: What Primer to Use Over Body Filler? A Comprehensive Guide)
Q6: How Do I Protect Surrounding Areas During Painting?
A: Use painter’s tape to mask off surrounding areas before painting. This ensures a clean and professional look without unintentional paint overspray affecting other parts of your vehicle.
Q7: Can Extreme Weather Affect the Painting Process?
A: Yes, extreme weather conditions can impact the paint’s adherence and overall quality of the finish. Choose a dry day with moderate temperatures for the painting process.
Q8: Should I Use a Clear Coat After Painting?
A: Yes, applying a clear coat is recommended. It adds an extra layer of protection and provides a polished appearance to your parking sensors.
Q9: How Often Should I Maintain Painted Parking Sensors?
A: Regular maintenance is essential. Gently clean the sensors with non-abrasive materials to preserve both the paint job and the functionality of the sensors.
Q10: Can I Customize the Color of My Parking Sensors?
A: Absolutely! Embrace your unique style by choosing colors that resonate with you. Just ensure the selected paint is suitable for automotive applications.
By addressing these frequently asked questions, we aim to provide clarity and guidance for those considering the exciting journey of painting parking sensors. Remember to balance aesthetics and functionality for a truly customized and safe driving experience.
Conclusion: Striking the Right Balance
In conclusion, the decision to paint parking sensors is a personal one that requires careful consideration and execution. Personalizing your vehicle is a gratifying experience, but it’s crucial to strike the right balance between aesthetics and functionality.
Whether you choose to embark on the painting process yourself or enlist professional help, precision is the key. By following the outlined steps and being mindful of potential challenges, you can successfully add a personalized touch to your vehicle without compromising the essential safety features provided by parking sensors.
Remember, the road to personalization should be enjoyable, and with the right approach, you can achieve a customized look that reflects your unique style while ensuring the safety and functionality of your vehicle’s parking sensors.


