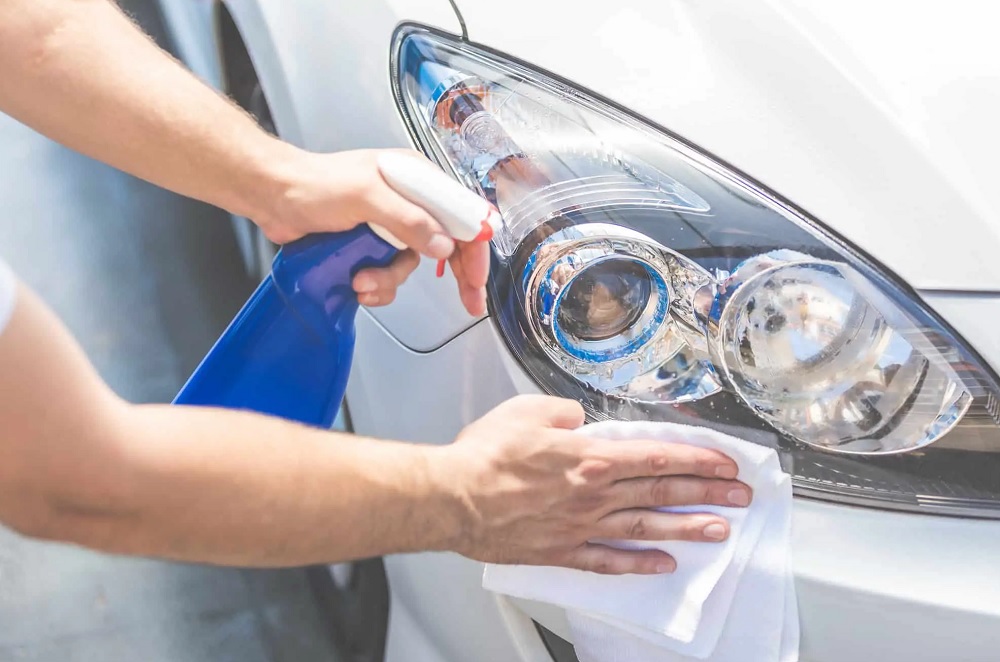
In the realm of DIY car care, the Magic Eraser has become a household name, celebrated for its remarkable ability to tackle stains and grime. However, the question on every car enthusiast’s mind remains: can this seemingly ordinary eraser work its magic on foggy headlights? In this comprehensive exploration, we will dissect the process, weigh the pros and cons, and provide practical tips for optimal results.
Understanding the Hype Around Magic Eraser
What is a Magic Eraser?
A Magic Eraser, composed of melamine foam, is renowned for its micro-abrasive properties. Originally designed for household cleaning, its adaptability has led to creative applications, including the restoration of foggy headlights.
The Science Behind the Magic
Melamine foam acts as a gentle abrasive, capable of lifting surface contaminants without causing damage. This unique composition makes the Magic Eraser an intriguing candidate for headlight restoration.
Why Headlights Lose Clarity
Before delving into the magical solution, it’s crucial to understand why headlights accumulate fog and lose their clarity over time. Factors such as UV exposure, oxidation, and environmental contaminants contribute to this common automotive woe.
The Magic Eraser Experiment: Putting it to the Test
Gathering Your Tools
Before embarking on the experiment, assemble your toolkit. All you need is a Magic Eraser, water, and a clean cloth. It’s a cost-effective alternative to professional restoration services.
Step-by-Step Headlight Restoration
- Inspecting Headlight Condition Begin by assessing the severity of fogging. Is the haze mild or deeply ingrained? This initial inspection guides the restoration process.
- Wetting the Magic Eraser Dampen the Magic Eraser with water, ensuring it’s not overly saturated. Too much moisture can impede the eraser’s effectiveness.
- Gently Rubbing the Headlight Surface Employ gentle circular motions to rub the foggy surface. The micro-abrasive nature of the Magic Eraser begins to lift contaminants, revealing the underlying clarity.
- Wiping Clean After erasing the fog, wipe the headlight clean with a dry cloth. The results may surprise you.
The Magic Unveiled: Does It Work?
Pros of Using a Magic Eraser
- Cost-Effective Solution In comparison to professional restoration services, a Magic Eraser offers an economical approach for DIY enthusiasts.
- DIY Convenience With minimal tools required, it’s a do-it-yourselfer’s dream solution. No need for complex procedures or specialized skills.
- Surprisingly Effective Results Witness the magic unfold as the eraser eliminates haze and enhances clarity. The immediate improvement is often visible.
Cons and Considerations
- Temporary Solution While the Magic Eraser provides quick results, the effects may be temporary. Periodic reapplication might be necessary for sustained clarity.
- Potential for Abrasion Exercise caution to prevent overuse. Excessive scrubbing can lead to abrasion, potentially affecting the longevity of your headlights.
Tips and Tricks for Optimal Results
Enhance your Magic Eraser headlight restoration experience with these valuable tips:
- Regular Maintenance: Periodically use the Magic Eraser to prevent severe fogging, incorporating it into your routine car care.
- Protective Coating: After restoration, apply a protective coating to prolong the clarity achieved. This extra step adds a layer of defense against future environmental damage.
- Test in an Inconspicuous Area: Before widespread application, test the Magic Eraser in a hidden spot to ensure compatibility and avoid any unforeseen issues.
Beyond the Magic: Additional Headlight Care Tips
UV Protection Films
Consider applying UV protection films to your headlights. These films act as a shield against harmful UV rays, minimizing the risk of future fogging and discoloration.
Professional Restoration
For persistent fogging or significant damage, professional restoration services might be the optimal solution. Trained technicians can address complex issues, ensuring a more durable and long-lasting outcome.
Expert Tips for Headlight Restoration with a Magic Eraser
Headlight restoration with a Magic Eraser is a DIY project that can yield impressive results, but mastering the technique requires a bit of finesse. Here are some expert tips to enhance your headlight cleaning experience and achieve optimal clarity.
1. Choose the Right Magic Eraser Variant
Not all Magic Erasers are created equal. Opt for the original variant without added cleaning agents. This ensures a pure melamine foam that won’t leave residues on your headlights.
2. Prep the Headlight Surface
Before diving into the restoration process, thoroughly clean the headlight surface to remove loose dirt and grime. This sets the stage for the Magic Eraser to focus on the more stubborn contaminants.
3. Control Pressure and Motion
Apply a gentle and consistent pressure when using the Magic Eraser. Circular motions work well to lift contaminants without causing unnecessary abrasion. Avoid excessive force to prevent damage.
4. Work in Sections
Divide the headlight into manageable sections. This approach ensures thorough coverage and allows you to monitor progress. It’s particularly effective for larger headlights or those with intricate designs. (See Also: Sprayway vs. Invisible Glass: Choosing the Best Cleaner for Crystal-Clear Results)
5. Rinse the Magic Eraser Frequently
As you work on the headlights, rinse the Magic Eraser frequently to prevent the accumulation of debris. A clean eraser maintains its effectiveness and reduces the risk of scratches.
6. Use Protective Eyewear
While the Magic Eraser is generally safe to use, wearing protective eyewear is advisable. This precautionary measure shields your eyes from any dislodged particles during the cleaning process.
7. Apply UV Protection After Restoration
To extend the life of your headlight clarity, consider applying a UV protective coating after using the Magic Eraser. This additional layer acts as a shield against the sun’s harmful rays, minimizing future oxidation.
8. Regular Maintenance is Key
Incorporate headlight maintenance into your regular car care routine. Periodic use of the Magic Eraser can prevent severe fogging and ensure consistently clear headlights.
9. Test in an Inconspicuous Area
Before commencing the full restoration, test the Magic Eraser in a small, inconspicuous area to check for any adverse reactions. This simple step helps avoid unexpected issues on the entire headlight surface.
10. Combine with Polishing for Extra Shine
For an extra shine, consider combining the Magic Eraser with a plastic headlight polishing kit. This two-step process can elevate the clarity of your headlights to a professional level.
11. Dry Thoroughly After Cleaning
Once you’ve completed the restoration process, ensure the headlights are thoroughly dry before hitting the road. A clean, dry surface minimizes the risk of water spots and maintains the clarity achieved.
12. Monitor for Long-Term Results
While the Magic Eraser offers immediate improvement, monitor your headlights for long-term results. If fogging reoccurs frequently, consider more permanent solutions or professional assistance.
13. Avoid Overusing the Magic Eraser
While effective, the Magic Eraser should not be overused. Reserve its application for when fogging is evident, and avoid unnecessary scrubbing to prevent premature wear on the headlight surface.
14. Seek Professional Help for Deep Damage
For headlights with extensive damage or persistent fogging, consulting a professional restoration service is recommended. Trained technicians can address complex issues for a more durable outcome.
15. Enjoy the Fruits of Your Labor
Finally, once the restoration is complete, take a moment to enjoy the transformation. Clear headlights not only enhance your vehicle’s appearance but also contribute to safer nighttime driving. (See Also: Can You Use Shoe Polish on Car Windows? Exploring Surprising Hacks!)
By incorporating these expert tips into your Magic Eraser headlight restoration routine, you can elevate the clarity of your headlights and ensure a lasting impact. Remember, a well-maintained vehicle is not only a reflection of care but also a key factor in road safety.
Headlight Restoration with Magic Eraser: Frequently Asked Questions
Headlight restoration using a Magic Eraser is a popular DIY method, but it often comes with a range of questions. Let’s address some common queries to guide you through the process and ensure successful headlight clarity restoration.
1. Can I Use Any Type of Magic Eraser for Headlight Restoration?
While there are various Magic Eraser variants available, it’s recommended to use the original variant without added cleaning agents. This ensures a pure melamine foam for effective headlight restoration without leaving residues.
2. How Often Should I Use the Magic Eraser for Headlight Maintenance?
For routine maintenance, using the Magic Eraser every few months is generally sufficient. However, the frequency may vary based on environmental conditions and your driving habits. Regular checks can help determine when maintenance is needed.
3. Is the Magic Eraser Method Safe for All Headlight Materials?
The Magic Eraser is safe for most headlight materials, including plastic and polycarbonate. However, it’s advisable to test in a small, inconspicuous area first to ensure compatibility and avoid any adverse reactions.
4. Will the Magic Eraser Method Completely Remove Scratches from Headlights?
The Magic Eraser primarily addresses surface contaminants and fogging, but it may not eliminate deep scratches. For scratches, consider additional steps such as polishing or consult a professional for more advanced solutions.
5. Can I Apply UV Protection After Using the Magic Eraser?
Absolutely! Applying a UV protective coating after Magic Eraser restoration is a smart move. It acts as a shield against harmful UV rays, extending the life of the headlight clarity achieved during the restoration process.
6. How Long Does the Effect of Magic Eraser Headlight Restoration Last?
The effects of Magic Eraser restoration are generally immediate, providing a noticeable improvement. However, the duration of clarity can vary. Factors such as weather conditions, driving habits, and exposure to environmental elements will influence the longevity of the results.
7. Is the Magic Eraser Method Suitable for Severe Headlight Damage?
While the Magic Eraser is effective for mild to moderate fogging, it may not be suitable for severe damage. In such cases, seeking professional assistance or exploring more advanced restoration methods is recommended for optimal results.
8. Can I Use the Magic Eraser on Taillights or Other Vehicle Surfaces?
While the Magic Eraser is primarily designed for household cleaning and headlight restoration, it can be used on other vehicle surfaces like taillights. However, it’s important to check for compatibility and avoid sensitive areas.
9. Does the Magic Eraser Method Work on Colored or Tinted Headlights?
The Magic Eraser method is most effective on clear headlights. While it may improve clarity on colored or tinted headlights to some extent, the results may not be as pronounced. Always test in an inconspicuous area before widespread application.
10. Can I Drive Immediately After Using the Magic Eraser on Headlights?
It’s advisable to let the headlights dry thoroughly after using the Magic Eraser before driving. This ensures that any residual moisture is eliminated, preventing water spots and maintaining the clarity achieved during the restoration process. (See Also: How to Remove Duct Tape Residue from Car Window – Expert Tips)
11. What Should I Do If I Notice Abrasion or Damage After Using the Magic Eraser?
If you observe signs of abrasion or damage after using the Magic Eraser, discontinue the process immediately. Assess the severity of the damage, and if needed, consult a professional for appropriate restoration or repair.
12. Is the Magic Eraser Method Environmentally Friendly?
The Magic Eraser itself is made of melamine foam, which is a non-toxic material. However, it’s essential to dispose of used Magic Erasers responsibly. Consider the environmental impact and follow local waste disposal guidelines.
13. Can I Combine the Magic Eraser Method with Other Headlight Restoration Techniques?
Yes, you can combine the Magic Eraser method with other techniques, such as plastic headlight polishing, for enhanced results. Always follow proper procedures and test compatibility to avoid any adverse reactions.
14. Is the Magic Eraser Method Suitable for Vintage or Classic Car Headlights?
The Magic Eraser method is generally suitable for a wide range of headlights, including those on vintage or classic cars. However, exercise caution, and if in doubt, test in a small area first to ensure compatibility.
15. Can I Use a Magic Eraser on Headlights with a Protective Coating?
While the Magic Eraser can be effective on headlights with protective coatings, it’s essential to assess the condition of the coating. Overzealous scrubbing may compromise the coating, so gentle and controlled application is recommended.
Navigating the world of headlight restoration with a Magic Eraser can raise questions, but armed with these answers, you’re well-equipped to embark on your journey to clearer, brighter headlights.
Conclusion: Is the Magic Eraser Your Headlight Savior?
In conclusion, the Magic Eraser emerges as a viable option for DIY headlight restoration. While it may not provide a permanent fix, its accessibility, cost-effectiveness, and immediate results make it a valuable tool in the car care arsenal.
Unveil the magic, witness the transformation, and let your headlights shine bright with the simple yet effective touch of a Magic Eraser! Remember, maintaining the clarity of your headlights is not only about aesthetics but also crucial for safe nighttime driving. So, embrace the magic and enjoy the road with crystal-clear headlights.


