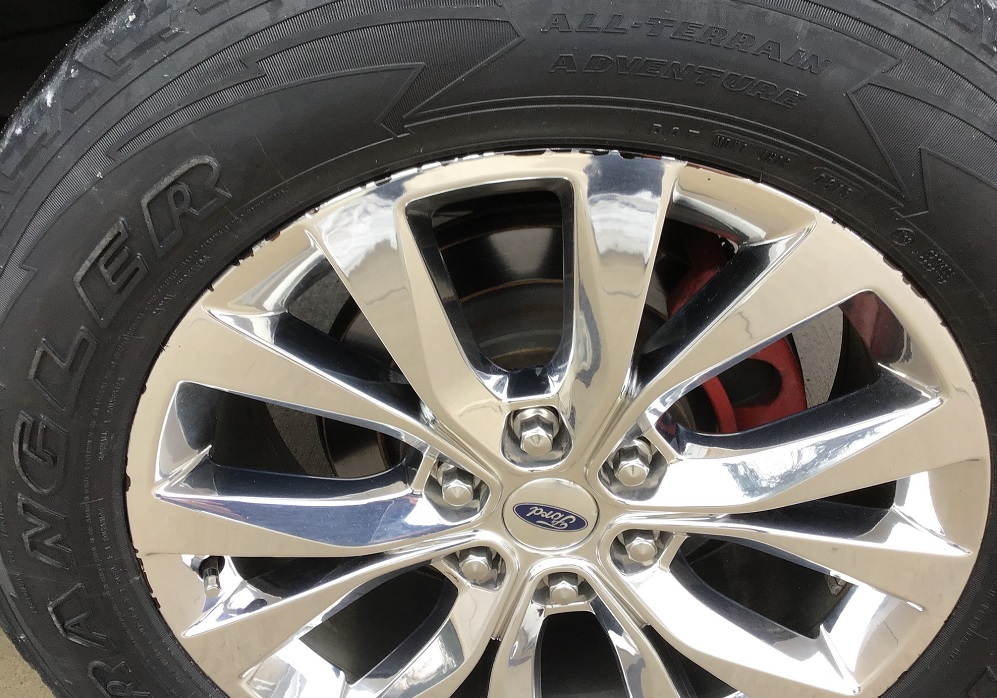
Chrome rims, with their sleek and glossy finish, can transform the look of any vehicle. However, when flaking occurs, it not only tarnishes the appearance but can also lead to more significant issues if not addressed promptly. This comprehensive guide aims to equip you with a deep understanding of how to fix flaking chrome rims. We won’t just explore quick fixes; we’ll delve into sustainable solutions that ensure your chrome rims maintain their brilliance for the long haul.
Understanding the Causes of Chrome Rim Flaking
Chrome rims, positioned at the outer edges of your vehicle, endure a variety of environmental factors that contribute to flaking. Before we jump into restoration methods, let’s unravel the factors that lead to this pesky problem.
Factors Contributing to Flaking
- Prolonged Exposure to Elements: Chrome rims bear the brunt of unpredictable weather conditions. Continuous exposure to rain, snow, and sunlight accelerates wear and tear, making flaking more likely.
- Inadequate Maintenance: The choice of cleaning products matters. Using abrasive cleaners or harsh chemicals can strip away the protective layers of chrome, making it susceptible to flaking.
Assessing the Damage
Before diving into restoration, a crucial step is assessing the extent of the damage. This ensures you tailor your approach to the specific needs of your chrome rims.
Steps to Assess Flaking
- Visual Inspection: Examine the rims closely, noting areas with visible signs of flaking. Look out for discoloration or irregularities.
- Tactile Check: Run your fingers over the surface to feel for rough patches. This tactile assessment helps gauge the severity of the flaking.
DIY Restoration Methods
With the damage assessed, let’s explore DIY methods to restore your chrome rims, especially effective for minor flaking issues.
1. Gentle Cleaning
Initiate the restoration process with a gentle cleaning routine to remove surface dirt and grime without causing further damage.
Cleaning Supplies
- Microfiber Cloth
- Mild Dish Soap
- Water
2. Chrome Polish Application
Invest in a quality chrome polish to address minor flaking and bring back the luster to your rims.
Applying Chrome Polish
- Apply a small amount of polish to a soft cloth.
- Gently rub it onto affected areas using circular motions.
- Buff the chrome until it regains its original shine.
3. DIY Chrome Cleaning Solutions
Explore homemade chrome cleaning solutions using ingredients like vinegar or baking soda. These can be effective in tackling minor flaking and restoring the shine.
Advanced Restoration Techniques
For more severe cases of flaking, where the damage penetrates deeper, advanced restoration techniques become necessary for a lasting solution.
1. Sanding and Repainting
Extensive flaking may require sanding and repainting for a more comprehensive restoration.
Steps for Sanding and Repainting
- Sand the Rims: Utilize fine-grit sandpaper to smooth out the flaked areas, providing a clean canvas for the next steps.
- Apply Primer: Use a chrome primer to prepare the surface for painting, ensuring better adhesion.
- Paint Application: Choose a high-quality chrome paint and apply it evenly for a seamless finish.
2. Professional Chrome Restoration Services
In cases of severe flaking, seeking professional help from chrome restoration services might be the best option. These services have the expertise and tools to tackle extensive damage effectively.
Preventive Measures for Long-Term Maintenance
While restoration is crucial, adopting preventive measures can ensure your efforts yield lasting results. (See Also: Can ArmorAll Be Used on Leather? A Complete Guide to Leather Care)
1. Regular Maintenance
Incorporate a routine maintenance schedule to prevent future flaking and keep your chrome rims looking pristine.
Maintenance Tips
- Gentle Cleaning: Stick to mild soaps and soft cloths for regular cleaning, avoiding abrasive materials that can damage the chrome.
- Protective Coating: Apply a dedicated chrome sealant for an added layer of protection against the elements, reducing the risk of future flaking.
2. Weather-Appropriate Storage
During harsh weather conditions, consider storing your vehicle in a sheltered space or using protective coverings to shield the rims from the elements.
Expert Tips for Chrome Rim Restoration
Restoring flaking chrome rims requires more than just basic cleaning. To achieve professional-grade results, consider these expert tips that go beyond the ordinary.
Flaking chrome rims can be a source of frustration, but with the right approach, you can bring them back to life. Here are some expert tips to enhance your chrome rim restoration efforts:
1. Precision in Sanding
When sanding the rims, focus on precision. Use fine-grit sandpaper, and work methodically to smooth out the flaked areas. This ensures a seamless surface for painting and a professional finish.
2. Choose High-Quality Chrome Paint
Opt for a premium chrome paint for a durable and long-lasting finish. Quality matters, so invest in a paint product specifically designed for automotive chrome surfaces.
3. Layered Application for Sealants
If you’re using a protective sealant, consider a layered application. Multiple thin layers provide better protection than a single thick coat. Ensure each layer is fully dry before applying the next.
4. Regularly Inspect and Clean
Make a habit of regularly inspecting your chrome rims for signs of wear and tear. Catching issues early allows for quick fixes and prevents more extensive flaking. Regular cleaning with mild products maintains the shine without causing damage.
5. Consider Professional Restoration Services
For severe cases of flaking or if you want a flawless finish, consider professional chrome restoration services. Experts have the tools and expertise to handle intricate repairs and ensure a showroom-worthy result.
6. Mind the Weather During Restoration
If you’re conducting restoration activities outdoors, be mindful of the weather. Choose a dry and moderately warm day for painting and sealing to ensure optimal adhesion and drying.
7. Use Protective Gear
When working with sandpaper, paint, or sealants, wear protective gear such as gloves and goggles. This not only protects you but also ensures a clean and uncontaminated restoration process. (See Also: How to Get Buffing Compound Out of Cracks: Expert Tips for Car Enthusiasts)
8. Explore Wheel-Specific Cleaners
Invest in wheel-specific cleaners that are formulated to clean and protect chrome surfaces. These cleaners often have rust inhibitors and provide an added layer of defense against environmental factors.
9. Apply a Ceramic Coating
Consider applying a ceramic coating to your chrome rims after restoration. Ceramic coatings offer superior protection against contaminants, UV rays, and harsh weather conditions, extending the lifespan of your restoration efforts.
10. Adjust Your Driving Habits
Be mindful of your driving habits to prevent future damage. Avoid rough terrains and potholes that can contribute to vibrations and impact, leading to premature flaking.
With these expert tips, your chrome rim restoration efforts can surpass expectations, leaving you with rims that not only shine but stand the test of time.
Frequently Asked Questions About Fixing Flaking Chrome Rims
Flaking chrome rims can be a perplexing issue for vehicle owners. To provide clarity and guidance, here are answers to some frequently asked questions about restoring chrome rims to their original glory.
1. Q: Why do chrome rims flake in the first place?
A: Chrome rims flake due to prolonged exposure to harsh weather conditions, use of abrasive cleaning agents, and general wear and tear over time.
2. Q: Can I fix minor flaking on my own?
A: Yes, minor flaking can be addressed with DIY methods such as gentle cleaning, chrome polishing, and using homemade cleaning solutions.
3. Q: What if the flaking is extensive?
A: For extensive flaking, consider sanding and repainting the rims or seek professional chrome restoration services for a more comprehensive solution.
4. Q: How do I choose the right chrome paint for repainting?
A: Opt for a high-quality chrome paint specifically designed for automotive use. Research and select a product known for durability and a seamless finish.
5. Q: How often should I inspect and clean my chrome rims?
A: Regularly inspect and clean your chrome rims at least once a month. Early detection of issues allows for prompt resolution and prevents further flaking. (See Also: Can You Use Simple Green on Cars? Exploring Safe Car Cleaning Practices)
6. Q: Can I prevent future flaking after restoration?
A: Yes, adopting preventive measures like using protective coatings, gentle cleaning, and storing your vehicle appropriately can help prevent future flaking.
7. Q: Is professional chrome restoration worth it?
A: Professional chrome restoration services are worth considering for severe flaking or if you desire a flawless, showroom-quality finish.
8. Q: Can I drive immediately after restoring my chrome rims?
A: It’s advisable to wait for the paint or sealant to fully dry before driving to avoid any damage. Follow the specific product’s instructions for drying times.
9. Q: Are there specific cleaners for chrome rims?
A: Yes, wheel-specific cleaners formulated for chrome surfaces are available. These cleaners often include rust inhibitors and are designed to clean and protect.
10. Q: Can chrome rims be damaged by road salt?
A: Yes, road salt can contribute to chrome rim damage. Regular cleaning and applying protective coatings can help mitigate the impact of road salt.
These FAQs provide valuable insights into the process of fixing flaking chrome rims, helping you navigate the restoration journey with confidence. If you have additional questions, feel free to consult with automotive experts or refer to your product’s specific guidelines.
Conclusion
In conclusion, addressing flaking chrome rims requires a combination of understanding the causes, assessing the damage, and applying the appropriate restoration techniques. Whether you opt for DIY methods or seek professional assistance, the key is patience and dedication. Maintaining the sleek appearance of your vehicle’s rims is an ongoing process, but armed with the knowledge gained from this guide, you can confidently restore and preserve the brilliance of your chrome rims. Say goodbye to flaking and hello to a ride that turns heads wherever it goes!


