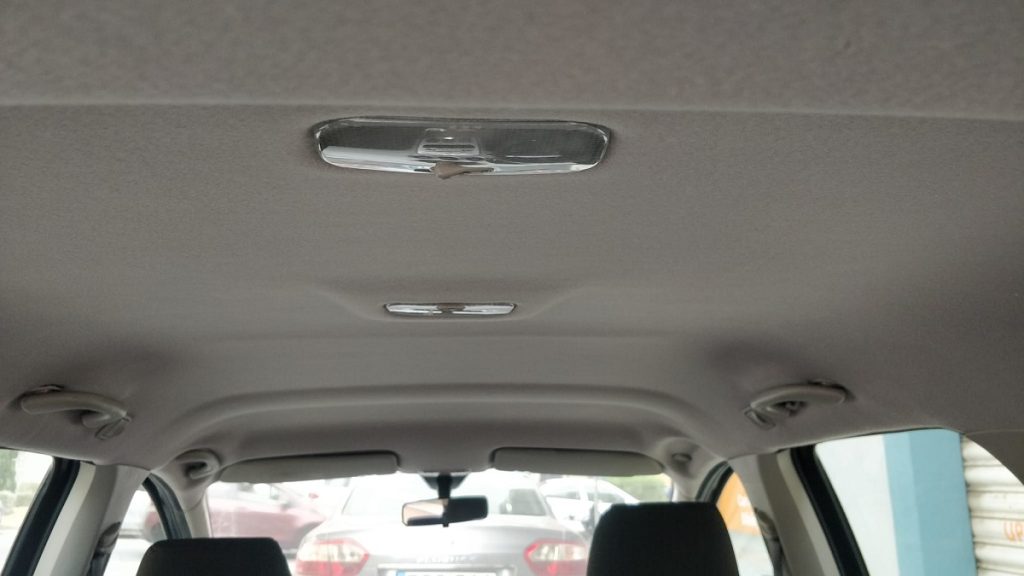
Welcome to the world of automotive DIY, where every detail matters, especially when it comes to your car’s interior. One often-overlooked aspect is the headliner, and mastering the use of automotive headliner adhesive can make a significant difference. In this comprehensive guide, we will delve deeper into the process, exploring additional considerations, troubleshooting, material choices, maintenance tips, and even advanced techniques for those who want to take their interior customization to the next level.
Understanding the Basics
What is Automotive Headliner Adhesive?
Automotive headliner adhesive is more than just glue; it’s the invisible force that holds the fabric of your headliner securely in place. A special formulation designed for automotive use, this adhesive ensures a durable bond that can withstand the unique conditions within your vehicle.
Choosing the Right Adhesive
Selecting the appropriate adhesive is crucial. Look for one that not only suits your vehicle’s specifications but also provides durability and temperature resistance. The adhesive’s ease of application is equally important, especially for those new to DIY car projects.
Preparing for the Task
Gather Your Tools
Before embarking on the application process, gather your tools like a seasoned pro. In addition to adhesive, a screwdriver, lint-free cloth, and a soft brush are essential for ensuring a smooth and hassle-free experience.
Surface Preparation
Achieving a strong bond starts with a clean canvas. Remove any remnants of old adhesive and thoroughly clean the area. A well-prepared surface is key to the adhesive’s effectiveness.
Step-by-Step Application
1. Test Fit the Headliner
Before applying any adhesive, take the time to test fit the headliner. This step ensures proper alignment, preventing issues during the gluing process.
2. Apply the Adhesive
Using a recommended applicator, apply the adhesive evenly on both the headliner fabric and the vehicle’s roof. Pay special attention to the edges for a secure fit.
3. Align and Press
Gently align the headliner and press it onto the adhesive-coated surface. Smooth out any wrinkles or air bubbles using a soft brush, ensuring a flawless finish.
4. Secure Edges
Edges are prone to peeling, so applying additional adhesive here is a smart move. It enhances the durability of the bond, ensuring a long-lasting result.
Tips for Success
Temperature Matters
The weather plays a role in the success of your adhesive application. Opt for a day with moderate temperatures to ensure optimal performance. Extreme heat or cold can impact the bonding process.
Patience is Key
Allow the adhesive sufficient time to dry. Rushing this step can compromise the effectiveness of the bond. Patience ensures a job well done.
Post-Application Inspection
Inspect the headliner after the adhesive has cured. Ensure all edges are secure, and the fabric sits flush against the roof. A meticulous post-application check ensures a professional outcome.
Troubleshooting Common Issues
Dealing with Bubbles
Bubbles can be a common issue during application. If they appear, gently lift the fabric, reapply adhesive, and press it back into place. A careful approach resolves the problem. (See Also: What Are Mercedes MB-Tex Problems? Unveiling Common Issues and Solutions)
Addressing Peeling Edges
For peeling edges, delicately lift the affected area, apply adhesive, and secure the fabric once again. Quick action prevents further issues down the road.
Choosing the Right Headliner Material
Cloth vs. Vinyl Headliners
Consider the material of your headliner. Cloth headliners provide a softer feel and are often found in older vehicles, while vinyl headliners offer durability and resistance to stains, making them popular in modern cars.
Patterns and Colors
Select a headliner material that complements your vehicle’s interior. Explore various patterns and colors to achieve a customized and aesthetically pleasing look.
Maximizing Durability
Cleaning and Maintenance
To prolong the life of your headliner, practice regular cleaning and maintenance. Use a gentle cleaning solution and a soft brush to remove dust and stains. Avoid harsh chemicals that can damage the fabric.
Reinforcing Weak Areas
If you notice weak spots or sagging in your headliner, address them promptly. Apply adhesive to reinforce these areas and prevent further deterioration.
Exploring Advanced Techniques
Headliner Replacement
In some cases, a complete headliner replacement may be necessary. Learn the step-by-step process of removing the old headliner, preparing the surface, and installing a new one for a fresh interior appearance.
Customizing with Headliner Kits
For those with a flair for customization, explore headliner kits. These kits often come with various fabric options and adhesive, catering to DIY enthusiasts looking to personalize their vehicle interiors.
Expert Tips: Elevate Your Automotive Headliner Adhesive Game
Welcome to the advanced level of automotive DIY craftsmanship! While the basic steps of using automotive headliner adhesive are essential, the journey toward a flawless and professional result involves a set of expert tips. These invaluable insights will not only enhance your adhesive application skills but also elevate the overall quality of your car’s interior. Let’s delve into these pro tips that set you apart in the world of automotive DIY.
1. Temperature Management is Key
Achieving the perfect bond between the headliner fabric and your vehicle’s roof hinges on temperature control. Select a moderate day for your project to ensure optimal conditions. Avoid extreme heat, as it may cause the adhesive to dry too quickly, or extreme cold, which can slow down the curing process.
2. Invest in a Quality Applicator
The tool you use can significantly impact the outcome. Invest in a high-quality applicator designed specifically for automotive adhesive application. A well-designed applicator ensures an even spread of adhesive, resulting in a smoother and more professional finish.
3. Work in Small Sections
Resist the temptation to apply adhesive to the entire headliner at once. Working in small sections allows you to maintain better control over the process. It prevents the adhesive from drying before you have the opportunity to precisely align and press the fabric, reducing the likelihood of mistakes.
4. Consider Weight Distribution
After applying the adhesive, introduce a strategic element—weight distribution. Placing a light weight or applying even pressure across the headliner aids in establishing proper contact between the fabric and the roof. This technique minimizes the risk of air bubbles and wrinkles, contributing to a more professional appearance. (See Also: What is Activex Seating Material in F150? A Comprehensive Guide)
5. Be Patient with Drying Time
Patience is a virtue in automotive DIY. Allow the adhesive ample time to dry thoroughly before moving forward. Rushing this stage may compromise the strength of the bond and lead to potential issues down the road. Consider the curing time specified by the adhesive manufacturer and adhere to it diligently.
6. Use Protective Measures
Preserve the integrity of your vehicle’s interior during the adhesive application process by implementing protective measures. Lay down covers to shield surfaces from accidental spills or adhesive transfer. This precautionary step ensures a clean and professional workspace.
7. Choose the Right Adhesive for Your Material
Different headliner materials have distinct requirements. Ensure compatibility by selecting an adhesive specifically formulated for the material of your headliner, whether it’s cloth or vinyl. This targeted approach contributes to the longevity and effectiveness of the bond.
8. Inspect and Address Weak Areas
Regular inspections are essential for maintaining the longevity of your headliner. Periodically check for weak spots or sagging, and if identified, reinforce these areas promptly with additional adhesive. This proactive approach prevents further deterioration and ensures a durable headliner.
9. Explore Customization Options
Elevate your interior game by exploring customization options. Headliner kits, equipped with various fabric choices and adhesive, provide an opportunity to personalize your vehicle’s interior according to your preferences. Embrace creativity and make your car uniquely yours.
10. Maintain Consistent Pressure
Consistency is key when pressing the headliner onto the adhesive-coated surface. Whether using a soft brush or your hands, maintaining uniform pressure ensures an even bond. Pay particular attention to edges and corners to minimize the risk of uneven edges.
Mastering these expert tips is not just about achieving a successful adhesive application; it’s about creating a headliner that stands out for its professional finish and attention to detail. Incorporate these insights into your DIY routine, and witness the transformative impact on your car’s interior—a testament to your commitment to excellence in automotive craftsmanship. Happy crafting!
FAQs: Navigating the World of Automotive Headliner Adhesive
Embarking on the journey of using automotive headliner adhesive may spark questions and uncertainties. Fear not; this FAQ section is designed to address common queries, providing clarity and guidance to ensure your DIY project unfolds seamlessly.
Q1: What is the Purpose of Automotive Headliner Adhesive?
A: Automotive headliner adhesive is a specialized glue formulated for affixing headliner fabric to the interior roof of a vehicle. It ensures a secure and long-lasting bond, contributing to the overall aesthetics and functionality of the car’s interior.
Q2: Can I Use Any Adhesive for my Headliner?
A: While generic adhesives may seem like a quick fix, it’s advisable to use automotive headliner adhesive. These formulations are designed to withstand the unique conditions within a vehicle, providing durability, temperature resistance, and a secure bond.
Q3: How Do I Prepare the Surface Before Applying Adhesive?
A: Surface preparation is crucial. Ensure the surface is clean, dry, and free from debris. Remove any remnants of old adhesive, and use a lint-free cloth to guarantee a strong bond. (See Also: What is Anthracite Headlining in BMW? Explore Luxury Features)
Q4: Can I Apply Adhesive to the Entire Headliner at Once?
A: It’s recommended to work in small sections. Applying adhesive to the entire headliner may lead to premature drying, making it challenging to align and press the fabric evenly.
Q5: What Do I Do If Bubbles Appear During Application?
A: If bubbles appear, gently lift the fabric, reapply adhesive, and press it back into place. Take your time to smooth out the fabric, ensuring a flawless finish.
Q6: How Long Should I Wait for the Adhesive to Dry?
A: Patience is key. Follow the recommended drying time specified by the adhesive manufacturer. Rushing this stage can compromise the effectiveness of the bond.
Q7: Can I Customize my Headliner Material?
A: Absolutely! Explore headliner kits that offer various fabric options and adhesive. These kits are perfect for DIY enthusiasts looking to personalize their vehicle’s interior.
Q8: What Should I Do If I Notice Weak Areas or Sagging?
A: Address weak spots promptly by reinforcing them with additional adhesive. This proactive approach prevents further issues and ensures a durable headliner.
Q9: Can I Clean the Headliner After Application?
A: Yes, regular cleaning is essential for maintenance. Use a gentle cleaning solution and a soft brush to remove dust and stains. Avoid harsh chemicals that can damage the fabric.
Q10: Is Headliner Replacement Difficult?
A: While it may seem daunting, headliner replacement is manageable with proper guidance. Follow a step-by-step process, and consider consulting professional resources or guides for assistance.
Navigating the world of automotive headliner adhesive is now more accessible with these FAQs. Whether you’re a novice or seasoned DIY enthusiast, these answers provide insights to ensure a successful and enjoyable project. Happy crafting!
Conclusion
Mastering the application of automotive headliner adhesive elevates your DIY automotive skills. With the right knowledge and a bit of patience, you can revitalize your car’s interior with a headliner that’s as good as new. Embrace the process, and let your vehicle’s roof tell a story of meticulous craftsmanship. Whether you’re a seasoned DIYer or a novice, this guide equips you with the insights needed to achieve professional-looking results. Take pride in your handiwork, and enjoy the enhanced aesthetic and comfort of your refreshed car interior. Happy DIYing!


