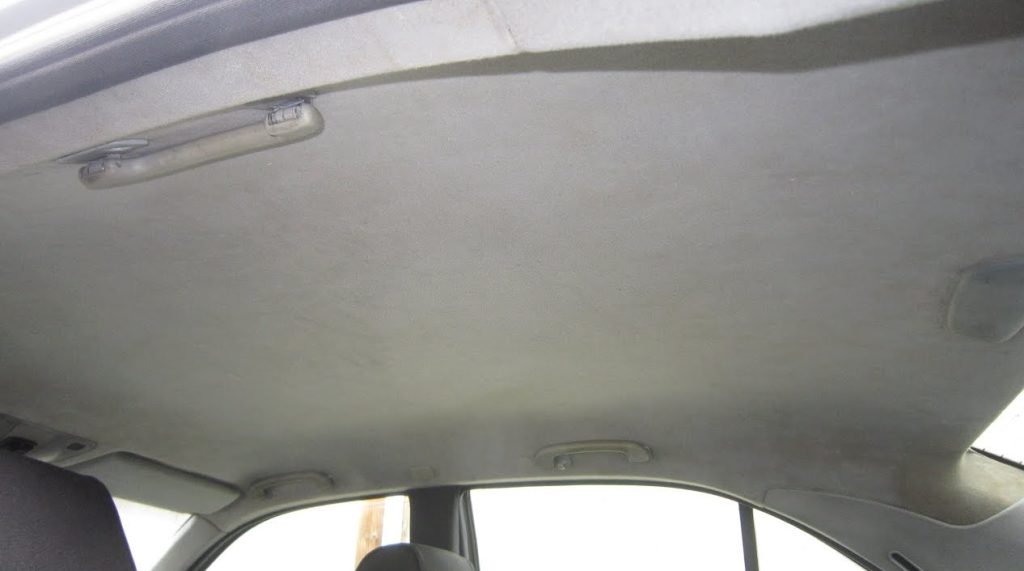
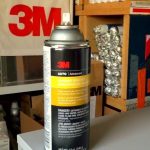
In the intricate world of car care, the challenge of maintaining a pristine interior often leads us to confront the notorious issue of a sagging or damaged headliner. Specifically, understanding how to remove headliner foam becomes paramount in restoring our vehicles’ aesthetic and structural integrity. Fear not, for this extensive guide aims to be your steadfast companion, taking you on a leisurely stroll through the process, providing in-depth insights, and sharing practical tips to ensure a seamless and satisfying DIY experience.
Understanding the Headliner Foam
Before we delve into the removal process, let’s demystify the composition of headliner foam. Picture it as the unsung hero, quietly contributing to your car’s interior aesthetics and acoustics. Typically a composite material, headliner foam can succumb to wear and tear over time due to factors like heat, humidity, and everyday use. A deeper understanding of its composition primes you for success in the removal process.
Tools and Materials: The DIY Arsenal
Now that you’re acquainted with your automotive foe, let’s assemble the tools and materials that will empower you in this quest:
- A diverse set of screwdrivers
- Trim removal tools for precision
- Quality upholstery adhesive
- Fresh headliner fabric
- A reliable utility knife
- Spray adhesive for an even coat
- A clean cloth for meticulous finishing touches
Step-by-Step Guide
1. Prepare Your Workspace
Begin this automotive escapade by selecting the optimal workspace. Park your car in a shaded, well-ventilated area, and throw open all windows and doors to invite the breeze. Safeguard the interior with a protective covering, ensuring your efforts won’t inadvertently lead to collateral damage.
2. Remove Interior Components
With the precision of a skilled surgeon, delicately remove any interior components that may stand in your way. Visors, handles, and lights are common culprits, and your trusty screwdriver set is the key to their release.
3. Detach Moldings and Trim Panels
The choreography continues with the removal of moldings and trim panels. Employ trim removal tools to execute this delicate dance, taking your time to avoid any inadvertent damage to these intricate components.
4. Peel Back the Headliner Fabric
The unveiling ceremony commences as you gently peel back the headliner fabric, revealing the underlying foam. Exercise patience to prevent tears, creating a smooth canvas for the upcoming restoration. Take this opportunity to inspect the foam for signs of wear and tear, gathering insights into the root cause.
5. Remove the Old Foam
Introduce the utility knife as your surgical instrument of choice, carefully peeling off the old headliner foam. Observe its condition like a seasoned detective; it holds clues that can unravel the mystery behind the issue.
6. Clean the Surface
A pristine canvas is essential for the masterpiece you’re about to create. Wipe down the exposed surface, eliminating any residual adhesive and debris. A meticulous approach at this stage ensures optimal adhesion for the new headliner.
7. Apply Adhesive to the Roof
Enter the adhesive phase; an even coating of spray adhesive on the roof sets the stage for the grand entrance of the new headliner foam. Follow the product instructions meticulously for optimal results.
8. Attach the New Headliner Foam
Place the new headliner foam onto the adhesive-coated surface with the precision of an artist. Smooth out any wrinkles or bubbles, ensuring a secure fit that promises not just immediate satisfaction but longevity in the years to come. (See Also: How to Fix Headliner with Adhesive Spray: A Comprehensive Guide for Car Enthusiasts)
9. Reattach Headliner Fabric
The fabric returns, like a phoenix rising from the ashes. Gently reattach the headliner fabric, aligning it perfectly to avoid creases or uneven stretches. This step is the final brushstroke, completing the restoration canvas.
10. Reinstall Interior Components
Assemble the interior components you gracefully removed earlier. Ensure a snug fit, securing any screws tightly. The symphony of your automotive restoration reaches its crescendo.
Tips and Tricks
- Temperature Matters: Just like Goldilocks searching for the perfect porridge, perform this task in moderate temperatures for optimal adhesive performance.
- Choose Quality Materials: Your car deserves the best. Invest in high-quality headliner fabric and adhesive for results that withstand the test of time.
- Take Photos: Transform into a documentarian during the disassembly process. Photos serve as your visual guide during the reassembly, preventing any missteps.
Additional Considerations
1. Temperature and Humidity:
Be mindful of the ambient temperature and humidity during the removal process. Extreme conditions can impact the effectiveness of adhesives, potentially compromising the longevity of your headliner restoration.
2. Selecting the Right Fabric:
Choosing the right headliner fabric is crucial for both aesthetics and durability. Consider factors like color, texture, and resistance to wear and tear. A fabric that complements your car’s interior style while offering resilience is the ideal choice.
3. Dealing with Structural Issues:
If your headliner foam issues are symptomatic of structural problems, such as a leaking roof or damaged supports, consider addressing these underlying issues during the removal process. Rectifying structural problems ensures a long-lasting headliner restoration.
Expert Tips for Headliner Foam Removal
Embarking on the journey of headliner foam removal is a rewarding yet nuanced process that demands attention to detail and a strategic approach. Here, we’ve curated a set of expert tips to guide you through this undertaking, ensuring not just a successful removal but a restoration that stands the test of time.
1. Temperature Control Is Key
Achieving the Goldilocks zone of temperature is crucial for optimal adhesive performance during the headliner removal process. Performing this task in moderate conditions prevents adhesive complications, such as premature drying or insufficient bonding. Consider tackling this project during a day with mild temperatures and avoid extreme weather conditions.
2. Invest in Quality Materials
The longevity of your headliner restoration project heavily depends on the quality of the materials you use. Opt for high-grade headliner fabric and adhesive to guarantee a lasting outcome. Quality materials not only enhance the aesthetic appeal but also ensure that your restoration can withstand the wear and tear of daily use.
3. Photographic Documentation
Transform yourself into a documentarian during the disassembly process. Take detailed photos of each step, from the removal of interior components to the unveiling of the headliner foam. These visual records serve as a crucial roadmap during reassembly, minimizing the chance of oversights and ensuring a seamless restoration.
4. Consider Structural Issues
Use the headliner removal process as an opportunity to address any underlying structural issues. If your headliner foam troubles are indicative of broader problems, such as a leaking roof or damaged supports, take the time to rectify these issues. Fixing the root cause ensures a comprehensive restoration, preventing future complications. (See Also: How to Keep Car Seats from Sliding on Leather Seats? Effective Tips and Solutions)
5. Choose the Right Fabric
The selection of headliner fabric goes beyond mere aesthetics. Consider factors such as color coordination, texture, and resistance to wear and tear. Choosing a fabric that complements your car’s interior style while offering durability ensures a harmonious blend of form and function.
6. Precision in Component Reinstallation
The final steps of reinstallation demand surgical precision. As you put back interior components, ensure a snug fit and tighten screws securely. This attention to detail not only adds a professional touch to your work but also guarantees that all elements of your car’s interior are as impeccable as the newly restored headliner.
Incorporating these expert tips into your headliner foam removal process transforms it from a DIY task to a meticulous and professional-grade restoration. Whether you’re a seasoned automotive enthusiast or a first-time DIYer, these insights will undoubtedly elevate your skills, ensuring a successful and enduring outcome for your car’s interior. Happy restoring!
Headliner Foam Removal FAQs: Unveiling the Answers to Your Queries
Embarking on the journey of headliner foam removal can raise numerous questions, especially for those new to automotive DIY projects. In this FAQ section, we’ll unravel the mysteries and provide clarity on common concerns, guiding you through a successful restoration journey.
Q1: Is headliner foam removal a task suitable for beginners?
A: While it might seem daunting, headliner foam removal is a manageable task for beginners with a penchant for DIY projects. This guide breaks down the process into step-by-step instructions, ensuring a smooth and rewarding experience.
Q2: How do I choose the right headliner fabric for replacement?
A: Consider factors like color, texture, and wear resistance when choosing headliner fabric. Opt for a material that not only complements your car’s interior but also withstands daily use.
Q3: Can I perform headliner foam removal in extreme temperatures?
A: It’s advisable to avoid extreme temperatures. Perform the task in moderate conditions to ensure optimal adhesive performance, preventing complications such as premature drying or insufficient bonding.
Q4: Is there a way to prevent the headliner from sagging again in the future?
A: Addressing underlying issues, such as leaks or damaged supports, during the removal process can prevent future sagging. Additionally, investing in high-quality materials ensures a more durable restoration.
Q5: How long does the entire headliner foam removal process usually take?
A: The duration varies based on experience and the extent of restoration needed. On average, expect a few hours to a day for completion, ensuring ample time for precision and attention to detail. (See Also: How to Stop Sliding on Leather Car Seats: Expert Tips for a Secure Drive)
Q6: Can I reuse the old headliner fabric?
A: Reusing old headliner fabric may compromise the quality of the restoration. It’s advisable to invest in new fabric to ensure a fresh and long-lasting outcome.
Q7: Are there any safety precautions to consider during the removal process?
A: Prioritize safety by working in a well-ventilated area. Wear protective gear, including gloves and safety glasses, to guard against any potential hazards.
Q8: What if I encounter difficulties during the removal process?
A: If you face challenges, don’t hesitate to seek guidance from online forums, automotive communities, or professionals. Sometimes, a fresh perspective can provide valuable solutions.
Q9: Can I perform headliner foam removal on any car model?
A: While the basic process remains similar, the specific steps may vary by car model. Refer to your vehicle’s manual for model-specific instructions and nuances.
Q10: Is it necessary to replace the headliner foam, or can I skip this step?
A: Replacing the headliner foam is crucial for a comprehensive restoration. Skipping this step may lead to issues like poor adhesion or the recurrence of sagging over time.
Navigating the headliner foam removal process becomes smoother when armed with the answers to these frequently asked questions. Embrace the journey, and may your restoration endeavors be both successful and gratifying!
Conclusion
Removing headliner foam is more than a task; it’s a journey into the soul of your car’s interior. Savor each step, relish the satisfaction of problem-solving, and take pride in the rejuvenation of a space you spend so much time in. Your efforts, guided by this comprehensive DIY guide, will not only restore your headliner but also empower you with newfound automotive prowess. So, equip yourself, dive in, and let the restoration begin! Happy tinkering!


