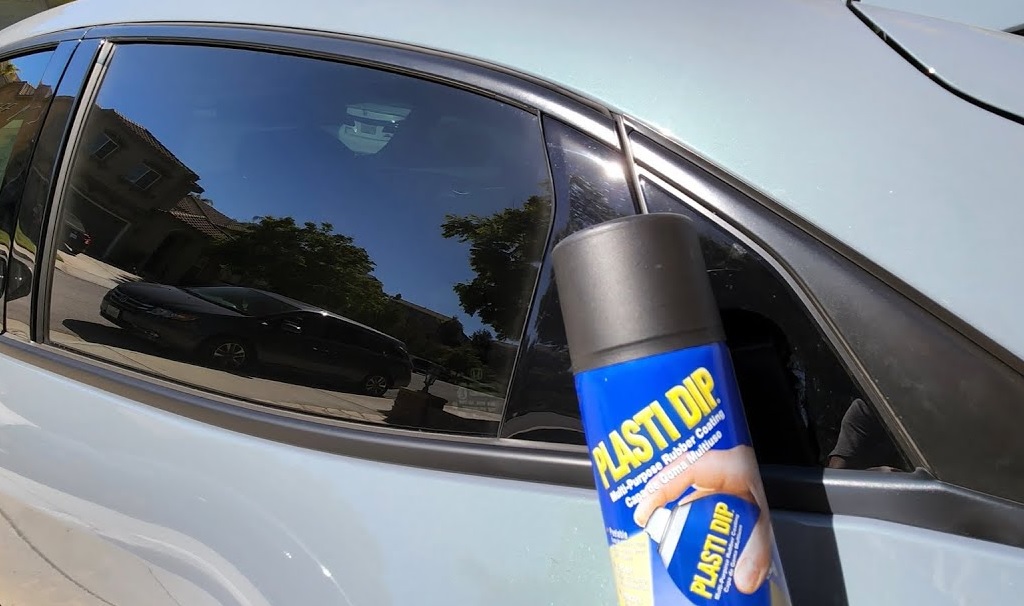
When it comes to DIY projects and giving a new lease of life to everyday items, Plasti Dip emerges as a go-to solution for those looking to transform plastic surfaces. The flexibility and versatility of Plasti Dip make it an excellent choice for enhancing the appearance of various objects, from household items to automotive components. In this in-depth guide, we’ll explore the fascinating world of Plasti Dip and provide you with all the information you need to successfully Plasti Dip plastic surfaces.
Table of Contents
- Understanding Plasti Dip and Its Magic
- The Essentials: What You Need to Plasti Dip Plastic
- Step-by-Step Guide: How to Plasti Dip Plastic Like a Pro
- Troubleshooting Common Issues
- Beyond Basics: Advanced Plasti Dipping Techniques
- The Finishing Touch: Sealing the Deal
- Maintenance Tips for Long-lasting Results
- Expert Tips for Perfect Plasti Dipping: Elevate Your Coating Game
- 1. Temperature Matters: Optimal Conditions for Application
- 2. Thin and Even Coats: The Secret to Professional Results
- 3. Experiment with Color Combinations: Get Creative
- 4. Flexibility Test: Ensure the Coating Can Withstand Movement
- 5. Practice Proper Cleanup: Keep It Neat
- 6. Don’t Rush the Drying Process: Patience is Key
- 7. Enhance Grip on Tools: Practical Application Beyond Aesthetics
- 8. Experiment with Textures: Beyond Standard Finishes
- 9. Consider Topcoat Options: Boost Durability
- 10. Test on a Small Area First: Ensure Compatibility
- Frequently Asked Questions About Plasti Dipping Plastic
- Q1: Can Plasti Dip Be Applied to All Types of Plastic Surfaces?
- Q2: How Do I Remove Plasti Dip If I Want to Change the Color?
- Q3: Can I Plasti Dip Outdoor Items Like Garden Furniture?
- Q4: Is Plasti Dip Permanent, or Can It Be Removed Later?
- Q5: Can I Apply Plasti Dip to Flexible Plastic Surfaces?
- Q6: Does Plasti Dip Work on Car Interiors, Like Dashboards or Door Panels?
- Q7: Can I Mix Different Plasti Dip Colors to Create a Custom Shade?
- Q8: How Long Does Plasti Dip Take to Dry Completely?
- Q9: Can I Use Plasti Dip on Items That Will Be Submerged in Water?
- Q10: Can I Plasti Dip Over Damaged or Scratched Plastic?
- Conclusion
Understanding Plasti Dip and Its Magic
Plasti Dip, originally designed for coating tool handles, has evolved into a multi-purpose rubber coating with a wide range of applications. What makes Plasti Dip unique is its ability to adhere to various surfaces, including plastic, rubber, metal, and even fabric. The rubberized texture it provides not only enhances the visual appeal but also offers added protection.
The Versatility of Plasti Dip
Plasti Dip isn’t just limited to basic color applications. It comes in various formulations, including glossifiers, enhancers, and even metallic finishes, allowing you to get creative with your projects. Whether you want a sleek matte look or a vibrant burst of color, Plasti Dip has you covered.
The Essentials: What You Need to Plasti Dip Plastic
Before diving into your Plasti Dipping endeavor, it’s crucial to gather the necessary tools and materials. Let’s break down the essentials to ensure you’re well-prepared for a successful project.
Tools and Materials Checklist
- Plasti Dip spray in your desired color(s)
- Plastic primer for improved adhesion
- Painter’s tape for precise masking
- Cleaning supplies (soap, water, and a soft cloth)
- Sandpaper for surface preparation
- Clear sealer for added protection (optional)
Importance of Surface Preparation
Proper surface preparation is the foundation of a successful Plasti Dipping project. Cleaning the plastic surface thoroughly, removing any dirt or grease, and lightly sanding the surface contribute to better adhesion. Remember, a well-prepared surface ensures the longevity of the Plasti Dip coating.
Step-by-Step Guide: How to Plasti Dip Plastic Like a Pro
Now that you have your materials ready, let’s dive into the step-by-step process of Plasti Dipping plastic surfaces.
1. Surface Preparation: Cleanliness is Key
Begin by cleaning the plastic surface with soap and water to remove any dirt or grease. Once clean, lightly sand the surface to create a textured finish, enhancing the adhesion of the Plasti Dip.
2. Masking and Taping: Precision Matters
Use painter’s tape to mask off areas you don’t want to coat. This step ensures clean, straight lines and prevents unintentional overspray.
3. Priming for Success: Why It Matters
Apply a plastic primer to the surface, enhancing the adhesion of the Plasti Dip. Allow the primer to dry completely before moving on to the next step.
4. The Art of Plasti Dipping: Spray Techniques
Hold the Plasti Dip spray can 6-8 inches away from the surface. Apply thin, even coats with a sweeping motion. Multiple thin coats are preferable to one thick coat, ensuring a smooth and professional-looking finish.
5. Drying and Curing: Patience is a Virtue
Allow each coat to dry completely before applying the next. Follow the recommended curing time to ensure the Plasti Dip forms a durable and resilient coating. (See Also: How to Fix Plasti Dip Texture: A Comprehensive Guide)
Troubleshooting Common Issues
Even with careful planning, you may encounter common issues during the Plasti Dipping process. Let’s address these problems and provide quick solutions to keep your project on track.
Uneven Coating
If you notice uneven coating, it may be due to inconsistent spraying. Ensure you maintain a consistent distance and motion while applying Plasti Dip.
Drips and Runs
To fix drips or runs, wait until the Plasti Dip is dry, then gently sand the affected area. Apply an additional coat to even out the surface.
Peeling
Peeling can occur if the surface wasn’t adequately cleaned or primed. In such cases, carefully remove the affected areas, re-prepare the surface, and reapply Plasti Dip.
Beyond Basics: Advanced Plasti Dipping Techniques
Once you’ve mastered the fundamentals, it’s time to explore advanced techniques to elevate your Plasti Dipping projects.
Custom Colors and Textures
Experiment with different Plasti Dip formulations to create custom colors and textures. Combine glossifiers and enhancers for a unique finish that suits your style.
Masking and Stenciling
Take your projects to the next level by incorporating masking and stenciling techniques. Create intricate designs or patterns to personalize your plastic items.
The Finishing Touch: Sealing the Deal
To ensure the longevity of your Plasti Dip coating, consider adding a clear sealer as the final step. This additional layer provides extra protection against wear and tear, ensuring your DIY creations withstand the test of time.
Maintenance Tips for Long-lasting Results
Caring for Plasti Dip-coated items is essential to preserve their appearance and durability. Here are some maintenance tips to keep your projects looking fresh.
Gentle Cleaning
Use a mild soap and water solution for cleaning Plasti Dip-coated surfaces. Avoid harsh chemicals, as they may damage the coating. (See Also: Choosing the Right Thinner for Raptor Liner: A Comprehensive Guide)
Avoid Abrasive Materials
When cleaning, use a soft cloth or sponge to prevent scratching or damaging the Plasti Dip. Abrasive materials can compromise the integrity of the coating.
Periodic Inspections
Regularly inspect Plasti Dip-coated items for any signs of wear or damage. Address issues promptly to prevent further deterioration.
Expert Tips for Perfect Plasti Dipping: Elevate Your Coating Game
When it comes to Plasti Dipping plastic surfaces, a few expert tips can make all the difference between a good and a great outcome. Whether you’re a seasoned DIY enthusiast or a novice looking to enhance your skills, these tips will help you achieve a flawless Plasti Dip coating.
1. Temperature Matters: Optimal Conditions for Application
- Plasti Dip adheres best when applied in temperatures between 50°F and 90°F.
- Avoid extreme heat or cold, as it can affect the drying and curing process.
2. Thin and Even Coats: The Secret to Professional Results
- Apply multiple thin coats rather than one thick coat for a smoother finish.
- Allow each coat to dry thoroughly before adding the next layer.
3. Experiment with Color Combinations: Get Creative
- Combine different Plasti Dip colors to create custom shades.
- Use enhancers and glossifiers for added depth and texture.
4. Flexibility Test: Ensure the Coating Can Withstand Movement
- Before fully curing, gently flex the coated surface to test its flexibility.
- Plasti Dip should remain intact without cracking or peeling.
5. Practice Proper Cleanup: Keep It Neat
- Immediately remove any overspray with a cloth or sponge.
- Use a razor blade for precision cleanup around masked areas.
6. Don’t Rush the Drying Process: Patience is Key
- Allow each coat to dry completely before moving on to the next step.
- Rushing the process can result in uneven coating and imperfections.
7. Enhance Grip on Tools: Practical Application Beyond Aesthetics
- Plasti Dip tool handles for a comfortable, non-slip grip.
- This application not only looks great but also adds functionality.
8. Experiment with Textures: Beyond Standard Finishes
- Create textured finishes by varying the spraying distance.
- Play with different textures for a truly unique and customized look.
9. Consider Topcoat Options: Boost Durability
- While Plasti Dip is durable on its own, adding a clear topcoat can enhance longevity.
- Choose a topcoat with UV protection for outdoor applications.
10. Test on a Small Area First: Ensure Compatibility
- Before tackling a large project, test Plasti Dip on a small, inconspicuous area.
- Ensure compatibility with the plastic surface and desired finish.
Incorporating these expert tips into your Plasti Dipping endeavors will not only elevate the quality of your projects but also boost your confidence in tackling a variety of surfaces and applications. Happy Dipping!
Frequently Asked Questions About Plasti Dipping Plastic
Curiosity often accompanies creativity, and when it comes to Plasti Dipping plastic, questions abound. Let’s address some common queries to ensure you embark on your Plasti Dipping journey with confidence.
Q1: Can Plasti Dip Be Applied to All Types of Plastic Surfaces?
A: Yes, Plasti Dip is formulated to adhere to a variety of plastics, including ABS, PVC, and polypropylene. However, always test on a small area first to ensure compatibility.
Q2: How Do I Remove Plasti Dip If I Want to Change the Color?
A: To remove Plasti Dip, gently peel it off from the edges. If it’s stubborn, use a plastic dip dissolver or rubbing alcohol to loosen the coating.
Q3: Can I Plasti Dip Outdoor Items Like Garden Furniture?
A: Absolutely! Plasti Dip is suitable for both indoor and outdoor use. Ensure proper curing time for outdoor items exposed to the elements.
Q4: Is Plasti Dip Permanent, or Can It Be Removed Later?
A: Plasti Dip is removable. It provides a durable coating but can be peeled off if you decide to change the color or return to the original surface.
Q5: Can I Apply Plasti Dip to Flexible Plastic Surfaces?
A: Yes, Plasti Dip is flexible and works well on surfaces that bend or flex. It maintains its integrity even on items that undergo movement. (See Also: Can You Spray Bedliner On Aluminum Diamond Plate? Expert Guide)
Q6: Does Plasti Dip Work on Car Interiors, Like Dashboards or Door Panels?
A: Absolutely! Plasti Dip is commonly used on car interiors. Ensure proper surface preparation for a long-lasting and professional finish.
Q7: Can I Mix Different Plasti Dip Colors to Create a Custom Shade?
A: Yes, mixing different Plasti Dip colors allows you to create custom shades. Experiment with ratios to achieve your desired color.
Q8: How Long Does Plasti Dip Take to Dry Completely?
A: Drying times vary based on factors like temperature and humidity. Generally, each coat takes about 15-30 minutes to touch dry, with full curing in 24 hours.
Q9: Can I Use Plasti Dip on Items That Will Be Submerged in Water?
A: Plasti Dip is water-resistant, but prolonged submersion may affect the coating. For items in constant contact with water, consider additional sealing.
Q10: Can I Plasti Dip Over Damaged or Scratched Plastic?
A: Plasti Dip can conceal minor scratches, but significant damage may require repairs before application. Ensure a smooth surface for the best results.
Navigating the world of Plasti Dipping is exciting, and these FAQs provide valuable insights to help you achieve optimal results in your plastic coating endeavors. Happy Dipping!
Conclusion
In conclusion, the versatility and ease of application make Plasti Dip an excellent choice for transforming plastic surfaces. Armed with the knowledge shared in this comprehensive guide, you’re well-prepared to embark on your Plasti Dipping adventures. Whether you’re revamping household items or adding a personal touch to your car’s interior, Plasti Dip opens up a world of creative possibilities. Unleash your imagination, follow the steps outlined here, and watch as mundane plastic items become personalized masterpieces with the magic of Plasti Dip!