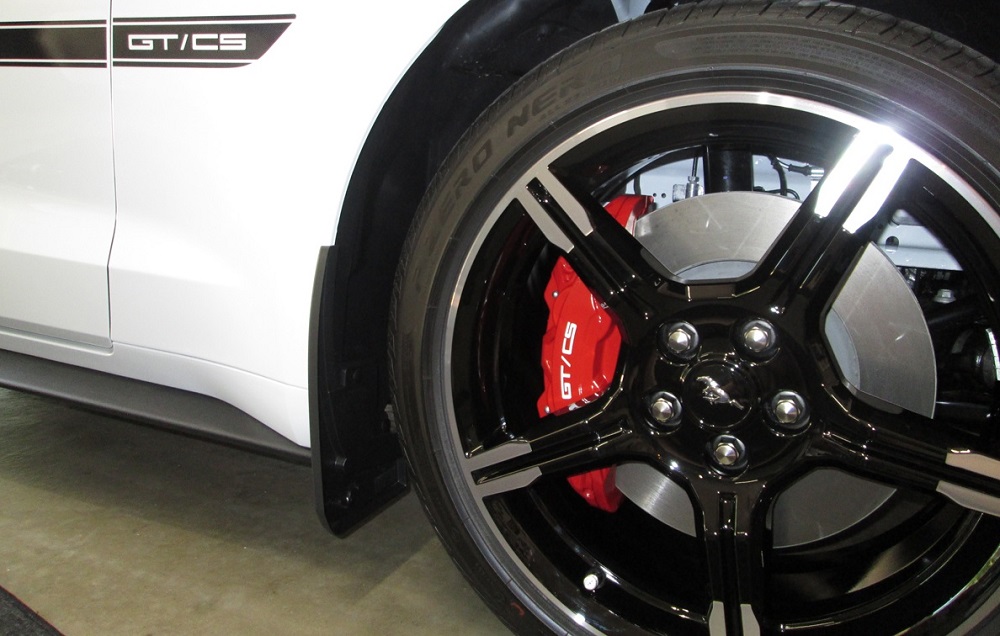
Keeping your vehicle in top-notch condition involves more than just engine maintenance; it extends to preserving its visual allure. One often underestimated yet impactful aspect is the cleanliness of painted brake calipers. In this detailed guide, we will delve into the step-by-step process of cleaning painted brake calipers, ensuring your vehicle not only performs optimally but also stands out with a sleek appearance.
Understanding the Importance of Clean Brake Calipers
Performance Impact
Beyond aesthetic concerns, the cleanliness of your brake calipers significantly influences your vehicle’s performance. Brake dust, road grime, and environmental contaminants can accumulate on the calipers, affecting both their appearance and function. Efficient brakes are crucial for your safety on the road.
Preventing Corrosion
Brake calipers are often exposed to harsh elements, leading to the potential for corrosion. Regular cleaning helps remove corrosive substances and prevents the onset of rust, ensuring the longevity of your braking system.
Gathering the Essentials: What You’ll Need
Before embarking on this cleaning journey, assemble the necessary supplies. Having the right tools ensures a thorough and effective cleaning process:
- Wheel cleaner or gentle soap: Choose a product that is safe for your wheel finish.
- Soft-bristle brush: Opt for a brush specifically designed for wheel and caliper cleaning to avoid scratches.
- Microfiber towels: These are essential for wiping down and drying the calipers.
- Brake cleaner: A specialized cleaner designed to remove brake dust and contaminants.
- High-temperature brake paint (optional): Ideal for touch-ups or enhancing the caliper’s appearance.
Step 1: Prepare Your Workspace
Safety First
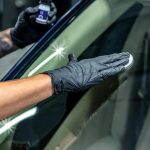
Start by parking your vehicle on a level surface, ensuring it’s cool to the touch. Safety is paramount, so make sure to put on protective gloves before starting the cleaning process.
Lift and Secure
Loosen the lug nuts before using a jack to elevate your car. Once lifted, secure the vehicle with jack stands for added safety.
Step 2: Remove the Wheels
Carefully remove the wheels to gain unobstructed access to the brake calipers. This step is crucial for a thorough cleaning process.
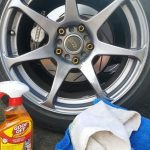
Step 3: Initial Cleaning with Wheel Cleaner or Soap
Choose the Right Cleaner
Select a wheel cleaner or mix a gentle soap with water. Ensure the product is compatible with your wheel finish to prevent damage.
Scrubbing Technique
Using a soft-bristle brush, scrub the brake calipers thoroughly. Pay close attention to areas with visible dirt and brake dust. The goal is to remove as much surface grime as possible.
Step 4: Detailed Cleaning with Brake Cleaner
Precision Cleaning
Apply a specialized brake cleaner to target more stubborn contaminants. This step is crucial for achieving a deep clean, preparing the calipers for inspection and any necessary touch-ups.
Mindful Application
Exercise caution when using brake cleaner, as it can be harsh. Follow the manufacturer’s instructions, and avoid contact with other vehicle components, especially rubber seals.
Step 5: Inspect for Damage
Visual Inspection
While cleaning, closely inspect the brake calipers for signs of damage or wear. Look out for cracks, leaks, or any abnormalities that may require immediate attention.
Addressing Issues
If you notice any problems during the inspection, consider consulting a professional mechanic for further assessment and repairs.
Step 6: Optional – Touch Up with High-Temperature Brake Paint
Restoring Appearance
For a polished look, consider using high-temperature brake paint for any touch-ups. Ensure the paint is compatible with your vehicle’s make and model. (See Also: Can I Wash My Car With Just Water? Discover the Surprising Truth)
Application Tips
Follow the manufacturer’s guidelines for proper application. Applying multiple thin coats is preferable to prevent drips and ensure even coverage.
Step 7: Wipe Down and Dry
Microfiber Magic
After the cleaning and any necessary touch-ups, use microfiber towels to wipe down the brake calipers. Ensure they are completely dry before moving on to reattach the wheels.
Avoid Water Streaks
Proper drying prevents water streaks, preserving the visual appeal of your brake calipers.
Step 8: Reattach the Wheels
Secure Attachment
Carefully place the wheels back onto the vehicle and hand-tighten the lug nuts. Lower the car and finish tightening the lug nuts using a crisscross pattern to ensure even pressure.
Torque to Specification
Refer to your vehicle’s manual for the recommended torque specifications for lug nuts. Over-tightening can lead to warped brake rotors, while under-tightening poses safety risks.
Step 9: Test Your Brakes
Brake Pedal Exercise
Before hitting the road, pump the brake pedal a few times to reseat the brake pads. This ensures optimal brake performance after cleaning.
Listen and Observe
During the test, pay attention to any unusual sounds or sensations. If you notice anything out of the ordinary, consult a professional mechanic for further evaluation.
Maintaining Clean Brake Calipers: Tips and Tricks
Regular Inspection
Make a habit of inspecting and cleaning your brake calipers regularly. This practice prevents excessive buildup and ensures the longevity of your braking system.
Gentle Cleaning
Avoid using harsh chemicals or abrasive tools that may damage the caliper paint or other components. Opt for products specifically designed for brake systems.
Consider Ceramic Coating
For added protection and easier cleaning in the future, consider applying a ceramic coating to the calipers. This protective layer helps repel contaminants and enhances the calipers’ overall resilience.
Expert Tips for Maintaining Pristine Painted Brake Calipers
Preserving the appearance and functionality of your painted brake calipers involves more than just a routine cleaning. Here are some expert tips to elevate your caliper maintenance game and keep your vehicle looking sharp and performing at its best.
1. Regular Inspection is Key
Frequent visual inspections can catch potential issues early on. Look for signs of wear, leaks, or damage, and address them promptly to prevent more extensive problems.
2. Opt for High-Quality Cleaning Products
Invest in high-quality wheel and brake cleaners designed for your specific wheel finish. This ensures effective cleaning without compromising the integrity of the caliper paint. (See Also: Can You Clay Bar a Ceramic Coated Car? Tips and Techniques for Flawless Maintenance)
3. Apply a Ceramic Coating for Long-lasting Protection
Consider applying a ceramic coating to your brake calipers after cleaning. This protective layer adds an extra shield against contaminants, making future cleanings easier and extending the lifespan of the paint.
4. Use a Dedicated Soft-Bristle Brush
Choose a soft-bristle brush designed for wheel and caliper cleaning. Avoid stiff or abrasive brushes, as they can scratch the paint and compromise the caliper’s appearance.
5. Perform Touch-Ups with Care
If you decide to touch up your calipers with high-temperature brake paint, follow proper application techniques. Multiple thin coats are preferable to ensure an even and durable finish.
6. Mindful Brake Cleaner Application
When using brake cleaner, apply it with precision. Take care to avoid contact with other vehicle components, especially rubber seals, as brake cleaner can be harsh and may cause damage.
7. Torque Lug Nuts to Specifications
When reattaching wheels, follow your vehicle’s manual for lug nut torque specifications. This step is crucial to prevent issues like warped brake rotors or safety risks associated with under-tightening.
8. Prioritize Safety during Brake Tests
After cleaning and reassembly, conduct a thorough brake test before hitting the road. Listen for unusual sounds and pay attention to any sensations. If anything seems amiss, consult a professional mechanic for a detailed inspection.
9. Avoid Abrasive Tools
Steer clear of abrasive tools or harsh chemicals when cleaning your calipers. These can damage the paint and compromise the effectiveness of the braking system.
10. Keep Your Calipers Dry
Proper drying after cleaning is essential to avoid water streaks on your calipers. Use microfiber towels to ensure a thorough and streak-free drying process.
Incorporating these expert tips into your brake caliper maintenance routine will not only enhance the visual appeal of your vehicle but also contribute to the overall longevity and performance of your braking system.
FAQs: Clearing the Confusion on Cleaning Painted Brake Calipers
When it comes to maintaining the cleanliness and appearance of your painted brake calipers, questions often arise. Let’s address some frequently asked questions to provide clarity on this crucial aspect of vehicle maintenance.
1. Why is cleaning painted brake calipers important?
Regular cleaning not only enhances your vehicle’s visual appeal but also prevents the buildup of brake dust and contaminants that can compromise brake performance and lead to corrosion.
2. Can I use any wheel cleaner for cleaning brake calipers?
While some wheel cleaners may be suitable, it’s best to use a cleaner specifically designed for both wheels and brake components. This ensures effective cleaning without causing damage to the caliper paint. (See Also: Is Rain-X Bad for Your Car? Debunking Myths and Exploring the Impact on Automotive Finishes)
3. How often should I inspect and clean my brake calipers?
A visual inspection and cleaning every 3-6 months is a good starting point. However, if you notice excessive brake dust or environmental contaminants, more frequent cleaning may be necessary.
4. Is it necessary to remove the wheels for caliper cleaning?
Yes, removing the wheels provides better access to the calipers, allowing for a more thorough cleaning process. It also facilitates inspection for any signs of damage or wear.
5. Can I touch up my calipers with regular paint?
It’s recommended to use high-temperature brake paint specifically designed for this purpose. Regular paint may not withstand the heat generated by the braking system and can lead to peeling or discoloration.
6. What should I do if I find damage during the inspection?
If you discover damage, such as cracks or leaks, it’s crucial to consult a professional mechanic for a detailed assessment and necessary repairs. Ignoring damage can lead to safety risks and further complications.
7. Can I use brake cleaner on all parts of the caliper?
Exercise caution when using brake cleaner and avoid direct contact with rubber seals or other sensitive components. Brake cleaner is designed for metal surfaces and may cause damage to non-metallic parts.
8. How long does it take for the high-temperature brake paint to dry?
Drying times can vary depending on the specific product. Follow the manufacturer’s instructions, but typically, multiple thin coats are applied with drying intervals between each coat.
9. Is it safe to drive immediately after cleaning and reassembling the calipers?
Before hitting the road, perform a brake test by pumping the brake pedal to reseat the brake pads. Ensure there are no unusual sounds or sensations. If everything checks out, it’s safe to drive.
10. Can I apply ceramic coating to calipers with existing paint damage?
It’s advisable to address any existing paint damage before applying ceramic coating. The coating enhances protection but may not hide existing imperfections in the paint.
Navigating the world of brake caliper maintenance can be perplexing, but these FAQs aim to provide answers and guidance for a smoother journey towards clean and well-maintained painted brake calipers.
Conclusion
By following this comprehensive guide on how to clean painted brake calipers, you not only enhance the visual appeal of your vehicle but also contribute to its overall maintenance and safety. A small effort in cleaning can go a long way in ensuring your brakes perform at their best while looking fantastic. Show your vehicle the care it deserves, and enjoy the satisfaction of a clean and well-maintained brake system. Remember, safety and regular maintenance are key to a smooth and enjoyable driving experience.