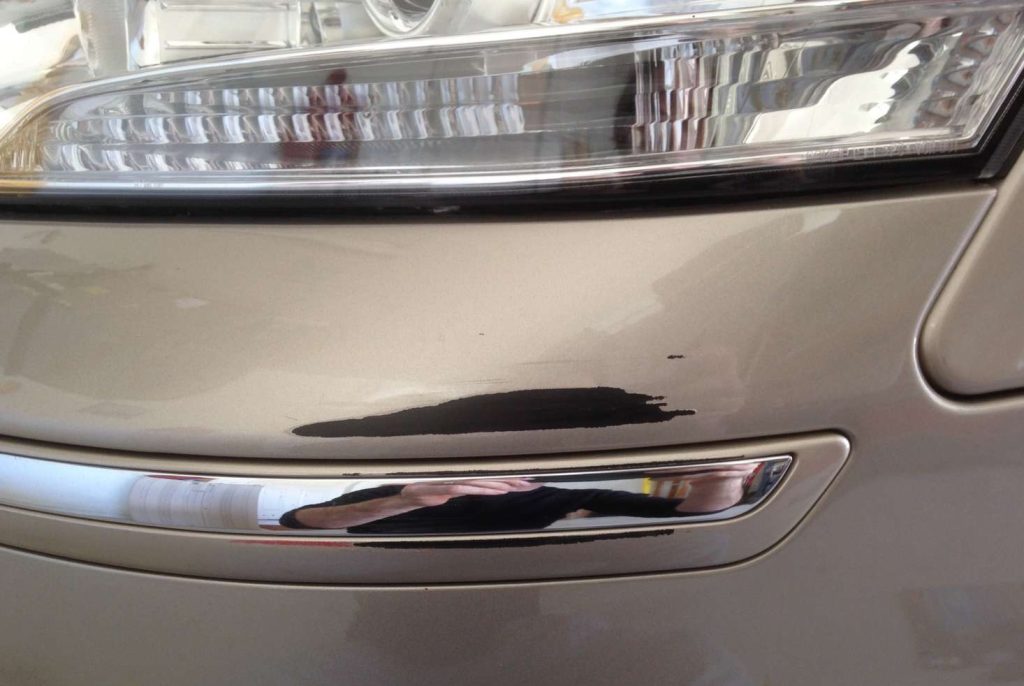
Maintaining the pristine appearance of your car is a priority for any car owner. One of the most common issues faced is chipped paint, often accompanied by the ominous presence of rust. Fear not – this guide will walk you through the steps to restore your car’s paint and keep it looking brand new.
Table of Contents
- Understanding the Culprits: Chipped Paint and Rust
- Assessing the Damage
- Gathering Your Arsenal: Tools and Materials
- Step-by-Step Repair Guide
- Post-Repair Care
- Troubleshooting Tips
- Expert Tips for Effortless Paint and Rust Restoration
- Frequently Asked Questions (FAQs) About Fixing Chipped Paint on Cars with Rust
- 1. What Causes Chipped Paint on Cars?
- 2. How Does Chipped Paint Lead to Rust?
- 3. Can I Fix Chipped Paint and Rust Myself?
- 4. What Safety Precautions Should I Take During the Repair Process?
- 5. How Do I Choose the Right Paint Color for my Car?
- 6. Is Rust Converter Necessary, or Can I Skip It?
- 7. Can I Repair Deep Rust Damage on my Own?
- 8. How Often Should I Wax my Car to Prevent Chipped Paint?
- 9. Can I Use Touch-Up Paint for Small Chips?
- 10. What Do I Do If I Notice Paint Blisters After the Repair?
- Conclusion
Understanding the Culprits: Chipped Paint and Rust
Chipped paint is the gateway for rust to wreak havoc on your car’s body. Before diving into the repair process, let’s understand the dynamics of these two adversaries.
1. The Menace of Chipped Paint
Chipped paint is not merely a cosmetic concern; it’s the precursor to more significant problems. Whether it stems from the impact of road debris, inclement weather, or other external factors, chipped paint leaves the underlying metal exposed. This vulnerability opens the door for rust to establish its foothold.
2. The Silent Intruder: Rust
Rust, the insidious foe of every car owner, thrives in environments with moisture and oxygen. Once it takes hold, it can spread stealthily beneath the surface, causing structural damage that can compromise the integrity of your vehicle. Addressing rust promptly is imperative to prevent further deterioration.
Assessing the Damage
Before delving into the repair process, it’s crucial to assess the extent of the damage. This initial evaluation will guide the level of intervention required for an effective restoration.
3. Inspection and Evaluation
Take the time to thoroughly inspect the chipped paint and rusted areas. Identify the size and depth of the chips, and assess the extent of rust spread. This careful examination lays the foundation for a targeted and successful repair strategy.
Gathering Your Arsenal: Tools and Materials
To embark on this restoration journey, gather the necessary tools and materials that will be your allies in reviving your car’s appearance.
4. Essential Tools
Your toolkit should include sandpaper in various grits, rust converter, primer, matching paint, clear coat, painter’s tape, and microfiber cloths. Each of these elements plays a crucial role in the restoration process.
5. Protective Gear
Safety should be a top priority. Don gloves, safety glasses, and a mask to protect yourself from potentially harmful chemicals that may be encountered during the repair process.
Step-by-Step Repair Guide
Now, let’s break down the step-by-step process of fixing chipped paint on your car and addressing the accompanying rust.
6. Clean the Area
Begin by cleaning the affected area with a gentle car wash soap and water. Remove any dirt, grime, or loose paint. It’s essential to start with a clean slate before proceeding.
7. Sanding the Surface
Use sandpaper with varying grits to smooth out the chipped paint and rusted areas. This step ensures a clean and even surface, allowing for optimal adhesion in the subsequent stages of the repair process.
8. Rust Converter Application
Apply a rust converter to the affected areas. This chemical treatment is designed to transform rust into a stable compound, effectively halting its progression. Follow the product instructions diligently for optimal results. (See Also: How Often Should You Polish Your Car? Expert Tips for Maintaining a Gleaming Finish)
9. Primer Application
Once the rust converter has dried, apply a high-quality primer. The primer serves as a foundation, creating a smooth base for the paint to adhere to. Additionally, it enhances the durability of the repair, ensuring a long-lasting finish.
10. Matching Paint Application
Select a paint color that precisely matches your car’s original hue. Apply thin, even coats of paint, allowing each layer to dry before adding the next. Patience is paramount to achieving a seamless and professional-looking finish.
11. Clear Coat Application
Complete the repair process by applying a clear coat. This final layer not only adds a glossy finish but also provides essential protection against the elements. It acts as a shield, preserving the integrity of the newly painted surface.
Post-Repair Care
Congratulations on successfully restoring your car’s paint! Now, let’s explore how to maintain and prolong the effects of your hard work.
12. Regular Inspection
Make it a habit to inspect your car regularly for any new chips or signs of rust. Early detection allows for swift intervention, preventing minor issues from escalating into more significant problems.
13. Routine Waxing
Incorporate routine waxing into your car care regimen. Waxing provides an additional layer of protection against environmental elements, such as UV rays and harsh weather conditions. It not only enhances the aesthetic appeal of your car but also safeguards the paint from premature deterioration.
Troubleshooting Tips
Even with meticulous care, challenges may arise. Here’s how to troubleshoot common issues that might surface after the repair.
14. Dealing with Paint Blisters
If you notice paint blisters, don’t panic. Carefully sand the affected area and reapply paint. Blisters often indicate insufficient surface preparation during the initial stages of the repair process.
15. Addressing Rust Resurgence
Should rust reappear, take immediate action. Repeat the rust converter and painting process to curb its advancement. Consistent vigilance and proactive measures are essential in preventing the resurgence of rust.
Expert Tips for Effortless Paint and Rust Restoration
When it comes to fixing chipped paint on your car with rust, a blend of expertise and finesse can make all the difference. Here are some expert tips to streamline the restoration process and ensure a flawless finish.
1. Early Intervention Is Key
Address chipped paint promptly to prevent rust from gaining a foothold. The sooner you tackle the issue, the easier and more effective the restoration process will be.
2. Choose Quality Products
Invest in high-quality rust converters, primers, and paints. Quality products not only enhance the durability of the repair but also contribute to a smoother and more professional-looking result.
3. Patience Pays Off in Sanding
Take your time when sanding the affected areas. Thorough and patient sanding ensures a smooth surface, setting the stage for impeccable paint adhesion. (See Also: Will Clay Bar Remove Water Spots on Glass? Expert Tips for Crystal-Clear Car Windows)
4. Mind the Weather
Choose a dry and moderate-temperature day for the repair process. Extreme weather conditions can affect the drying and curing times of the products, potentially compromising the quality of the restoration.
5. Layer Wisely
Apply multiple thin layers of paint and clear coat rather than a single thick layer. This approach not only ensures a more even finish but also reduces the risk of paint blisters.
6. Preventative Maintenance Matters
Incorporate routine waxing into your car care routine. A waxed surface acts as an additional barrier against environmental elements, prolonging the life of your paint job.
7. Stay Vigilant with Inspections
Regularly inspect your car for new chips or signs of rust, even after the restoration. Early detection allows for swift corrective action, preventing issues from escalating.
8. Don’t Skip Protective Gear
Always wear appropriate protective gear, including gloves, safety glasses, and a mask. Ensuring your safety during the repair process is paramount.
9. Test Paint Compatibility
Before applying the chosen paint, test it on a small inconspicuous area to ensure it matches your car’s color and adheres well.
10. Seek Professional Advice if Unsure
If you’re uncertain about any aspect of the restoration process, don’t hesitate to consult with a professional. Their expertise can provide valuable insights and guidance.
Remember, mastering the art of paint and rust restoration takes practice, so don’t be discouraged if your first attempt isn’t perfect. Learn from each experience, and with time, you’ll become adept at preserving your car’s aesthetic appeal. Happy restoring!
Frequently Asked Questions (FAQs) About Fixing Chipped Paint on Cars with Rust
Navigating the world of chipped paint and rust restoration can raise numerous questions. Here, we provide answers to some common queries to guide you through the process seamlessly.
1. What Causes Chipped Paint on Cars?
Chipped paint on cars can result from various factors, including road debris, gravel, harsh weather conditions, and even everyday wear and tear. Identifying the cause helps in implementing effective preventive measures.
2. How Does Chipped Paint Lead to Rust?
Chipped paint exposes the bare metal beneath, making it susceptible to moisture. When water and oxygen come into contact with the metal, rust begins to form. Addressing chipped paint promptly prevents the onset of rust.
3. Can I Fix Chipped Paint and Rust Myself?
Yes, you can! With the right tools, materials, and a step-by-step guide, many car owners successfully tackle chipped paint and rust restoration as a DIY project. It’s essential to follow the recommended procedures for optimal results. (See Also: What Do the Different Color Polishing Pads Mean? A Comprehensive Guide)
4. What Safety Precautions Should I Take During the Repair Process?
When fixing chipped paint with rust, prioritize safety. Wear gloves, safety glasses, and a mask to protect yourself from potential hazards, including chemicals used in rust converters and paints.
5. How Do I Choose the Right Paint Color for my Car?
Selecting the right paint color is crucial for a seamless repair. Consult your car’s manufacturer or use the vehicle identification number (VIN) to ensure an exact match. Testing the paint on a small area before applying it is also recommended.
6. Is Rust Converter Necessary, or Can I Skip It?
Rust converter is a critical step in the restoration process. It chemically transforms rust into a stable compound, preventing further corrosion. Skipping this step may result in a temporary fix with the potential for rust recurrence.
7. Can I Repair Deep Rust Damage on my Own?
Deep rust damage may require professional intervention. If the rust has compromised the structural integrity of the vehicle, it’s advisable to consult with an expert for a comprehensive assessment and repair.
8. How Often Should I Wax my Car to Prevent Chipped Paint?
Waxing your car every three to six months provides an additional layer of protection against environmental elements. However, frequency may vary based on your location and climate conditions.
9. Can I Use Touch-Up Paint for Small Chips?
Yes, touch-up paint is suitable for small chips. Clean the area thoroughly, apply the touch-up paint, and blend it to match the surrounding surface. Keep in mind that touch-up paint may not be as effective for larger areas.
10. What Do I Do If I Notice Paint Blisters After the Repair?
Paint blisters may indicate insufficient surface preparation. Carefully sand the affected area, reapply primer, paint, and clear coat in thin, even layers. This should address the issue.
Feel free to reach out if you have additional questions or concerns about fixing chipped paint on your car with rust.
Conclusion
Repairing chipped paint on your car with rust may seem like a daunting task, but armed with the right knowledge and tools, you can restore your vehicle’s aesthetic appeal successfully. Remember, proactive care is the key to preserving your car’s beauty and structural integrity. As you embark on this journey of restoration, take your time, be thorough, and revel in the satisfaction of witnessing your car regain its original luster. Happy repairing!


