In the world of automotive aesthetics, touch-up paint serves as a quick fix for those irritating scratches and blemishes that seem to appear out of nowhere. However, there may come a time when you need to remove that touch-up paint to restore your car’s pristine appearance. Fear not! In this detailed guide, we’ll walk you through the process step by step, ensuring you achieve a flawless finish that speaks volumes about your car care prowess.
Table of Contents
Understanding Touch-Up Paint Removal
Removing touch-up paint isn’t a one-size-fits-all task; it requires a systematic approach. Let’s explore each step in greater detail.
1. Gather Your Materials
Before embarking on your touch-up paint removal journey, assemble the necessary tools:
- Soft Microfiber Cloths: Ideal for gentle cleaning without scratching.
- Rubbing Alcohol: Effective in breaking down paint without harming your car’s finish.
- Car Wash Soap: A mild soap for general cleaning.
- Clay Bar: A go-to tool for removing contaminants from your car’s surface.
- Fine-Grit Sandpaper: For stubborn spots that require a bit more elbow grease.
- Polish and Wax: The final steps for restoring shine and providing protection.
2. Assess the Paint Damage
Understanding the extent of the damage is crucial. Is it a minor scratch or a more significant imperfection? This assessment guides your approach.
3. Cleaning with Rubbing Alcohol
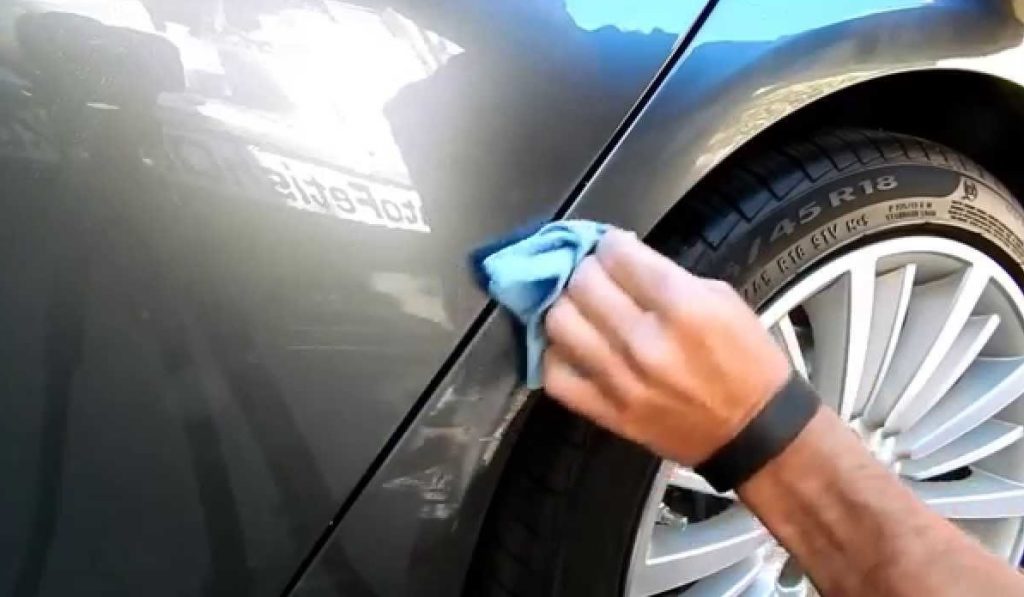
Take a soft cloth, apply a bit of rubbing alcohol, and gently rub the touch-up paint. This initial step helps to break down the paint layers, preparing the surface for further treatment.
4. Use a Clay Bar
The clay bar is a valuable tool for lifting contaminants and residual paint. Glide it gently over the affected area to ensure a smooth and clean surface.
5. Fine-Grit Sandpaper for Stubborn Spots
For those persistent spots that refuse to budge, employ fine-grit sandpaper. Caution is essential here; sand lightly in the direction of the scratch to avoid unintended damage.
Professional Tips for Success
Discover some insider tips to ensure your touch-up paint removal process is successful from start to finish.
6. Patience Is Key
Impatience can lead to unintended scratches and damage. Take your time, and approach each step with care.
7. Test in a Small Area
Before applying any method extensively, perform a test in a small, inconspicuous area. This ensures compatibility with your car’s paint and helps you gauge the effectiveness of your chosen method.
The Dos and Don’ts of Touch-Up Paint Removal
Navigate the process with finesse by adhering to these dos and avoiding common pitfalls.
8. Do: Follow Proper Techniques
Stick to recommended techniques to prevent further damage to your car’s paint. Each step serves a purpose, contributing to the overall success of the touch-up paint removal process.
9. Don’t: Use Harsh Chemicals
Steer clear of harsh chemicals that can harm your car’s clear coat. Opt for gentle, automotive-friendly products to safeguard your vehicle’s finish.
Polishing and Waxing for a Finishing Touch
After successfully removing touch-up paint, give your car that finishing touch to make it truly shine.
10. Polish for Shine
Polishing isn’t just about aesthetics; it’s about restoring the natural shine of your car’s paint. Choose a high-quality automotive polish and work it into the treated area for a lustrous finish.
11. Apply a Protective Wax
A protective wax coating is your car’s armor against the elements. Apply it generously to the treated area, ensuring long-lasting protection and a radiant appearance.
Troubleshooting Common Issues
Even with careful execution, challenges may arise. Here’s how to troubleshoot common touch-up paint removal issues.
12. Dealing with Residue
If residue persists after the removal process, revisit the area with rubbing alcohol and a soft cloth for a final clean. This ensures that no remnants of the touch-up paint linger on your car’s surface.
13. Addressing Paint Color Variations
In some cases, the touch-up paint may differ in color from your car’s original paint. If this occurs, it’s advisable to consult with a professional to find a seamless solution that blends seamlessly with your vehicle’s overall aesthetic.
Expert Tips for Effortless Touch-Up Paint Removal
When it comes to maintaining the pristine appearance of your car, tackling touch-up paint removal requires finesse. Here are some expert tips to ensure you navigate this process with ease and achieve a flawless finish.
- Early Action Yields Better Results
The sooner you address touch-up paint, the easier it is to remove. Tackling it early prevents the paint from bonding too firmly to your car’s surface. - Choose the Right Products
Invest in high-quality rubbing alcohol, clay bars, and automotive-friendly cleaning agents. The right products make a significant difference in the effectiveness of the removal process. - Mind Your Technique
Gentle and deliberate actions are key. Avoid aggressive rubbing or excessive force, especially when using sandpaper. Patience pays off in achieving a scratch-free finish. - Temperature Matters
Consider the temperature when undertaking touch-up paint removal. Warmer conditions can make the paint more pliable and easier to remove. - Test in an Inconspicuous Spot
Before applying any method extensively, conduct a small test in an inconspicuous area to ensure compatibility with your car’s paint. This helps you avoid any unexpected reactions. - Regular Maintenance Is Key
Incorporate touch-up paint inspection into your regular car maintenance routine. Spotting and addressing issues early prevents the need for extensive removal later on. - Seek Professional Advice for Color Matching
If you’re uncertain about color matching when applying touch-up paint, consult with a professional. They can guide you in selecting the right shade for a seamless result. - Preventive Waxing
Regularly waxing your car creates a protective layer that can make future touch-up paint removal easier. It adds an extra barrier against potential blemishes. - Take Your Time Polishing
When polishing your car after touch-up paint removal, patience is crucial. Allow the polish to work its magic, enhancing the shine of your car’s finish gradually. - Inspect for Residue
After the removal process, meticulously inspect the treated area for any residue. Addressing any remnants ensures a clean and polished final look.
These expert tips, combined with the comprehensive guide provided earlier, equip you with the knowledge and techniques needed to master touch-up paint removal. Incorporate them into your car care routine, and watch your vehicle maintain its showroom-worthy appearance effortlessly.
Frequently Asked Questions About Touch-Up Paint Removal
Navigating the intricacies of touch-up paint removal can raise several questions. Here, we address common queries to ensure you embark on this process with confidence and clarity.
Q1: Can I Use Household Cleaners to Remove Touch-Up Paint?
A: It’s not recommended. Household cleaners may contain harsh chemicals that can damage your car’s clear coat. Stick to automotive-friendly products for a safe and effective removal process.
Q2: How Do I Know If the Touch-Up Paint Is Ready for Removal?
A: Test its readiness by gently rubbing with rubbing alcohol. If the paint starts to lift without damaging your car’s finish, it’s ready for removal. If not, wait a little longer before attempting the process.
Q3: Can I Remove Touch-Up Paint Without Damaging the Original Paint?
A: Yes, with the right techniques. Using gentle methods, such as rubbing alcohol and clay bars, minimizes the risk of damaging the original paint. Patience and a careful approach are key.
Q4: Will Removing Touch-Up Paint Affect the Car’s Resale Value?
A: If done correctly, it shouldn’t impact resale value. In fact, maintaining a scratch-free exterior can enhance your car’s appeal. Ensure a seamless finish and consider professional assistance if needed.
Q5: What If the Touch-Up Paint Color Doesn’t Match?
A: Consult with a professional for color matching. If the touch-up paint differs, seeking expert advice ensures you choose a shade that blends seamlessly with your car’s original color.
Q6: How Often Should I Inspect and Remove Touch-Up Paint?
A: Regular inspections are crucial. Check your car for touch-up paint blemishes during routine maintenance. Early detection allows for easier removal and prevents further damage.
Q7: Can I Use Sandpaper on All Types of Car Paint?
A: Exercise caution and use fine-grit sandpaper. While fine-grit sandpaper is generally safe, be mindful of your car’s paint type. When in doubt, test on a small, inconspicuous area first.
Q8: Is Waxing Necessary After Touch-Up Paint Removal?
A: Yes, waxing is advisable. Applying a protective wax layer not only enhances the shine but also guards against future scratches. It’s the finishing touch for a polished appearance.
Q9: Can I Remove Touch-Up Paint in Cold Weather?
A: Warmer conditions are ideal. Cold weather can make the paint more resistant. If removal is necessary in colder temperatures, consider warming the area slightly for better results.
Q10: What If Residue Persists After Removal?
A: Use rubbing alcohol and a soft cloth for a final clean. If residue lingers, a gentle wipe with rubbing alcohol ensures a clean and residue-free finish.
These FAQs cover common concerns related to touch-up paint removal, providing insights to help you navigate the process smoothly. If you have additional questions, don’t hesitate to seek professional advice for personalized guidance.
Conclusion: Achieve a Flawless Finish with Confidence
In the pursuit of a flawless finish, removing touch-up paint from your car becomes an art. Armed with the right knowledge, tools, and a dash of patience, you can restore your car’s finish to its former glory.
Incorporate these detailed steps into your regular car care routine, transforming touch-up paint removal from a daunting task into a satisfying accomplishment. Remember, a little patience and the right approach go a long way in achieving automotive perfection. Happy detailing!


