Are you tired of that frustrating wax haze obscuring the once-gleaming finish of your car? Fret not! This in-depth guide is here to walk you through the intricate process of banishing wax residue, revealing the lustrous brilliance your vehicle deserves.
Understanding Wax Haze: The Culprit Behind the Cloudiness
Before we embark on the journey of removing wax haze, it’s essential to understand what causes it in the first place. Typically, this cloudiness emerges due to improper wax application or removal. If you’ve ever used too much wax, skipped the buffing step, or worked under the unforgiving rays of the sun, you’ve likely encountered this cloudy aftermath.
Wax haze isn’t just an aesthetic inconvenience; it can compromise the protective layer on your car’s paint, making it more susceptible to environmental elements like UV rays, contaminants, and water spots. So, addressing it promptly is crucial for maintaining not only the appearance but also the overall health of your vehicle.
Gathering Your Arsenal: Essential Tools for the Battle Against Haze
To effectively combat wax haze, assembling the right tools is paramount. Here’s your arsenal for this detailing mission:
- Microfiber Cloths: These are gentle on your car’s paint and perfect for the delicate process of buffing.
- Car Wash Soap: Begin with a clean slate by washing your car with a high-quality car wash soap. This removes surface dirt and prepares the vehicle for more targeted cleaning.
- Clay Bar: A magic wand for car enthusiasts, a clay bar helps eliminate embedded contaminants, providing a smooth surface for subsequent steps.
- Wax Remover or Isopropyl Alcohol: For tackling stubborn wax residue, these products work wonders. They break down the wax, making it easier to remove.
- Polishing Compound: To restore the paint’s original shine, a polishing compound is your go-to product. It smoothens out imperfections and adds a glossy finish.
- Applicator Pads: Achieve even and controlled application of wax and other products with these pads.
Step-by-Step Guide to Removing Wax Haze: The Art of Restoration
1. Start with a Thorough Wash
Begin the wax haze removal process by giving your car a thorough wash with a high-quality car wash soap. This initial step removes surface dirt, making it easier to focus on the targeted areas.
2. Clay Bar Magic: The Detailer’s Secret Weapon
Once your car is clean, introduce the clay bar. Glide it gently over the paint, and witness the magic as it lifts embedded contaminants. This step is crucial for achieving a smooth and contaminant-free surface.
3. Assess the Severity: Is It a Light Film or Stubborn Residue?
Take a moment to assess the severity of the wax haze. Is it a light film that can be easily buffed away, or does it present a more stubborn challenge? This evaluation will guide the intensity of your subsequent steps.
4. Targeted Wax Remover Application: Breaking Down the Buildup
Apply a wax remover or isopropyl alcohol specifically to the affected areas. Utilize a soft cloth or applicator pad, and work in circular motions to break down the stubborn wax residue. This step is crucial for initiating the removal process.
5. Thorough Buffing: Say Goodbye to Loosened Wax
Following the wax remover application, buff the area with a microfiber cloth. This step aids in removing the loosened wax, revealing the refreshed paint underneath. For persistent haze, repeat the wax remover application and buffing until satisfaction is achieved.
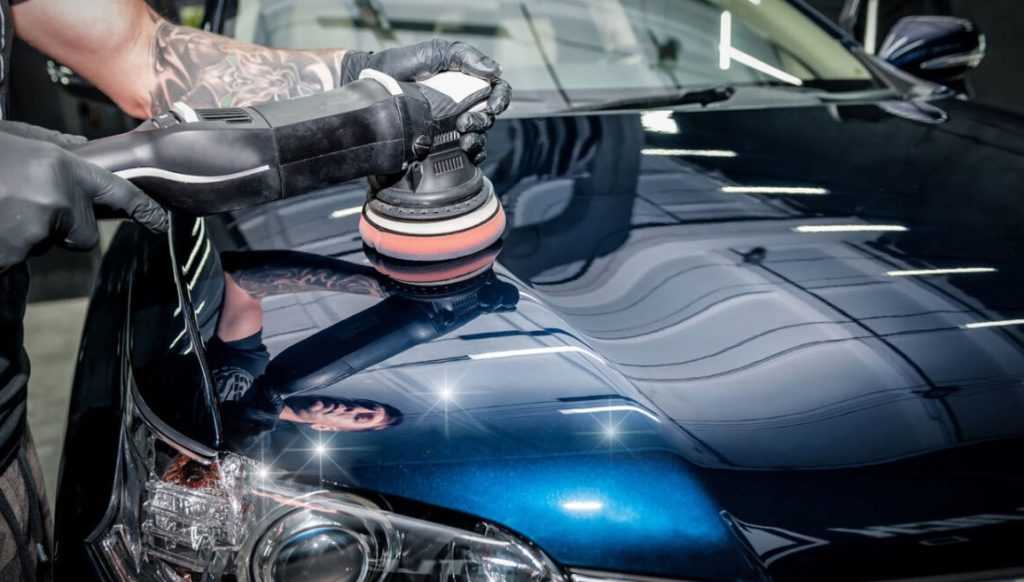
6. Polishing for Perfection: Bringing Back the Shine
For a truly showroom-worthy shine, introduce a polishing compound. Apply it with an applicator pad, working it into the paint to restore its original brilliance. Follow up with a thorough buffing using a clean microfiber cloth. (See Also: How to Remove Water Spots from Car: Expert Tips for Spotless Shine)
7. Final Rinse: Ensuring a Residue-Free Finish
Give your car a final rinse to remove any remaining product. This step ensures a clean surface, free from residue and ready to showcase its renewed luster.
8. Inspect and Touch Up: Achieving Flawlessness
After the final rinse, inspect the paint meticulously. Should any haze persist, repeat the targeted wax remover application and buffing process until your car’s finish is flawless.
9. Protective Wax Application: Shielding Your Shine
Once satisfied with the clarity of your car’s paint, it’s time to apply a fresh coat of high-quality wax. This not only adds a protective layer but enhances the shine, providing a finishing touch to your detailing efforts.
Pro Tips for a Gleaming Finish: Insights from the Detailing Masters
- Mind the Temperature: Opt for a cool, shaded area when waxing to prevent premature drying and haze. Working in a controlled environment ensures the best results.
- Use Quality Products: Invest in reputable wax and detailing products for optimal results. Quality products contribute significantly to the longevity of your car’s shine.
- Patience Pays Off: Detailing is an art that requires time and precision. Rushing through the process may lead to overlooked haze. Take your time, enjoy the process, and marvel at the transformation.
Expert Tips for Effortless Wax Haze Removal: Unveiling the Secrets of Detailing Masters
Car detailing is both an art and a science, and mastering the nuances of wax haze removal can elevate your vehicle’s appearance to unparalleled heights. Here are some expert tips to ensure your detailing endeavors are not just effective but also a joy to undertake.
1. Timing Is Everything: Choose the Right Conditions
Before you embark on your wax haze removal journey, ensure you pick the right time and conditions. Opt for a cool, shaded area, preferably indoors, to prevent premature drying of products. Working in a controlled environment not only makes the process smoother but also minimizes the risk of introducing new contaminants during the detailing.
2. The Gentle Touch: Microfiber Cloths Are Your Best Friends
When it comes to buffing and wiping, there’s no substitute for microfiber cloths. Their soft and gentle texture ensures you’re not inadvertently scratching the paint while effectively removing residue. Invest in high-quality microfiber cloths, and your car will thank you with a swirl-free, glossy finish.
3. Patience Is a Virtue: Take Your Time
Detailing is not a race; it’s a meticulous process that demands patience. Rushing through steps might lead to overlooked haze or, worse, new imperfections. Take your time, enjoy the therapeutic aspect of detailing, and revel in the satisfaction of seeing your car’s shine gradually restored.
4. Strategic Approach: Assess the Severity Before Diving In
Before reaching for the heavy-duty wax removers, take a moment to assess the severity of the wax haze. Is it a light film or a more stubborn residue? This evaluation guides the intensity of your efforts, ensuring you use the right products and methods tailored to the specific needs of your car’s finish.
5. Layering for Protection: Apply Wax Regularly
Prevention is key in the battle against wax haze. Regularly applying a high-quality wax layer not only enhances your car’s shine but also forms a protective barrier against contaminants. This proactive approach minimizes the chances of stubborn haze buildup, making future detailing tasks more manageable. (See Also: Can I Wash My Car With Just Water? Discover the Surprising Truth)
6. Clay Bar Mastery: Make it a Regular Ritual
The clay bar isn’t just for troubleshooting wax haze; it’s a versatile tool that should be part of your regular detailing arsenal. Incorporate clay bar treatments into your routine to keep your paint surface smooth and free of embedded contaminants, reducing the likelihood of haze-related challenges.
7. Tailor Your Technique: Adjust Based on Paint Type
Different car paints have distinct characteristics, and this should influence your detailing approach. Adjust your techniques and product choices based on whether your vehicle has single-stage or clear coat paint. This personalized approach ensures that your efforts are not only effective but also considerate of your car’s unique finish.
8. Detailing from the Inside Out: Interior Care Matters Too
While we focus on the exterior, don’t neglect the interior. Wax residue can find its way inside, affecting surfaces like glass and plastic. Utilize detailing products specifically designed for interior surfaces to ensure a comprehensive and balanced cleaning regimen.
Incorporating these expert tips into your wax haze removal routine transforms the process from a chore into a rewarding experience. Enjoy the journey of unveiling your car’s true radiance with these tried-and-true strategies from detailing masters.
FAQs on Wax Haze Removal: Demystifying the Art of Detailing
Embarking on the journey of wax haze removal can be filled with questions. Fear not! We’ve compiled a list of frequently asked questions to guide you through the intricacies of this detailing task. Let’s demystify the art of detailing and address your concerns.
1. What causes wax haze on my car’s paint?
Wax haze typically results from improper wax application or removal. Using too much wax, not buffing it properly, or working in direct sunlight are common culprits. Understanding these causes is key to effective removal.
2. Can I use household products to remove wax haze?
While some suggest vinegar or baking soda, it’s best to stick to dedicated automotive products for safe and effective removal. Household items might not be gentle enough on your car’s paint.
3. How often should I wax my car to prevent haze?
Waxing every 3-4 months provides a protective layer without risking excessive buildup. However, frequency can vary based on factors like climate, storage conditions, and the quality of the wax used.
4. What’s the importance of using a clay bar in wax haze removal?
A clay bar is a detailing powerhouse. It helps eliminate embedded contaminants, creating a smooth surface for subsequent steps. Regular use can also prevent the buildup of contaminants that contribute to wax haze. (See Also: Will Painters Tape Damage Car Paint? Avoiding Risks and Protecting Your Vehicle Finish)
5. Is it possible to remove wax haze without damaging the paint?
Absolutely. Using gentle products like microfiber cloths, appropriate wax removers, and following a step-by-step process minimizes the risk of paint damage. Patience and a careful approach are your allies in preserving your car’s finish.
6. Can wax haze be prevented altogether?
While complete prevention may be challenging, regular and proper waxing, along with meticulous detailing practices, significantly reduces the likelihood of wax haze. A proactive approach goes a long way in maintaining your car’s pristine appearance.
7. What’s the significance of the final rinse in wax haze removal?
The final rinse is crucial to remove any remaining product and ensure a clean surface free from residue. This step is the finishing touch that guarantees a glossy, haze-free result.
8. How do I know if the wax haze removal process is complete?
A thorough inspection is key. If the paint appears clear, glossy, and free of haze after the final steps, you’ve likely succeeded. If any haze persists, be prepared to repeat targeted steps until satisfaction is achieved.
Navigating wax haze removal becomes more straightforward when armed with knowledge. These FAQs and answers aim to equip you with the information needed to tackle this detailing challenge with confidence. Happy detailing!
Conclusion: Revel in Your Ride’s Radiance
Bid farewell to wax haze and welcome back the dazzling allure of your car’s finish. Armed with the right tools, a bit of elbow grease, and the insights provided in this guide, you’ll be cruising in style with a vehicle that gleams from every angle. Happy detailing!