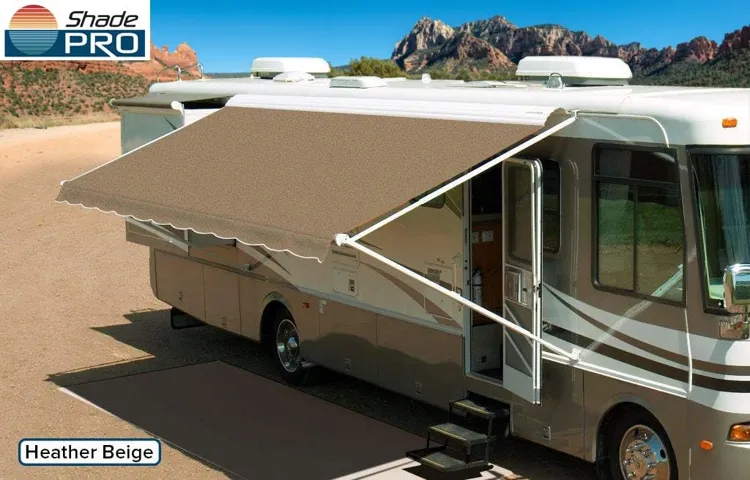
Hey there, fellow adventurers! Have you ever found yourself enjoying picturesque sceneries while lounging under the shade of your RV awning? Whether you’re sipping a cup of coffee at a serene campsite or listening to the gentle pitter-patter of raindrops, an RV awning is an essential accessory for any road trip enthusiast. However, like any handy tool, it may also require occasional maintenance and, at times, a fabric replacement to keep it in top-notch condition.Just like your favorite pair of worn-out jeans, RV awning fabrics can become tattered and worn over time.
Whether it’s due to exposure to the elements, UV rays, or the occasional unexpected mishap, a damaged awning fabric can put a damper on your outdoor fun. But fear not! Replacing the fabric is a relatively simple task that can breathe new life into your awning and ensure it continues to provide shade and protection for years to come.But where do you start when it comes to replacing your RV awning fabric? Don’t worry, we’ve got you covered.
In this guide, we’ll walk you through the process step-by-step, providing all the essential information you need to know. From determining the right fabric size and type to removing the old fabric and installing the new one, we’ll cover it all.So, whether you’re a seasoned RV enthusiast or a newbie hitting the open road for the first time, we invite you to join us on this journey to discover the ins and outs of RV awning fabric replacement.
Get ready to unleash your inner DIY spirit and give your trusty awning a much-needed makeover. Let’s dive in and explore the world of RV awning fabric replacement together!
Benefits of Replacing RV Awning Fabric
Are you tired of dealing with a worn-out or damaged RV awning fabric? Well, it might be time to consider replacing it. Replacing the awning fabric on your RV brings many benefits that will enhance your overall camping experience. First and foremost, a new awning fabric will improve the appearance of your RV.
Whether you choose a stylish pattern or a solid color, a fresh awning fabric can give your RV a whole new look. Additionally, replacing the fabric can also provide better protection from the elements. Over time, awning fabrics can become faded and weakened, leaving your RV susceptible to sun damage, rain leaks, and even mold growth.
By replacing the fabric, you can ensure maximum protection for your RV and its occupants. Furthermore, replacing your awning fabric can also improve its functionality. If your current fabric is torn, frayed, or difficult to retract, a new fabric will provide smoother operation and ease of use.
Ultimately, replacing your RV awning fabric is a worthwhile investment that will enhance the appearance, protection, and functionality of your RV.
Improved Aesthetics
Replacing RV awning fabric can greatly improve the aesthetics of your RV and give it a fresh new look. Over time, awning fabric can become worn, faded, and damaged from exposure to the elements. By replacing it with new fabric, you can instantly enhance the appearance of your RV and make it look more inviting.
Whether you choose a bold, vibrant color or a subtle, neutral tone, the new awning fabric can transform the overall look and feel of your RV. It can also help to hide any stains or unsightly marks that may have accumulated over time. By investing in new awning fabric, you can give your RV a much-needed facelift and make it stand out from the crowd.
So why not give your RV a fresh new look and replace that tired old awning fabric? You won’t be disappointed with the results.
Increased Durability
RV awning fabric replacement can offer numerous benefits, and one of the most significant advantages is increased durability. Over time, awning fabric can become worn and damaged from exposure to the elements, such as sunlight, rain, and wind. This can result in tears, fading, or even complete fabric failure.
By replacing the fabric, you can ensure that your awning is more resistant to these elements and stands up to the test of time. New fabric is often made from high-quality materials that are specifically designed to be more durable and long-lasting. This means that you can enjoy your RV awning for longer periods without worrying about it deteriorating or needing frequent repairs.
Additionally, the increased durability of the fabric can also provide better protection for you and your RV from the sun’s harmful UV rays, keeping you cooler and reducing the risk of sunburn. So, if you’re looking to enhance the longevity and resilience of your RV awning, replacing the fabric is a smart investment.
Better Shade
awning replacement, RV awning fabric, benefits, shade, protection, durabilityAre you tired of dealing with a worn-out RV awning fabric? It may be time to consider replacing it with a new one. Not only will a new awning fabric enhance the appearance of your RV, but it also comes with a range of benefits that can greatly improve your camping experience. One of the most significant advantages of replacing your RV awning fabric is better shade.
The primary purpose of an awning is to provide shade and protection from the sun, and over time, the fabric can become faded and damaged, reducing its effectiveness. By replacing the fabric, you ensure that you have a fresh, vibrant awning that can provide optimal shade, allowing you to relax comfortably outdoors without worrying about harmful UV rays. Additionally, a new fabric can provide better insulation, keeping the inside of your RV cooler during hot summer days.
Another benefit of replacing your RV awning fabric is increased durability. Over time, exposure to the elements, such as rain, wind, and sun, can cause the fabric to deteriorate. By installing a new fabric, you can ensure that your awning lasts longer and can withstand various weather conditions, saving you money in the long run.
So, if you’re looking to upgrade your RV and enjoy all the benefits of a new awning fabric, it’s time to consider a replacement.
Choosing the Right Replacement Fabric
So, you’ve decided it’s time to replace your RV awning fabric. Well, you’ve come to the right place! Choosing the right replacement fabric is crucial for the overall look and functionality of your RV awning. There are a few factors to consider when selecting the perfect fabric for your awning.
First and foremost, you’ll want to think about the material. The two most common options are vinyl and acrylic. Vinyl is known for its durability and resistance to the elements, while acrylic offers a more vibrant and attractive appearance.
Next, you’ll want to consider the color and design. Think about the overall aesthetic of your RV and choose a fabric that complements it. Lastly, be sure to consider the size and dimensions of your awning.
You’ll want to select a fabric that is the correct size and can be easily installed. By taking all of these factors into consideration, you’ll be well on your way to choosing the perfect replacement fabric for your RV awning!
Measurements
replacement fabric, measurements
Material Types
When it comes to choosing the right replacement fabric for your DIY project, it’s important to consider the material type. Different fabrics have different characteristics that can affect the overall look and durability of your finished product. There are a variety of options to choose from, including cotton, polyester, nylon, and faux leather.
Cotton is a popular choice for its softness and breathability, making it great for clothing and home decor. Polyester, on the other hand, is known for its durability and resistance to wrinkles, making it a good option for upholstery and outdoor projects. Nylon is a strong, versatile fabric that is often used for bags and backpacks, while faux leather provides a sleek and stylish look for items like furniture and accessories.
By considering the specific qualities of each material, you can ensure that you choose the right fabric for your project.
Color and Design
When it comes to choosing the right replacement fabric for your furniture, color and design play a crucial role. The color of the fabric can completely transform the look and feel of a room. It can make a bold statement or create a soothing and relaxing atmosphere.
When selecting the color, consider the overall color scheme of your space. You want the fabric to harmonize with the existing colors and enhance the overall aesthetic. It’s also important to consider the design of the fabric.
Whether you prefer a solid color, a pattern, or a texture, make sure it complements the style of your furniture and the mood you want to create in your living space. Additionally, think about the durability and functionality of the fabric. Will it be able to withstand everyday wear and tear? Is it easy to clean? These factors are important to consider when choosing the right replacement fabric for your furniture.
Tools and Materials Needed
When it comes to replacing RV awning fabric, there are a few tools and materials you will need to have on hand. First and foremost, you will need the new awning fabric itself. This can usually be purchased at an RV supply store or online. (See Also: Where Can I Take My Old Engine Oil? At Local Recycling Centers)
You will also need a ladder or step stool to reach the awning, as well as a pair of safety glasses to protect your eyes while you work. Additionally, you will need a power drill or screwdriver to remove the old fabric and attach the new one, along with a tape measure to ensure proper sizing. Finally, having some extra hands to help with the installation process can be beneficial, especially when it comes to lining up the fabric and securing it in place.
With the right tools and materials, replacing your RV awning fabric can be a relatively simple DIY task.
Measuring Tape
measuring tapeTools and Materials Needed When it comes to getting accurate measurements, a measuring tape is an essential tool that no household should be without. Whether you’re a DIY enthusiast or just need to measure something for a home improvement project, a measuring tape will come in handy. You don’t need any fancy tools or expensive equipment to get started.
All you need is a good quality measuring tape. Look for one with clear markings and a durable housing that can withstand regular use. It’s also a good idea to choose a tape that has both metric and imperial measurements, so you can easily convert between the two if needed.
Lastly, make sure the tape is long enough for your needs. Most tapes come in lengths ranging from 25 to 30 feet, but you can also find longer tapes for bigger projects. Having a measuring tape in your toolbox is like having a trusted assistant by your side, ready to help with any measurement task.
So make sure you have one on hand for all your DIY projects and home improvement needs.
Scissors or Knife
In the debate of scissors or knife, the answer really depends on the task at hand. Both tools have their own advantages and disadvantages, and knowing when to use each one can make a big difference in your project’s outcome. For smaller, more precise cuts, scissors are typically the go-to choice.
They offer greater control and maneuverability, allowing you to make clean, accurate cuts in a variety of materials. However, when it comes to tougher or thicker materials, a knife might be the better option. Knives provide more leverage and strength, allowing you to cut through dense materials with ease.
Additionally, knives often have sharper blades, making them ideal for tasks that require a bit more precision. Ultimately, it’s important to assess the specific needs of your project and choose the tool that will best suit those needs. So, next time you find yourself debating between scissors or knife, consider the task at hand and choose accordingly.
Awning Rail Lubricant
Awning Rail Lubricant, maintenance, RV awning, camping, easy application, avoid wear and tear, extend lifespan.When it comes to maintaining your RV awning, there’s one tool that can make all the difference: awning rail lubricant. This handy product is specifically designed to keep your awning gliding smoothly along its rail, preventing any unnecessary wear and tear that can shorten its lifespan.
To use awning rail lubricant effectively, all you’ll need is the lubricant itself and a clean cloth. Simply apply a small amount of the lubricant directly onto the awning rail, then use the cloth to spread it evenly along the surface. The lubricant will create a slick barrier that allows the awning to glide effortlessly along the rail, avoiding any snagging or sticking.
Using an awning rail lubricant is quick and easy, but the benefits are long-lasting. By regularly applying this lubricant to your RV awning, you can ensure that it remains in top condition for years to come. Not only will this make your camping trips more enjoyable, but it will also save you money in the long run by avoiding the need for costly repairs or replacements.
So, take a few minutes to invest in the care of your RV awning by using an awning rail lubricant. It’s a simple tool that can make a world of difference in keeping your awning in tip-top shape, allowing you to enjoy hassle-free camping adventures. Don’t let wear and tear hold you back from making the most of your outdoor experiences – grab some awning rail lubricant and get ready to glide smoothly into your next adventure!
Screwdriver or Drill
tools and materials needed, screwdriver or drill
Replacement Fabric
“replacement fabric”When it comes to replacing fabric on your furniture, having the right tools and materials is crucial. First and foremost, you’ll need a fabric measuring tape to accurately measure the dimensions of your furniture pieces. This will help ensure that you purchase the correct amount of replacement fabric.
Additionally, you’ll need a pair of sharp scissors or a rotary cutter to cut the fabric to size. It’s important to have a clean, precise cut to achieve the best results. In terms of materials, you’ll need the replacement fabric itself.
Consider the type of fabric you want to use, taking into account factors such as durability and color. You may also want to purchase a fabric adhesive or a sewing machine if you plan on attaching the fabric with a more permanent method. Having these tools and materials on hand will make the process of replacing fabric much easier and more efficient.
Step-by-step Guide: Replacing RV Awning Fabric
Are you tired of looking at your old, worn-out RV awning fabric? If so, it’s time to replace it and give your RV a fresh new look. Don’t worry, replacing RV awning fabric is easier than you might think. In this step-by-step guide, we’ll walk you through the process so you can do it yourself and save some money in the process.
First, you’ll need to gather the necessary materials. You’ll need a new awning fabric, a ladder, a screwdriver or power drill, and a helper to assist you. Once you have everything you need, start by extending the awning fully and securing it in place.
This will make it easier to remove the old fabric.Next, use the screwdriver or power drill to remove the screws that hold the fabric in place. Be sure to keep these screws in a safe place, as you’ll need them later.
Once the screws are removed, carefully remove the old fabric from the awning frame.Now it’s time to install the new fabric. Start by laying it out on the ground, making sure that it is facing the right direction.
Then, have your helper hold one end of the fabric while you secure the other end to the awning frame. Use the screws you removed earlier to attach the fabric to the frame.Once the fabric is secured, have your helper extend the awning while you make final adjustments.
Check to make sure the fabric is aligned properly and that it is fully extended without any wrinkles or folds.And there you have it – your RV’s awning fabric is replaced and ready to go. Now you can sit back and relax in the shade of your new awning, knowing that you did it yourself.
Step 1: Prepare the area
Replacing RV awning fabric can be a daunting task, but with a step-by-step guide, it can be made much easier. Step 1 is to prepare the area where you will be working. This involves making sure you have a clear space to work in and gathering all the necessary tools and materials.
Before you begin, it is also important to inspect the existing awning fabric and take note of any damage or wear. This will help you determine if any repairs or replacements need to be made before installing the new fabric. Additionally, it is a good idea to clean the area around the awning to ensure a clean surface for the installation.
By thoroughly preparing the area, you will set yourself up for success and make the process of replacing the RV awning fabric much smoother.
Step 2: Remove the existing fabric
In the process of replacing the fabric on your RV awning, the second step is to remove the existing fabric. This might seem like a daunting task, but with a little bit of patience and some basic tools, it can be done. First, make sure to extend the awning fully to expose the fabric.
Then, locate the screws or bolts that are holding the fabric in place on the roller tube. Use a screwdriver or wrench to carefully remove these fasteners. Once the fasteners are removed, you can start to slowly and carefully slide the old fabric off of the roller tube.
Take your time to avoid tearing or damaging the fabric. Once the fabric is completely removed, inspect the roller tube and the brackets to ensure they are in good condition. If any repairs or replacements are needed, now is the time to take care of them. (See Also: How Much for Synthetic Oil Change at Jiffy Lube? Cost Breakdown)
With the old fabric removed and any necessary repairs made, you are now ready to move on to the next step of replacing your RV awning fabric.
Step 3: Measure and cut the new fabric
“RV awning fabric replacement can seem like a daunting task, but with a step-by-step guide, it can be a manageable DIY project. Once you have taken down the old fabric and removed any hardware, it’s time to measure and cut the new fabric. This is a crucial step to ensure a proper fit and a seamless installation.
To measure the new fabric, start by laying it out on a flat surface and ensuring it is aligned with the roller tube. Measure the width of the roller tube itself, making sure to include any additional space you want for overhang on each side. This will determine the width of the new fabric.
Next, measure the length of the fabric by extending it fully and measuring from end to end, including any additional space you want for overhang. Remember to factor in any hardware you may need to attach the fabric to the RV.Once you have determined the measurements, it’s time to cut the new fabric.
Use a sharp pair of fabric scissors or a rotary cutter to make clean cuts. Take your time and make sure to follow the measured lines accurately to ensure an even and precise cut.Remember to double-check your measurements before cutting to avoid any mistakes.
It’s always better to cut a little larger and then trim down if needed, rather than ending up with a fabric that is too small.Replacing RV awning fabric can be a DIY project that saves you money and gives your RV a fresh new look. By following these step-by-step instructions, you can confidently measure and cut the new fabric for a seamless installation that will have your awning looking as good as new.
“
Step 4: Install the new fabric
Replacing the fabric on your RV awning can give it a fresh, updated look and prevent further damage. Step 4 in our step-by-step guide is to install the new fabric. Now that you have removed the old fabric and prepared the awning, it’s time to put the new fabric in place.
Start by aligning the fabric with the roller tube and inserting the spline into the groove. Make sure the fabric is centered and smoothly draped over the roller. Then, start rolling up the awning, making sure the fabric is rolling evenly.
As you roll, be careful not to stretch or wrinkle the fabric. Once the awning is fully rolled up, secure the end cap and lock it into place. Finally, test the awning by extending it fully to ensure that the fabric is properly installed and functioning correctly.
With the new fabric in place, your RV awning will not only look great but also provide you with the shade and protection you need on your outdoor adventures.
Step 5: Secure the awning fabric
To secure the awning fabric on your RV, follow these simple steps. First, carefully unroll the new fabric and make sure it is properly aligned with the awning roller tube. Next, slide the fabric into the roller channel and secure it in place using the awning’s built-in groove.
This groove should be located on the roller tube and will help keep the fabric in place while your RV is in motion. Once the fabric is in place, use the awning’s tension arms to tighten it and ensure a snug fit. These tension arms can be adjusted by hand, allowing you to get the perfect tension for your awning fabric.
Finally, make sure to properly secure the tension arms in place to prevent them from coming loose while you are driving. This can be done by tightening the screws or clips that hold the tension arms in place. By following these steps, you can easily secure your new awning fabric and ensure that it stays in place while you are on the road.
Maintenance Tips for RV Awning Fabric
If you own an RV, then you know how valuable the awning can be in providing shade and protection from the elements. However, over time, the awning fabric can start to wear out and become damaged. When this happens, it’s important to know how to replace RV awning fabric properly.
First, you’ll need to order the correct replacement fabric for your specific awning model. Then, start by extending the awning fully and securing it in place. Next, remove the end caps on the roller tube and slide the old fabric off.
Carefully unroll the new fabric and attach it to the roller tube, making sure it is straight and centered. Finally, reattach the end caps and test the functionality of the awning. By following these steps and taking proper care of your RV awning, you can ensure it lasts for many more camping trips to come.
Regular Cleaning
Regular cleaning is essential for maintaining the longevity of your RV awning fabric. Over time, dirt, bird droppings, and other debris can accumulate on the fabric, causing it to deteriorate and become less durable. To prevent damage, it’s important to regularly clean your awning fabric using mild soap, water, and a soft brush.
Start by rinsing the fabric with water to remove any loose dirt or debris. Then, mix a solution of mild soap and water and scrub the fabric using the soft brush. Be sure to clean both sides of the fabric and pay extra attention to any stained or heavily soiled areas.
After scrubbing, rinse the fabric thoroughly to remove any soap residue. Finally, allow the fabric to air dry completely before retracting the awning. With regular cleaning and maintenance, your RV awning fabric will stay clean, fresh, and in good condition for years to come.
Proper Storage
RV awning fabric is an essential part of any recreational vehicle. It provides shade and protection from the elements, allowing RV owners to enjoy the outdoors in comfort. However, to ensure that the awning fabric remains in good condition, proper maintenance is necessary.
One important aspect of maintenance is proper storage. When not in use, it is important to store the awning fabric in a clean and dry location. This will help prevent mold and mildew from forming on the fabric.
Additionally, it is important to roll up the fabric tightly and secure it with straps or bungee cords to prevent it from unraveling during transportation. By following these simple maintenance tips, RV owners can prolong the life of their awning fabric and ensure that it remains in good condition for years to come.
Routine Inspections
Are you a proud owner of an RV? If so, you probably know the importance of regular maintenance to ensure everything is in top shape for your next adventure. One crucial aspect of RV maintenance is inspecting the awning fabric. Over time, the fabric can deteriorate due to exposure to sunlight, wind, rain, and other elements.
To prevent any issues and prolong the lifespan of your awning fabric, it’s important to perform routine inspections. Start by checking for any tears, holes, or snags in the fabric. These can weaken the fabric and lead to further damage.
Additionally, look for signs of mold or mildew, as they can cause unpleasant odors and compromise the fabric’s integrity. If you notice any of these issues, it’s best to address them promptly to avoid further damage. Remember, a little maintenance goes a long way in ensuring your RV awning fabric stays in excellent condition for years to come.
Conclusion
So there you have it – a step-by-step guide on how to replace RV awning fabric. With just a little bit of time and effort, you can give your RV a whole new look and protect yourself from the elements. And the best part? You can save yourself some serious cash by doing it yourself.
Plus, it’s a great way to showcase your DIY skills and impress your fellow campers. So don’t let a torn or faded awning fabric dampen your camping experience – get out there and give your RV the makeover it deserves. Happy camping!”
FAQs
How often should RV awning fabric be replaced?
RV awning fabric should be replaced every 5-7 years, or sooner if there is visible damage or excessive wear and tear.
Can I replace RV awning fabric myself?
Yes, it is possible to replace RV awning fabric yourself. However, it can be a challenging task, so it is recommended to have some basic DIY skills and follow proper instructions.
What tools are needed to replace RV awning fabric?
To replace RV awning fabric, you will typically need a ladder, screwdriver, pliers, scissors, a tape measure, and a helper.
How long does it take to replace RV awning fabric?
The time required to replace RV awning fabric can vary depending on factors such as experience, fabric type, and the condition of the existing awning. Usually, it can take between 2-4 hours.
Can I use any type of fabric to replace RV awning fabric?
It is recommended to use fabric specifically designed for RV awnings to ensure proper fit and durability. Regular fabric may not have the necessary UV protection or weather resistance.
How much does it cost to replace RV awning fabric?
The cost of replacing RV awning fabric can vary depending on factors such as the size of the awning, type of fabric, and whether you hire a professional or do it yourself. On average, it can cost anywhere from $200 to $600.
Are there any safety precautions to consider when replacing RV awning fabric?
Yes, it is important to take safety precautions when replacing RV awning fabric. This includes using a ladder or step stool on a stable surface, wearing proper protective gear such as gloves and safety goggles, and being cautious of any electrical or sharp objects near the awning.