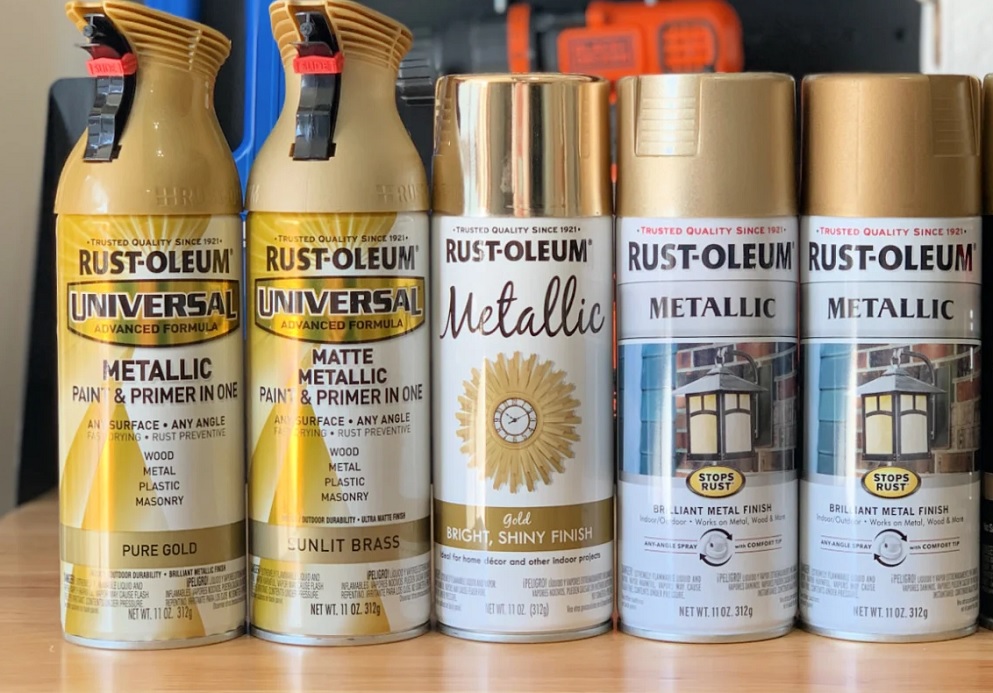
Embarking on a DIY journey to repaint your car with Rustoleum can be an exciting venture, but the question lingers: How many cans of Rustoleum will it take to transform your vehicle’s appearance? In this comprehensive guide, we’ll not only explore the intricacies of estimating paint quantities but also delve deeper into the nuances of surface preparation, paint types, and practical tips to ensure your painting endeavor is a resounding success.
Unveiling the Basics
1. Surface Preparation: A Crucial First Step
- Before diving into the paint, ensure your car’s surface is impeccably clean.
- Use a high-quality automotive soap and water to remove dirt and grime.
- Sand the surface lightly to create a textured foundation for optimal paint adhesion.
2. Choosing the Right Rustoleum Paint: A Palette of Possibilities
- Rustoleum offers an extensive range of colors and finishes.
- Consider the weather resistance, UV protection, and whether a primer is necessary.
- Some Rustoleum products come with built-in primers for added convenience.
The Art of Estimating Paint Quantity
3. Car Size Matters: A Pivotal Factor
- Larger cars naturally require more paint.
- Measure the length, width, and height of your vehicle to calculate the total surface area.
- A compact car may need fewer cans than an SUV or truck.
4. Type of Paint Job: From Touch-Ups to Full Overhauls
- The extent of your painting project plays a vital role in determining the quantity needed.
- A full car paint job demands more cans than a touch-up or partial painting.
- Decide if you’re going for a complete color change or merely refreshing the existing coat.
5. Multiple Coats for Flawless Finish
- Achieving a professional-looking finish often involves applying at least two coats.
- Each coat serves a purpose, from providing a base to enhancing color vibrancy.
- Factor in the quantity required for each layer separately.
Crunching the Numbers: A Step-by-Step Guide
6. Surface Area Calculation: Precision Matters
- Measure the length, width, and height of every surface you plan to paint.
- Use these measurements to calculate the total surface area.
- Precision in measurement ensures accuracy in your paint estimation.
7. Coverage per Can: Decoding the Specifications
- Examine the coverage specifications on the Rustoleum can.
- Coverage is typically measured in square feet per can.
- Divide the total surface area by the coverage to determine the number of cans needed for one coat.
8. Accounting for Waste: A Prudent Approach
- Allow for a margin of error and potential waste.
- Having a bit extra ensures you won’t be caught short during the project.
- Consider the complexity of your car’s shape; intricate designs may require more paint.
Practical Tips for Precision Painting
9. Start Small for Insightful Experience
- Begin with a smaller project, such as painting a panel or specific area.
- Gauge the paint’s coverage and adjust your estimate based on this experience.
- Learning through trial and error on a smaller scale minimizes the risk of oversights in a full car paint job.
10. Seek Expert Advice: A Community of Knowledge
- Connect with professionals or seasoned DIYers for valuable insights.
- Online forums and tutorials provide a wealth of practical advice and real-world experiences.
- Learning from others’ successes and challenges enriches your understanding of the painting process.
Understanding Burstiness in Rustoleum Cans
11. Burst of Color: Express Yourself
- Rustoleum’s extensive color palette offers a burst of creativity.
- Consider the emotional impact and personality each color brings to your car.
- Bright hues may require more attention to detail during the application process.
12. Burst of Durability: Long-Lasting Protection
- Rustoleum is renowned for its durability and protective qualities.
- Invest in the quantity needed to ensure a robust, long-lasting finish.
- Factor in the potential exposure to harsh weather conditions and road debris.
Expert Tips for Perfecting Your Rustoleum Car Paint Job
Embarking on a Rustoleum car painting project requires more than just cans of paint; it demands a nuanced approach to achieve a flawless finish. Here are some expert tips to elevate your DIY experience and ensure your vehicle turns heads with its professionally painted allure.
1. Prep Like a Pro: The Foundation Matters
Before reaching for that paint can, invest time in meticulous surface preparation. Clean, sand, and prime your car to create a flawless canvas for the Rustoleum magic.
2. Temperature Matters: Choose the Right Conditions
Optimal painting conditions contribute to a successful outcome. Aim for temperatures between 70-90°F for ideal paint application and drying. Avoid painting in extreme heat or cold.
3. Thin Coats for the Win: Patience is a Virtue
Resist the urge to apply thick coats of Rustoleum. Thin, even layers ensure better adhesion, a smoother finish, and quicker drying times between coats.
4. Sand Between Coats: Smooth Transitions
Achieve a glass-like finish by lightly sanding between coats. This step helps eliminate imperfections and promotes better paint adhesion for subsequent layers.
5. Mind the Overlap: Avoid Uneven Application
Maintain a consistent overlap pattern while applying each coat. This prevents streaks and ensures uniform coverage across the entire surface of your vehicle.
6. Consider a Clear Coat: Extra Protection
For added durability and a professional sheen, apply a clear coat over your final layer of Rustoleum. This protective layer enhances gloss and shields against environmental elements. (See Also: How Many Spray Cans to Paint a Car Hood: A Comprehensive Guide)
7. Ventilation is Key: Safety First
Ensure proper ventilation in your workspace to avoid inhaling fumes. Consider working in a well-ventilated area or using a respirator mask to protect yourself during the painting process.
8. Practice Patience: Let It Cure
Once the final coat is applied, resist the temptation to rush back on the road. Allow ample time for the paint to cure completely. This patience pays off in a resilient and long-lasting finish.
9. Quality Brushes and Rollers: Choose Wisely
Invest in high-quality brushes and rollers for a professional touch. Quality tools result in smoother application and a more polished appearance.
10. Plan for Touch-Ups: Be Ready
Even with meticulous planning, accidents happen. Keep a small quantity of Rustoleum for touch-ups, ensuring your car maintains its flawless appearance over time.
Implementing these expert tips will not only enhance the aesthetic appeal of your Rustoleum-painted car but also contribute to the longevity of the finish. With the right techniques, patience, and attention to detail, you’ll soon be cruising in a vehicle that showcases your DIY prowess. Happy painting!
Frequently Asked Questions (FAQs) About Rustoleum Car Painting
Embarking on a Rustoleum car painting project often raises questions, and we’re here to provide answers. Explore these frequently asked questions to ensure a smooth and successful journey as you transform your vehicle’s appearance.
1. Is Rustoleum Suitable for Car Painting?
Rustoleum is a popular choice for DIY car painting. It provides a durable finish, and with proper preparation and application, it can yield professional-looking results. (See Also: Can You Clear Coat Plasti Dip? Learn the Best Techniques for a Durable Finish)
2. How Many Cans of Rustoleum Do I Need for a Basic Car Paint Job?
The quantity depends on factors like car size, type of paint job, and desired coverage. Use our guide to calculate the estimated number of cans required.
3. Can I Dilute Rustoleum Paint for Thinning?
While it’s possible to dilute Rustoleum, it’s not recommended for car painting. Dilution affects coverage and may compromise the quality of the finish.
4. Do I Need to Sand Between Rustoleum Coats?
Yes, lightly sanding between coats is recommended for a smoother finish. It helps eliminate imperfections and promotes better adhesion for subsequent layers.
5. Can I Apply Rustoleum in Extreme Temperatures?
It’s best to avoid extreme temperatures. Aim for a temperature range of 70-90°F for optimal application and drying conditions.
6. Is a Clear Coat Necessary After Rustoleum Painting?
While not mandatory, applying a clear coat adds an extra layer of protection and enhances the gloss of your Rustoleum-painted car.
7. How Long Should I Wait Between Rustoleum Coats?
Wait for each coat to dry completely before applying the next. Drying times may vary, but a general guideline is to wait at least 24 hours between coats.
8. Can Rustoleum be Applied with a Spray Gun?
Rustoleum can be applied with a spray gun for a more even and professional finish. Ensure proper thinning and follow Rustoleum’s guidelines for spray application. (See Also: Can You Powder Coat Plastic Center Caps? A Comprehensive Guide)
9. What Should I Do If I Run Out of Rustoleum Mid-Project?
Always purchase a bit more paint than your initial estimate to account for waste or touch-ups. If you run out, ensure the new batch matches the original color.
10. How Long Should I Wait Before Driving the Car After Painting?
It’s advisable to wait at least a week before driving the car post-painting. This allows the paint to cure fully and ensures a durable finish.
Navigating a Rustoleum car painting project becomes more seamless with these answers to common queries. As you embark on this DIY adventure, feel confident in your ability to achieve a stunning result. Happy painting!
Final Thoughts: Embrace the Journey
Embrace the Creative Burst: Enjoy the Process
- Painting your car with Rustoleum is not just a project; it’s a creative endeavor.
- Revel in the burst of creativity as you witness your vehicle transform.
- Take pride in the process, from surface preparation to the final brushstroke.
In conclusion, estimating the number of Rustoleum cans needed is both a science and an art. Consider your car’s size, the nature of the paint job, and follow our comprehensive guide to ensure you have the right quantity for a stunning finish. Happy painting!


