
Embarking on the journey to revitalize your camper shell with a fresh coat of paint is an exciting endeavor. However, understanding the intricacies of the costs involved is crucial for a smooth and budget-friendly experience. In this comprehensive guide, we’ll delve deeper into each factor influencing the expense and explore additional tips for achieving a cost-effective yet stunning camper shell transformation.
Table of Contents
- Factors Affecting Camper Shell Painting Costs
- Understanding the Cost Breakdown
- Tips for Cost-Effective Camper Shell Painting
- Realistic Cost Estimates
- Additional Considerations
- Expert Tips for Cost-Effective Camper Shell Painting
- 1. Explore DIY Painting Kits
- 2. Prioritize Surface Preparation
- 3. Consider Partial Painting
- 4. Opt for Standard Colors
- 5. DIY Surface Repairs
- 6. Negotiate with Professionals
- 7. Plan According to Weather Conditions
- 8. Invest in Quality Paint and Materials
- 9. DIY Touch-Ups and Maintenance
- 10. Consider Vinyl Wrapping
- Frequently Asked Questions About Camper Shell Painting
- 1. How much does it cost to paint a camper shell?
- 2. Is it better to hire professionals or paint my camper shell myself?
- 3. What factors influence the cost of camper shell painting?
- 4. Are there cost-effective options for camper shell painting?
- 5. Can I change the color of my camper shell without repainting it?
- 6. How can I ensure the longevity of my camper shell paint job?
- 7. What weather conditions are ideal for camper shell painting?
- 8. Can I negotiate the cost with professional painters?
- 9. Are DIY painting kits suitable for beginners?
- 10. Can I perform partial painting to save costs?
- Conclusion
Factors Affecting Camper Shell Painting Costs
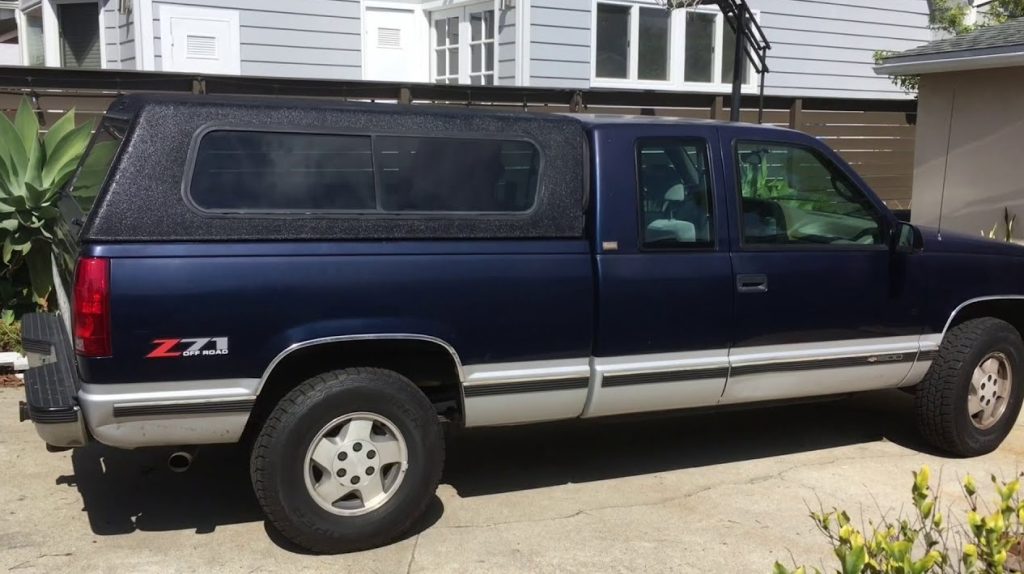
1. Size and Material
The dimensions and material composition of your camper shell play a pivotal role in determining the overall cost of painting. Larger shells inherently require more paint and time, contributing to a higher price tag. Additionally, the material of the shell influences the type of paint and preparation required, affecting costs accordingly.
2. Paint Type and Quality
Selecting the right paint type and quality is akin to choosing the personality of your camper shell. Basic, single-color options are generally more economical, while premium paints with unique finishes or effects can significantly escalate the overall expense. It’s essential to strike a balance between your aesthetic preferences and budget constraints.
3. Professional Services vs. DIY
The eternal dilemma: to hire professionals or embark on a do-it-yourself (DIY) adventure. Professional services assure a polished finish and save you time, but they come at a higher cost. On the other hand, the DIY approach offers potential cost savings but demands patience, skill, and the right equipment. Consider your priorities and capabilities when making this crucial decision.
4. Surface Preparation
Don’t underestimate the importance of proper surface preparation. Neglecting this step can lead to unsatisfactory results and, ultimately, additional costs for repairs. Depending on the condition of your camper shell, the need for sanding, priming, or repairs may vary, directly impacting the overall painting cost.
Understanding the Cost Breakdown
5. Labor Costs
One of the significant components contributing to the overall cost is labor. Professional painters typically charge based on the complexity of the job or hours worked. DIY enthusiasts can save on labor costs but should be prepared to invest time and effort into achieving a satisfactory result.
6. Additional Design Features
Injecting personality into your camper shell with extra design features comes at a price. Whether it’s intricate patterns, decals, or custom designs, these add-ons contribute to the overall cost. Consider your budget and the visual impact you want to achieve before opting for elaborate designs.
7. Location and Shop Rates
Geographical location is a silent influencer of costs. Urban areas often have higher shop rates, while rural or suburban locations might offer more budget-friendly options. Research local rates, and if feasible, explore neighboring areas for potential savings.
Tips for Cost-Effective Camper Shell Painting
8. Compare Multiple Quotes
Gathering quotes from several painters or shops is a smart strategy. This not only provides a clearer picture of the market rates but also allows you to assess the quality of services offered. Remember to consider customer reviews and testimonials when making your decision.
9. Consider DIY Kits
For the hands-on enthusiasts, DIY painting kits can be an attractive option. These kits typically include all the necessary materials and step-by-step instructions, empowering you to personalize your camper shell without the hefty price tag. However, ensure you have the time and patience to commit to the process.
10. Prioritize Essentials
If you find yourself working with a tight budget, prioritize essential aspects of the paint job. Focus on quality surface preparation and a durable finish, reserving intricate designs for future touch-ups or when your budget allows for more elaborate customization.
Realistic Cost Estimates
11. Basic Single-Color Paint Job
For a standard-sized camper shell undergoing a basic single-color paint job, expect to spend anywhere from $300 to $800. The variation depends on factors such as location, material, and the intricacy of the preparation process. (See Also: Rust-Oleum Peel Coat vs. Plasti Dip: Unveiling the Best DIY Automotive Finish)
12. Custom Designs and Premium Finishes
Should you opt for custom designs or premium finishes, be prepared to allocate between $800 and $2,500 or more. Complex designs, additional features, and the use of high-quality materials contribute to the higher end of the cost spectrum.
Additional Considerations
13. Weather Conditions
Consider the impact of weather conditions on the painting process. Extreme temperatures, humidity, or precipitation can affect the drying time and overall quality of the paint job. Plan your project during favorable weather conditions for optimal results.
14. Long-Term Value
While upfront costs are crucial, consider the long-term value of your investment. Quality painting jobs, whether done professionally or through DIY efforts, contribute to the longevity of your camper shell’s appearance, potentially saving you money on future touch-ups.
15. Warranty and Guarantees
When opting for professional painting services, inquire about warranties or guarantees offered by the service provider. This adds an extra layer of assurance and might be worth considering, especially for higher-cost projects.
Expert Tips for Cost-Effective Camper Shell Painting
Embarking on the journey of painting your camper shell? Here are expert tips to help you achieve a stunning result without breaking the bank.
1. Explore DIY Painting Kits
Introducing a personal touch to your camper shell doesn’t have to come with a hefty price tag. DIY painting kits are readily available, providing you with the tools and instructions needed for a successful project. Not only does this save on labor costs, but it also allows you to unleash your creativity.
2. Prioritize Surface Preparation
Invest time and effort in thorough surface preparation. Quality prep work ensures better paint adhesion and a longer-lasting finish. Address any imperfections, sand the surface, and use high-quality primers for optimal results. This step is essential for both professional and DIY projects.
3. Consider Partial Painting
Instead of a full repaint, consider partial painting for a budget-friendly option. Focus on high-visibility areas or those showing signs of wear and tear. This targeted approach can provide a refreshed look without the expense of a comprehensive paint job.
4. Opt for Standard Colors
While custom designs can be enticing, opting for standard colors can significantly reduce costs. Explore a range of appealing shades within a standard paint palette. This not only saves on paint expenses but also simplifies the overall process.
5. DIY Surface Repairs
Before starting the painting process, take care of minor surface repairs yourself. Fill in small dents, scratches, or imperfections using DIY repair kits. This proactive approach ensures a smoother painting process and minimizes additional costs for professional repairs.
6. Negotiate with Professionals
If you choose to hire professionals, don’t hesitate to negotiate. Obtain multiple quotes and discuss pricing options with different service providers. Some may be willing to offer discounts or package deals, especially during off-peak seasons. (See Also: Is BMW Carbon Black Metallic Blue? Unveiling the True Shades)
7. Plan According to Weather Conditions
Timing is crucial when painting your camper shell. Plan your project during favorable weather conditions to ensure optimal drying and curing times. This not only enhances the quality of the paint job but also prevents potential issues caused by extreme weather.
8. Invest in Quality Paint and Materials
While cost-cutting is essential, compromising on the quality of paint and materials can lead to unsatisfactory results. Invest in high-quality products for a durable and long-lasting finish. Quality paint not only looks better but also withstands the elements over time.
9. DIY Touch-Ups and Maintenance
After the initial paint job, be proactive in performing DIY touch-ups and maintenance. Keep a small supply of touch-up paint matching your camper shell color. This allows you to address minor issues promptly, preventing them from escalating into more extensive and costly repairs.
10. Consider Vinyl Wrapping
For a cost-effective alternative to traditional painting, explore vinyl wrapping. This technique offers a wide range of colors and designs, providing a protective layer to your camper shell. While it may not be suitable for intricate designs, it can be a budget-friendly and visually appealing option.
Embark on your camper shell painting project with confidence, armed with these expert tips to achieve a fantastic result within your budget. Whether you’re a seasoned DIY enthusiast or seeking professional services, these insights will guide you towards a cost-effective and visually stunning transformation.
Frequently Asked Questions About Camper Shell Painting
Embarking on a camper shell painting project involves various considerations. To address your queries and provide valuable insights, here are some frequently asked questions about camper shell painting.
1. How much does it cost to paint a camper shell?
The cost varies based on factors such as size, material, paint type, and whether you opt for professional services or a DIY approach. Basic single-color paint jobs can range from $300 to $800, while custom designs may cost $800 to $2,500 or more.
2. Is it better to hire professionals or paint my camper shell myself?
The choice between professional services and a DIY approach depends on your budget, time, and skill level. Professionals ensure a polished finish but come at a higher cost. DIY projects offer potential cost savings but require time, patience, and the right tools.
3. What factors influence the cost of camper shell painting?
Key factors include the size and material of the shell, the type and quality of paint, surface preparation needs, labor costs, additional design features, and location. Each element contributes to the overall expense of the painting project.
4. Are there cost-effective options for camper shell painting?
Yes, several cost-effective options exist. Exploring DIY painting kits, prioritizing essential surface preparation, negotiating with professionals, and considering partial painting are some strategies to achieve a refreshed look without overspending. (See Also: Can You Paint Over LINE-X? Tips and Tricks for a Flawless Finish)
5. Can I change the color of my camper shell without repainting it?
Yes, an alternative to traditional painting is vinyl wrapping. This method allows you to change the color or add designs without the permanence of paint. While it may not suit intricate designs, vinyl wrapping is a cost-effective and visually appealing option.
6. How can I ensure the longevity of my camper shell paint job?
Invest in quality paint and materials, prioritize thorough surface preparation, and perform DIY touch-ups and maintenance. Proactive care and attention to details can extend the lifespan of your camper shell’s paint job.
7. What weather conditions are ideal for camper shell painting?
Optimal weather conditions include moderate temperatures and low humidity. Avoid extreme heat or cold, as well as rainy or overly humid days. Planning your painting project during favorable weather ensures proper drying and curing times.
8. Can I negotiate the cost with professional painters?
Yes, negotiating with professional painters is a common practice. Obtain multiple quotes, discuss pricing options, and inquire about package deals or discounts. Many professionals are open to negotiation, especially during off-peak seasons.
9. Are DIY painting kits suitable for beginners?
Yes, DIY painting kits are designed to be user-friendly and suitable for beginners. They typically include all necessary materials and step-by-step instructions. However, it’s essential to follow the instructions carefully and be patient throughout the process.
10. Can I perform partial painting to save costs?
Yes, partial painting is a cost-effective option. Focus on high-visibility areas or those showing signs of wear and tear. This targeted approach allows you to achieve a refreshed look without the expense of a comprehensive paint job.
Explore these FAQs to gain a better understanding of camper shell painting and make informed decisions for your project. Whether you’re a DIY enthusiast or considering professional services, these answers provide valuable insights to guide you through the process.
Conclusion
In the realm of camper shell painting, the journey is as important as the destination. By thoroughly understanding the influencing factors, exploring cost-effective options, and considering additional tips, you can embark on this adventure with confidence. Whether you choose the expertise of professionals or the hands-on approach of DIY, the key is to align your choices with your vision and financial plan. So, how much does it cost to paint a camper shell? The answer lies in the balance you strike between your aspirations and the practicalities of your budget. Happy painting!