
In the vast realm of DIY painting and finishing, the timing of applying clear coat stands as a critical factor. If you’re pondering the age-old question, can I apply clear coat the next day?, you’re not alone. Let’s embark on a comprehensive journey into the intricacies of this common query, unveiling the secrets behind achieving impeccable finishes that stand the test of time.
Table of Contents
- Understanding the Basics
- Timing is Everything
- Pro Tips for Flawless Finishes
- Troubleshooting Common Concerns
- Additional Considerations
- Expert Tips for Achieving Flawless Clear Coat Finishes
- 1. Prep Like a Pro
- 2. Mind the Temperature
- 3. Invest in Quality Clear Coats
- 4. Thin Coats, Multiple Layers
- 5. Patience is a Virtue
- 6. Mind Your Environment
- 7. Consider UV Protection
- 8. Master the Art of Sanding
- 9. Practice in an Inconspicuous Area
- 10. Clean Tools, Better Results
- 11. Check for Compatibility
- 12. Embrace the Buff
- 13. Protect Your Work Area
- 14. Read the Manufacturer’s Guidelines
- 15. Inspect, Inspect, Inspect
- Clear Coat Conundrums: FAQs Decoded
- 1. Can I Apply Clear Coat the Next Day After Painting?
- 2. What Happens If I Apply Clear Coat Too Early?
- 3. Is Sanding Necessary Before Applying Clear Coat?
- 4. Can I Apply Clear Coat in High Humidity?
- 5. How Many Coats of Clear Coat Should I Apply?
- 6. What Causes Yellowing in Clear Coats?
- 7. Can I Use Any Clear Coat for Any Paint?
- 8. How Do I Prevent Overspray When Applying Clear Coat?
- 9. Do I Need to Buff the Clear Coat for a Glossier Finish?
- 10. What Should I Do If I Notice Imperfections After Applying Clear Coat?
- 11. Can I Clear Coat Over an Existing Clear Coat?
- 12. How Long Does Clear Coat Take to Cure Completely?
- Conclusion
Understanding the Basics
Clear coating serves as the final protective layer, enhancing both the durability and aesthetics of your painted surfaces. Before we delve into the time-sensitive aspect, let’s establish a foundational understanding of clear coats.
1. What is Clear Coat?
Clear coat, also known as a topcoat, is a transparent layer applied over painted surfaces. It serves as a shield, providing resistance against scratches, UV rays, and other environmental elements that can compromise the integrity of your paint job.
2. The Purpose of Clear Coat
The primary purpose of clear coating is twofold: it not only augments the longevity of your paint job but also adds a glossy or matte finish, depending on your preference. It’s the proverbial cherry on top of your painting endeavors.
Timing is Everything
Now, let’s address the burning question: can you apply clear coat the next day after painting?
3. Ideal Waiting Period
While the impatience to see the finished product might be tempting, it’s generally advisable to allow ample time for the base coat to dry thoroughly before applying the clear coat. Waiting at least 24 hours is a common recommendation to ensure the paint is fully cured.
4. Factors Influencing Timing
- Temperature and Humidity: Weather conditions play a crucial role in the drying process. Warmer and less humid environments generally facilitate faster drying times.
- Type of Paint: Different paints have varying drying times. Consult the paint manufacturer’s guidelines for accurate information.
5. Next Day Application
While waiting for the next day is often suitable, certain considerations come into play.
- Sanding: If you’ve waited longer than a day, light sanding may be necessary to promote adhesion between coats.
- Clean Surface: Ensure the painted surface is free from dust and debris before applying the clear coat to prevent imperfections.
Pro Tips for Flawless Finishes
6. Even Application Matters
Achieving a smooth, even application of the clear coat is crucial. Uneven clear coats can diminish the overall aesthetics of your project. Use long, even strokes for a professional finish.
7. Test in an Inconspicuous Area
Before committing to the entire surface, perform a test application in a hidden area. This allows you to assess compatibility and ensure the desired finish without compromising the visible portions of your project.
Troubleshooting Common Concerns
8. Cloudiness or Blushing
Cloudiness, often termed blushing, can occur if clear coat is applied in high humidity. To remedy this, wait for a drier day or use a humidity-reducing additive in your clear coat.
9. Yellowing Over Time
Some clear coats may yellow over time due to exposure to sunlight. To counteract this effect, opt for UV-resistant clear coats. These formulations are designed to withstand prolonged sun exposure without compromising clarity.
Additional Considerations
10. Ventilation is Key
Proper ventilation is crucial during the application of clear coat. Ensure that you are working in a well-ventilated area to disperse fumes and aid in the drying process.
11. Choosing the Right Clear Coat
The market offers a plethora of clear coat options. Consider factors such as sheen, durability, and intended use when selecting the clear coat that best suits your project. (See Also: How to Paint Fiberglass Truck Cap: A Step-by-Step Guide for a Stunning Finish)
12. Multiple Coats for Enhanced Protection
For high-traffic areas or items exposed to the elements, consider applying multiple coats of clear finish. This adds an extra layer of protection and extends the life of your painted surfaces.
Expert Tips for Achieving Flawless Clear Coat Finishes
When it comes to applying clear coat, mastering the art is more than just a matter of timing. It involves a combination of technique, preparation, and attention to detail. Whether you’re a seasoned DIY enthusiast or a novice painter, these expert tips will elevate your clear coat game and ensure your finishes are nothing short of perfection.
1. Prep Like a Pro
Before reaching for the clear coat, meticulously prepare the surface. Clean it thoroughly, remove any imperfections, and ensure a smooth canvas for the clear coat application.
2. Mind the Temperature
Optimal drying conditions are crucial. Aim to apply clear coat on days with moderate temperatures. Extreme heat or cold can affect the drying process and compromise the final result.
3. Invest in Quality Clear Coats
Not all clear coats are created equal. Invest in high-quality products to ensure durability and a professional finish. Cheap alternatives may save you money initially but can lead to headaches in the long run.
4. Thin Coats, Multiple Layers
Instead of one heavy application, opt for thin, even coats. Multiple layers provide better coverage and adhesion, resulting in a finish that withstands the test of time.
5. Patience is a Virtue
Rushing the process is a recipe for imperfections. Allow each coat to dry thoroughly before applying the next. Patience ensures a flawless finish and minimizes the need for touch-ups.
6. Mind Your Environment
Choose a well-ventilated workspace to disperse fumes and aid in the drying process. Avoid painting on windy days to prevent dust and debris from settling on wet surfaces.
7. Consider UV Protection
If your project will be exposed to sunlight, opt for clear coats with UV protection. This prevents yellowing and ensures the vibrancy of your painted surfaces over time.
8. Master the Art of Sanding
Before applying the clear coat, lightly sand the surface. This promotes adhesion and creates a smooth canvas for the clear coat to adhere to, resulting in a glass-like finish.
9. Practice in an Inconspicuous Area
Before committing to the entire project, practice your clear coat technique in a hidden spot. This allows you to perfect your method without compromising the visible areas.
10. Clean Tools, Better Results
Keep your tools clean throughout the process. Dirty brushes or spray equipment can introduce imperfections into the clear coat, marring the final result.
11. Check for Compatibility
Ensure compatibility between your base coat and clear coat. Some combinations may result in undesirable reactions, such as bubbling or lifting. (See Also: VHT Flameproof vs. Ceramic Coating: Unraveling the Best Heat Protection)
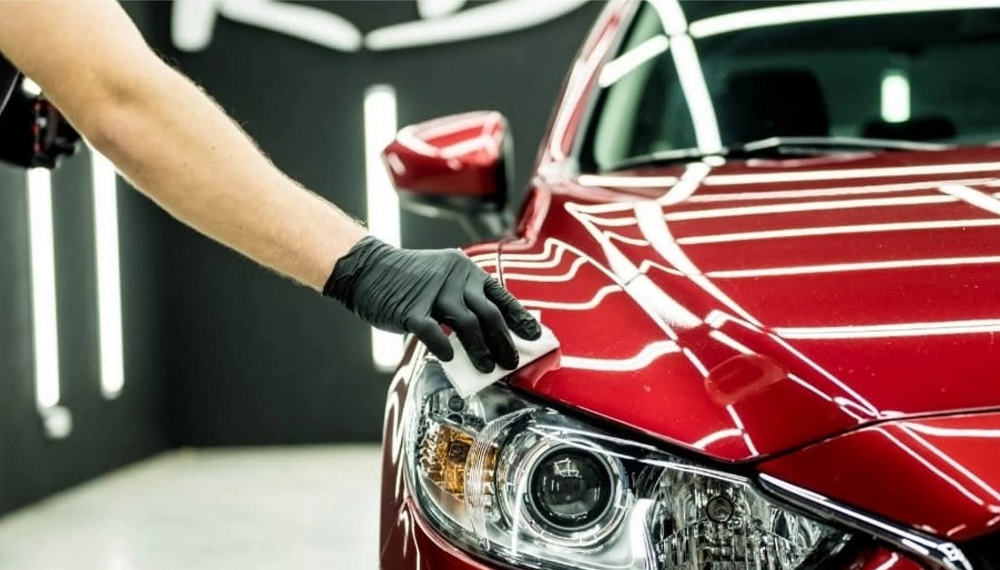
12. Embrace the Buff
For an extra level of sheen, consider buffing the clear coat once it’s fully cured. This step enhances the gloss and smoothness of the finish.
13. Protect Your Work Area
Clear coat is notorious for overspray. Cover nearby surfaces and objects to prevent unintentional clear coat application.
14. Read the Manufacturer’s Guidelines
Different clear coats may have specific recommendations. Always refer to the manufacturer’s guidelines for the best results.
15. Inspect, Inspect, Inspect
After the final coat has dried, inspect the finish carefully. Look for imperfections or inconsistencies that may require touch-ups. A keen eye ensures a truly flawless result.
With these expert tips in your arsenal, you’re well-equipped to tackle clear coat applications with confidence. Elevate your finishing game and transform your projects into professional-quality masterpieces.
Clear Coat Conundrums: FAQs Decoded
Embarking on a painting project, especially when it involves clear coat application, can raise numerous questions. To demystify the common queries and provide clarity, here’s a compilation of frequently asked questions and their insightful answers. Let’s unravel the mysteries of clear coat finishes.
1. Can I Apply Clear Coat the Next Day After Painting?
Yes, you can apply clear coat the next day, but waiting for at least 24 hours is advisable. This allows the base coat to fully cure, ensuring optimal adhesion and a flawless finish.
2. What Happens If I Apply Clear Coat Too Early?
Applying clear coat too early can lead to issues like poor adhesion, bubbling, or a cloudy finish. Patience is key to achieving professional results.
3. Is Sanding Necessary Before Applying Clear Coat?
Yes, lightly sanding the surface before applying clear coat promotes better adhesion and creates a smoother canvas for the clear coat to adhere to.
4. Can I Apply Clear Coat in High Humidity?
High humidity can lead to blushing or cloudiness in the clear coat. It’s advisable to wait for a drier day or use a humidity-reducing additive to mitigate this issue.
5. How Many Coats of Clear Coat Should I Apply?
Opt for thin, even coats and consider applying multiple layers for better coverage and durability. However, avoid over-application, as it can lead to drips and uneven finishes.
6. What Causes Yellowing in Clear Coats?
Yellowing in clear coats is often a result of exposure to sunlight. Choosing a clear coat with UV protection helps prevent yellowing and maintains the vibrancy of the painted surface. (See Also: Plasti Dip vs. Spray Paint Rims: Which is Best for Your Wheels?)
7. Can I Use Any Clear Coat for Any Paint?
Not all clear coats are compatible with every type of paint. Check the manufacturer’s guidelines to ensure compatibility and avoid undesirable reactions.
8. How Do I Prevent Overspray When Applying Clear Coat?
Protect nearby surfaces and objects by covering them before applying clear coat. Overspray is common, and prevention is key to maintaining a clean work area.
9. Do I Need to Buff the Clear Coat for a Glossier Finish?
Buffing the clear coat once it’s fully cured can enhance the gloss and smoothness of the finish. It’s an optional step for those seeking an extra level of sheen.
10. What Should I Do If I Notice Imperfections After Applying Clear Coat?
If imperfections are spotted, allow the clear coat to dry completely and lightly sand the affected area. Apply a touch-up coat for seamless results.
11. Can I Clear Coat Over an Existing Clear Coat?
Yes, you can clear coat over an existing clear coat. Ensure the surface is clean, lightly sand it, and apply the new clear coat for added protection and sheen.
12. How Long Does Clear Coat Take to Cure Completely?
The full curing time varies, but it typically takes a few days to a couple of weeks. Avoid exposing the painted surface to harsh conditions during this period for optimal results.
Navigating the world of clear coat finishes becomes more straightforward with these FAQs at your disposal. Clear away any uncertainties and embark on your painting projects with confidence, armed with knowledge to achieve professional-quality results.
Conclusion
In conclusion, the answer to the question “can I apply clear coat the next day” is a qualified yes. However, patience is key, and adherence to recommended drying times, environmental factors, and meticulous application techniques are paramount.
As you embark on your DIY projects, armed with the knowledge of when and how to apply clear coat, remember that the journey is as important as the destination. The results will undoubtedly speak volumes about your craftsmanship, turning your creations into enduring pieces of art. So, go ahead, paint the world with confidence and creativity!