
In the vast world of automotive customization, the question of whether you can paint a car headliner opens up a realm of possibilities. Buckle up as we embark on a comprehensive journey, exploring not only the affirmative answer but also delving into the nuances, tips, and creative possibilities that come with transforming your car’s interior through the art of headliner painting.
Table of Contents
- Understanding the Basics: Can You Really Paint Car Headliner?
- Preparation Is Key: Getting Your Headliner Ready for a Makeover
- The Painting Process: Step-by-Step Guide to Automotive Artistry
- Common Challenges and How to Overcome Them
- Personalizing the Finish: Optional Touches for Extra Flair
- Expert Tips for Perfectly Painting Your Car’s Headliner
- 1. Choose the Right Paint for the Job
- 2. Prioritize Surface Preparation
- 3. Practice Proper Masking Techniques
- 4. Test Your Spray Technique
- 5. Optimal Spray Distance is Key
- 6. Consider Ambient Conditions
- 7. Address Wrinkles and Bubbles Promptly
- 8. Patience During Drying and Curing
- 9. Add Personal Flair with Stencils or Patterns
- 10. Integrate LED Lights Strategically
- 11. Regular Maintenance for Longevity
- 12. Seek Inspiration and Guidance
- 13. Embrace Creativity and Experimentation
- 14. Document Your Process for Future Reference
- 15. Enjoy the Journey and Results
- FAQs: Mastering the Art of Car Headliner Painting
- 1. Can I Paint My Car’s Headliner Without Removing It?
- 2. What Type of Paint Should I Use for Car Headliner?
- 3. How Do I Address Wrinkles and Bubbles in the Painted Headliner?
- 4. Can I Integrate LED Lights Into a Painted Headliner?
- 5. Is It Possible to Add Patterns or Designs to a Painted Headliner?
- 6. How Long Should I Wait for the Painted Headliner to Dry and Cure?
- 7. Can I Use Regular Cleaning Products on a Painted Headliner?
- 8. What Should I Do if I Encounter Issues During the Painting Process?
- 9. Is Headliner Painting a Permanent Modification?
- 10. Can I Paint Over an Existing Headliner Paint Job?
- 11. Are There Specific Patterns or Designs That Work Best on a Headliner?
- 12. Can I Paint Different Sections of the Headliner in Different Colors?
- 13. Should I Consider Professional Help for Headliner Painting?
- 14. How Long Does a Painted Headliner Typically Last?
- 15. Can I Paint Over a Sagging Headliner?
- Conclusion: Your Car, Your Canvas
Understanding the Basics: Can You Really Paint Car Headliner?
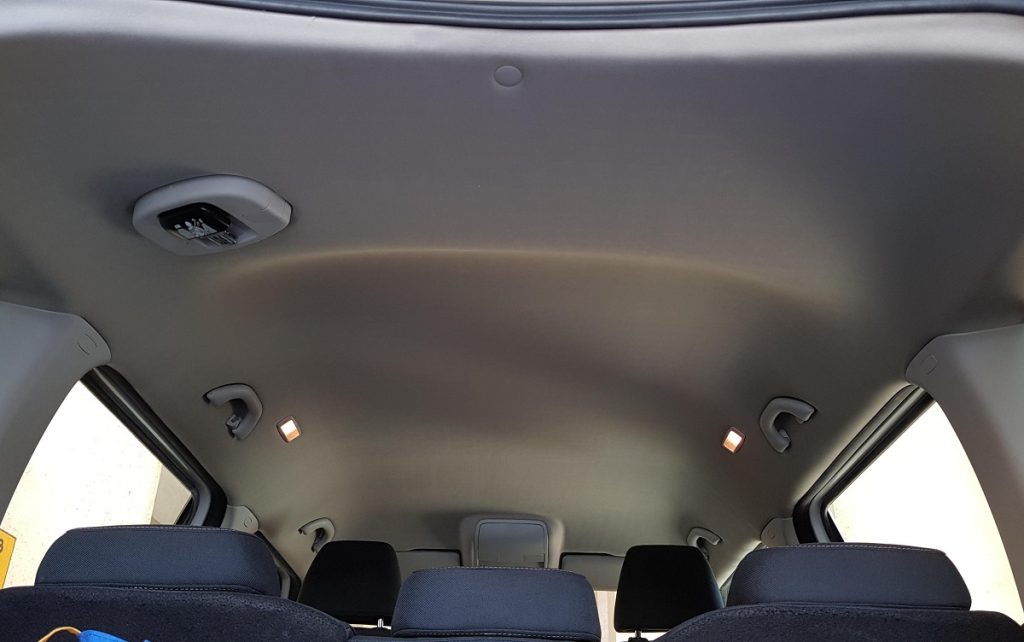
Before diving into the intricacies of headliner painting, let’s lay the groundwork by understanding the materials commonly found in car headliners. Most modern vehicles feature headliners made of fabric or foam-backed materials. The key to a successful painting venture lies in selecting the right paint and preparing the surface adequately to ensure an impeccable finish.
Spray Paint vs. Fabric Paint: Decoding the Dilemma
Choosing between spray paint and fabric paint is a pivotal decision. While spray paint provides a more even finish, fabric paint is formulated to adhere better to flexible surfaces. We’ll explore the pros and cons of each, helping you make an informed choice that aligns with your vision for a flawless finish.
Selecting Colors Wisely: Harmonizing with Your Car’s Aesthetics
The color palette you choose can significantly impact your car’s interior ambiance. Beyond personal preferences, we’ll delve into the psychology of colors, guiding you on selecting hues that not only resonate with your style but also complement your vehicle’s overall aesthetic.
Preparation Is Key: Getting Your Headliner Ready for a Makeover
With the basics in place, it’s time to roll up your sleeves and get your headliner ready for its makeover. We’ll cover crucial steps such as cleaning and prepping the surface, ensuring a pristine canvas for your artistic endeavors.
Cleaning and Prepping: The Essential First Steps
Before reaching for the paint, a clean canvas is paramount. We’ll provide detailed insights into the cleaning process, including the use of gentle cleaners that won’t damage the material. This step is foundational, ensuring a professional-looking result.
Masking and Protecting: Guarding Against Unwanted Splatters
Learn the art of masking and protecting surrounding areas to prevent unintended color encounters. From windows to seats, we’ll guide you on proper masking techniques, ensuring your paint job remains focused on the headliner, sparing your car’s interior from unexpected splatters.
The Painting Process: Step-by-Step Guide to Automotive Artistry
Now that your headliner is prepped, it’s time to dive into the painting process. We’ll provide a detailed step-by-step guide, covering everything from mastering spray techniques to understanding drying and curing times for a lasting finish.
Spray Techniques: Mastering the Art of Even Coats
Achieving an even and consistent spray pattern is an art. We’ll unlock the secrets, from the optimal distance to proper overlapping, ensuring your paint job is not only visually appealing but also long-lasting.
Drying and Curing: Patience Rewarded with a Lasting Finish
Patience is indeed a virtue in the world of car headliner painting. We’ll guide you on optimal drying and curing times, taking into account factors like temperature and humidity. This attention to detail ensures the longevity and durability of your newfound automotive masterpiece.
Common Challenges and How to Overcome Them
As with any DIY project, challenges may arise. We’ll address common issues such as wrinkles and bubbles, providing troubleshooting tips to help you overcome obstacles and achieve a smooth, polished result.
Dealing with Wrinkles and Bubbles: Troubleshooting Tips
Addressing common issues head-on is essential. Discover troubleshooting tips, from adjusting your spray technique to using heat to alleviate wrinkles. These insights will help you salvage your project, ensuring that wrinkles and bubbles don’t detract from the overall aesthetic.
Maintenance Tips: Preserving Your Headliner’s Aesthetic Appeal
Once your headliner is painted to perfection, learn practical maintenance tips to uphold its pristine appearance over time. From routine cleaning to avoiding harsh chemicals, proper care will ensure your interior continues to shine, maintaining the allure of your customized headliner.
Personalizing the Finish: Optional Touches for Extra Flair
With the basics covered, it’s time to explore optional touches that can elevate your headliner painting project to the next level. Discover creative possibilities such as adding patterns, designs, and even integrating LED lights for a truly unique automotive canvas.
Adding Patterns and Designs: Elevating the WOW Factor
Take a deep dive into the realm of creativity by incorporating patterns and designs. Whether you prefer subtle accents or bold statements, personalizing your car’s headliner adds a unique touch to your vehicle’s interior. Explore stencils, geometric designs, or even freehand painting for a bespoke look. (See Also: Does Hyundai Use Real Leather? Unveiling the Truth about Hyundai’s Leather Interiors)
Integrating LED Lights: Illuminating Your Automotive Canvas
Go beyond the ordinary by integrating LED lights into your headliner. Learn how to tastefully illuminate your painted masterpiece, creating a captivating nighttime ambiance that turns heads wherever you go. We’ll cover installation tips and showcase creative ways to use lighting for a dramatic effect.
Expert Tips for Perfectly Painting Your Car’s Headliner
Embarking on the journey of painting your car’s headliner is an exciting venture, but it requires a blend of skill and knowledge. To ensure your DIY project yields professional results, consider these expert tips that delve into the nuances of headliner painting.
1. Choose the Right Paint for the Job
Selecting the appropriate paint is crucial. Opt for fabric paint for flexibility or spray paint for a smooth finish. Ensure compatibility with your headliner material for optimal adhesion and longevity. Understanding the nature of the paint you choose sets the foundation for a successful project. Fabric paint provides the flexibility necessary for materials prone to movement, while spray paint offers a more even finish. Check compatibility to guarantee the paint adheres well to your specific headliner material, ensuring durability and vibrancy over time.
2. Prioritize Surface Preparation
A clean canvas is essential for a flawless finish. Thoroughly clean and prep the headliner surface, removing any dirt, grease, or residue that might hinder the paint’s adherence. Invest time in meticulous surface preparation. Use a gentle cleaner appropriate for your headliner material, ensuring you eliminate any contaminants that could compromise the adhesion of the paint. A well-prepped surface guarantees a professional look and enhances the paint’s longevity.
3. Practice Proper Masking Techniques
Master the art of masking to protect surrounding areas from unintended paint splatters. Use quality masking tape and plastic sheeting to cover windows, seats, and other interior components effectively. Precision in masking is an often-underestimated aspect of headliner painting. Take the time to mask off areas that shouldn’t be painted meticulously. Quality masking tape and plastic sheeting are your allies in this process, safeguarding your vehicle’s interior from accidental paint splatters.
4. Test Your Spray Technique
Before committing to the entire headliner, practice your spray technique on a small, inconspicuous area. This allows you to fine-tune your approach and ensure an even coat across the entire surface. Testing your spray technique on a small, inconspicuous section is a wise preliminary step. It helps you get accustomed to the specific paint canister and nozzle, allowing you to adjust your distance, speed, and angle for a consistent and even application.
5. Optimal Spray Distance is Key
Maintain an optimal spray distance of around 8-12 inches from the headliner. This distance ensures even coverage without oversaturation, preventing drips or uneven patterns. The right spray distance is a delicate balance. Too close, and you risk oversaturation leading to drips and uneven surfaces. Too far, and the paint may not adhere properly. Experiment within the optimal range to achieve a smooth, professional finish.
6. Consider Ambient Conditions
Take note of ambient conditions during painting. Optimal temperature and humidity levels can significantly impact drying and curing times. Aim for a controlled environment to achieve the best results. Acknowledge the influence of environmental factors on your painting process. Ideal conditions facilitate proper drying and curing, ensuring the paint adheres well and maintains its quality over time. Avoid extreme temperatures or high humidity levels, as they can impede the paint’s ability to set correctly.
7. Address Wrinkles and Bubbles Promptly
Wrinkles and bubbles can occur during the painting process. If they appear, address them promptly by smoothing the material with your hands or using a heat gun at a safe distance to eliminate imperfections. Wrinkles and bubbles are common challenges, but they can be swiftly addressed. Use your hands to smooth out the material or, if needed, employ a heat gun at a safe distance to eliminate these imperfections. Prompt attention to these issues ensures a polished final result.
8. Patience During Drying and Curing
Exercise patience during the drying and curing process. Rushing this stage can compromise the integrity of the paint. Follow manufacturer recommendations for specific paints and allow ample time for each coat to set. Patience is a virtue in the world of headliner painting. Respect the recommended drying and curing times specified by the paint manufacturer. Rushing this stage may lead to uneven drying, affecting the overall quality and longevity of your paint job.
9. Add Personal Flair with Stencils or Patterns
Elevate your headliner’s aesthetics by incorporating stencils or patterns. Whether it’s a subtle design or a bold statement, adding a personal touch enhances the overall visual appeal. Don’t be afraid to get creative. Stencils or freehand designs can add a unique touch to your headliner, turning it from a mere painted surface into a personalized piece of automotive art. Experiment with patterns that resonate with your style and make a statement.
10. Integrate LED Lights Strategically
For a truly unique finish, consider integrating LED lights. Plan their placement strategically to accentuate the painted headliner, creating a captivating ambiance inside your car. LED lights can take your headliner to the next level. Strategically placing them enhances the visual impact, creating an immersive ambiance. Whether you opt for subtle lighting or a vibrant display, the integration of LEDs adds a touch of sophistication to your customized interior.
11. Regular Maintenance for Longevity
Once your headliner is a masterpiece, implement regular maintenance routines. Gentle cleaning with appropriate products and avoiding harsh chemicals will preserve the paint’s longevity. Routine maintenance is key to preserving the vibrancy and quality of your painted headliner. Use gentle cleaning products specifically designed for the type of paint you’ve used. Avoid harsh chemicals that may degrade the paint over time. (See Also: Does BMW Use Real Wood? Discover the Truth About BMW Interior Materials)
12. Seek Inspiration and Guidance
Explore online resources, forums, and automotive communities for inspiration and guidance. Learn from others who have undertaken similar projects, benefitting from their experiences and insights. The vast online community of car enthusiasts and DIYers is a goldmine of inspiration and advice. Seek out forums, social media groups, and tutorials to gain insights from others who have successfully painted their headliners. Learn from their triumphs and challenges.
13. Embrace Creativity and Experimentation
Don’t be afraid to unleash your creativity. Experiment with colors, textures, and techniques to create a headliner that reflects your unique style and personality. Headliner painting is not just a technical process; it’s an artistic expression. Embrace the opportunity to experiment with different color combinations, textures, and even innovative techniques. Let your imagination run wild and create a headliner that truly stands out.
14. Document Your Process for Future Reference
Documenting your painting process through photos or notes serves as a valuable reference for future endeavors. It helps track what worked well and allows you to refine your approach in subsequent projects. Keep a record of your headliner painting journey. Document the specific steps you took, the products used, and any challenges faced. This documentation becomes a valuable resource for future projects, enabling you to build on your experiences and achieve even better results.
15. Enjoy the Journey and Results
Above all, enjoy the journey of transforming your car’s interior. Revel in the process of creating a personalized space that reflects your style. Once complete, savor the satisfaction of driving in a vehicle with a headliner that’s not just painted but uniquely yours. The joy of the DIY process is as important as the final result. Take pride in your creation, and every drive becomes a celebration of your automotive artistry.
Incorporating these expert tips into your headliner painting project will not only ensure professional results but also make the process an enjoyable and fulfilling endeavor. Happy painting!
FAQs: Mastering the Art of Car Headliner Painting
Embarking on the journey of painting your car’s headliner comes with its fair share of questions. Fear not, as we’ve compiled a list of frequently asked questions to guide you through this creative endeavor. Let’s dive into the queries and demystify the process of transforming your car’s interior.
1. Can I Paint My Car’s Headliner Without Removing It?
Yes, you can paint your car’s headliner without removing it. However, thorough masking and protection of surrounding areas are crucial to prevent unintended splatters. Take your time to ensure precise masking, covering windows, seats, and other interior components.
2. What Type of Paint Should I Use for Car Headliner?
The type of paint depends on your preference and headliner material. Fabric paint is suitable for flexibility, while spray paint offers a smooth finish. Ensure the chosen paint is compatible with your headliner material for optimal adhesion and durability.
3. How Do I Address Wrinkles and Bubbles in the Painted Headliner?
If wrinkles or bubbles appear during the painting process, address them promptly. Smooth out the material with your hands or use a heat gun at a safe distance to eliminate imperfections. Patience and a careful touch can restore a polished finish.
4. Can I Integrate LED Lights Into a Painted Headliner?
Absolutely! Integrating LED lights into a painted headliner can create a captivating ambiance. Plan the placement strategically to accentuate the painted surface, enhancing the overall visual appeal of your car’s interior.
5. Is It Possible to Add Patterns or Designs to a Painted Headliner?
Yes, you can add patterns or designs to a painted headliner. Whether through stencils or freehand painting, embracing creativity allows you to personalize your car’s interior further. Experiment with different designs to achieve a look that suits your style.
6. How Long Should I Wait for the Painted Headliner to Dry and Cure?
Drying and curing times vary based on the type of paint used. Follow the manufacturer’s recommendations for specific paints. Rushing this stage can compromise the paint’s integrity, so exercise patience to ensure a lasting and professional finish.
7. Can I Use Regular Cleaning Products on a Painted Headliner?
While gentle cleaning is recommended for a painted headliner, avoid harsh chemicals that may degrade the paint over time. Opt for cleaning products specifically designed for the type of paint used to preserve its vibrancy and longevity.
8. What Should I Do if I Encounter Issues During the Painting Process?
Common issues like wrinkles, bubbles, or uneven coats may arise. Refer to our troubleshooting tips in the expert tips section, addressing these issues promptly to salvage your project and achieve a smooth, polished result. (See Also: What is Anthracite Headlining in BMW? Explore Luxury Features)
9. Is Headliner Painting a Permanent Modification?
Headliner painting is considered a semi-permanent modification. While the paint adheres well and lasts, it can be removed or painted over in the future if desired. Proper surface preparation and maintenance contribute to the paint’s longevity.
10. Can I Paint Over an Existing Headliner Paint Job?
Yes, you can paint over an existing headliner paint job. Ensure the surface is clean, smooth, and free of imperfections before applying a new coat of paint. Consider light sanding to enhance adhesion.
11. Are There Specific Patterns or Designs That Work Best on a Headliner?
The choice of patterns or designs depends on personal preference. Experiment with geometric shapes, stencils, or even freehand painting to create a look that aligns with your style. There are no strict rules – let your creativity guide you.
12. Can I Paint Different Sections of the Headliner in Different Colors?
Certainly! Painting different sections of the headliner in different colors adds a unique touch. Ensure clean lines and precise masking for a polished result, allowing each color to complement the overall aesthetic.
13. Should I Consider Professional Help for Headliner Painting?
While headliner painting is a popular DIY project, some may prefer professional assistance for intricate designs or if unsure about the process. Professional help ensures a polished finish if you’re not confident in your painting skills.
14. How Long Does a Painted Headliner Typically Last?
The longevity of a painted headliner depends on factors like paint quality, application, and maintenance. With proper care, including gentle cleaning and avoiding harsh chemicals, a painted headliner can last for several years.
15. Can I Paint Over a Sagging Headliner?
It’s generally not recommended to paint over a sagging headliner, as it may worsen the issue. Sagging is often due to failing adhesive, and addressing the root cause by reattaching or replacing the headliner is advisable before painting.
Navigating the process of painting your car’s headliner becomes smoother with answers to these common questions. Feel empowered to unleash your creativity and transform your car’s interior with confidence.
Conclusion: Your Car, Your Canvas
In concluding this extensive exploration, the question “Can you paint car headliner?” becomes an invitation to unleash your inner artist. Armed with the right knowledge and techniques, you can embark on a DIY journey to transform your car’s interior. The key lies in preparation, the choice of paint, and a dash of creativity.
Remember, your car is not just a mode of transportation; it’s your canvas waiting to be adorned with the strokes of automotive artistry. So, grab your paintbrush, envision your design, and let the transformation begin! Whether you seek a sleek monochrome look or a vibrant expression of your personality, painting your car’s headliner is a journey of self-expression, turning every drive into a work of art.