
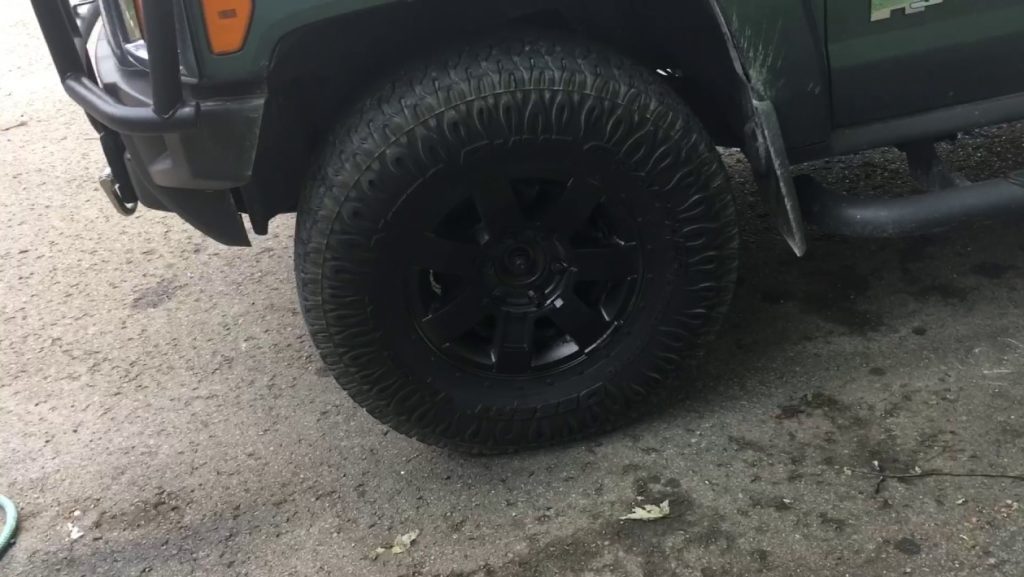
Plasti Dip, a flexible rubberized coating known for its peelable properties, has found its way into the hearts of DIY enthusiasts. From custom car exteriors to home décor projects, Plasti Dip offers a canvas for creativity. However, as tastes change and the need for a fresh look arises, a common question surfaces: Can you paint over Plasti Dip? In this detailed exploration, we’ll delve deeper into the process, offering insights, tips, and tricks for a successful transformation.
Table of Contents
- Understanding Plasti Dip
- The Urge for Change
- Assessing the Surface
- Choosing the Right Paint
- The Step-by-Step Process
- Tips and Tricks
- Potential Challenges
- Frequently Asked Questions
- Expert Tips for Perfectly Painting Over Plasti Dip
- Frequently Asked Questions About Painting Over Plasti Dip
- 1. Can I Paint Over Plasti Dip Multiple Times?
- 2. Is Plasti Dip Compatible with Acrylic Paint?
- 3. Do I Need to Use a Primer Before Painting Over Plasti Dip?
- 4. How Do I Address Peeling Concerns After Painting Over Plasti Dip?
- 5. Can I Paint Over Plasti Dip on Outdoor Surfaces?
- 6. How Long Should I Wait Between Each Coat of Paint?
- 7. What Type of Clear Coat Should I Use as a Protective Topcoat?
- 8. Can I Paint Over Plasti Dip Without Sanding?
- 9. Is Professional Assistance Necessary for Painting Over Plasti Dip?
- 10. Can I Change the Finish of the Painted Plasti Dip Surface?
- Conclusion
Understanding Plasti Dip
Plasti Dip, originally designed for tool handles, has become a dynamic solution for enhancing and protecting a variety of surfaces. Its unique peelable nature allows for experimentation without long-term commitment. Whether you’re looking to change the color of your car, revive worn-out furniture, or explore artistic possibilities, Plasti Dip provides a versatile starting point.
The Urge for Change
Why Paint Over Plasti Dip?
- Adaptation to New Tastes: As personal preferences evolve, the desire for a different color or finish emerges. Painting over Plasti Dip offers an easy and cost-effective way to keep up with changing aesthetics.
- Repair and Restoration: Plasti Dip, though durable, may show signs of wear over time. Painting over it can not only provide a fresh appearance but also serve as a protective layer, extending the life of the coated surface.
Assessing the Surface
Preparing for the Transformation
- Cleanliness Is Key: Before diving into the painting process, ensure the Plasti Dip surface is thoroughly cleaned. Use a mild detergent to remove dirt, grime, and any contaminants that may affect paint adhesion.
- Surface Inspection: Take the time to inspect the Plasti Dip coating. Look for areas where the coating may be peeling or damaged. Addressing these issues before painting ensures a smoother and more even finish.
Choosing the Right Paint
Options and Considerations
- Acrylic Paint Compatibility: Opt for acrylic-based paints, as they seamlessly integrate with Plasti Dip. The compatibility between Plasti Dip and acrylic paint promotes adhesion and durability.
- Primer Importance: Consider using a primer specifically designed for rubberized surfaces. Applying a primer enhances the bond between the Plasti Dip and the new paint, ensuring a longer-lasting finish.
- Color Choice Matters: When selecting the paint color, consider the existing Plasti Dip color and choose a shade that complements or contrasts effectively. This thoughtful choice can elevate the overall aesthetic appeal.
The Step-by-Step Process
Turning Vision into Reality
- Gentle Surface Abrasion: Lightly sanding the Plasti Dip surface provides a textured foundation for the paint to grip. This step is crucial for ensuring proper adhesion and a more professional-looking finish.
- Primer Application: Apply the chosen primer evenly, allowing it to dry completely before moving on to the next step. The primer acts as a bonding agent between the Plasti Dip and the new paint, promoting adhesion.
- Choosing the Right Paint: Opt for high-quality acrylic paint in your desired color. Apply multiple thin coats, allowing each layer to dry thoroughly before adding the next. This approach prevents smudging and promotes an even finish.
- Smooth and Even Coats: The key to a successful paint job is patience. Applying multiple thin coats of paint, with ample drying time between each coat, ensures a smooth and even finish. Rushing this step can lead to uneven color and texture.
Tips and Tricks
Ensuring a Professional Finish
- Patience Pays Off: Allow sufficient drying time between each coat. Patience is crucial for achieving a professional-looking finish. Rushing the process may result in imperfections and a less-than-ideal outcome.
- Protective Topcoat: Consider applying a clear protective topcoat to safeguard the newly painted surface. This additional layer adds durability and protects the paint from scratches, UV rays, and other environmental factors.
- Experiment with Finishes: Explore different finishes, such as matte, satin, or gloss, to achieve the desired look. Testing a small area before committing to the entire surface ensures compatibility and satisfaction.
Potential Challenges
Overcoming Hurdles
- Peeling Concerns: Proper surface preparation is key to preventing peeling. Ensure thorough cleaning, gentle abrasion, and the use of quality paints and primers to minimize the risk of peeling.
- Color Compatibility: Before committing to a full paint job, test a small inconspicuous area to confirm color compatibility. This step helps avoid any surprises and ensures the desired color outcome.
Frequently Asked Questions
Addressing Common Queries
- Can Plasti Dip be Repainted Multiple Times?: Yes, Plasti Dip can be repainted multiple times with proper surface preparation. Each repaint provides an opportunity for a fresh and customized appearance.
- Is Professional Assistance Necessary?: While a DIY approach is feasible, seeking professional advice, especially for intricate projects, can enhance the overall outcome. Professionals can offer insights, tips, and even product recommendations.
Expert Tips for Perfectly Painting Over Plasti Dip
When it comes to painting over Plasti Dip, mastering the nuances can elevate your DIY project to a professional level. Here are some expert tips to ensure a flawless finish that stands the test of time.
1. Prep Like a Pro
Before picking up the paintbrush, invest time in thorough preparation. Clean the Plasti Dip surface diligently, addressing any peeling or damaged areas. A well-prepped surface is the canvas for a seamless paint application.
2. Choose Quality Primer
The importance of a quality primer cannot be overstated. Select a primer specifically designed for rubberized surfaces to enhance paint adhesion. This foundational step sets the stage for a durable and long-lasting finish.
3. Acrylic Harmony
Opt for acrylic-based paints for compatibility with Plasti Dip. The synergy between Plasti Dip and acrylic paint ensures not only vibrant color but also a strong bond that resists peeling and fading over time.
4. The Art of Abrasion
Gentle surface abrasion is a secret weapon for optimal adhesion. Lightly sand the Plasti Dip to create a textured surface, providing the perfect grip for the primer and paint. This extra step goes a long way in achieving a professional look.
5. Thin and Even Coats
When applying paint, less is often more. Opt for multiple thin coats rather than a single thick layer. This approach not only ensures an even finish but also prevents common issues like dripping and uneven color distribution. (See Also: Can You Clear Coat Over Orange Peel? Expert Tips for Flawless Finishes)
6. Exercise Patience
Rome wasn’t built in a day, and neither should your painted Plasti Dip surface. Allow each coat to dry completely before applying the next. Patience in the painting process is the key to a smooth, flawless outcome.
7. Top It Off with Care
Consider adding a clear protective topcoat to shield your masterpiece. This additional layer acts as a barrier against scratches, UV rays, and daily wear, preserving the vibrancy of your newly painted surface.
8. Experiment with Finishes
Don’t shy away from experimenting with different finishes—matte, satin, or gloss. Test a small area before committing to the entire surface to ensure compatibility and achieve the desired aesthetic effect.
9. Address Peeling Concerns
To combat peeling, invest in proper surface preparation. A combination of thorough cleaning, gentle abrasion, and the use of quality paints and primers significantly minimizes the risk of peeling over time.
10. Test for Color Compatibility
Before embarking on a full paint job, conduct a color compatibility test in a small inconspicuous area. This precautionary step ensures the chosen color complements the existing Plasti Dip and aligns with your vision.
By incorporating these expert tips into your painting process, you’ll not only answer the question, “Can you paint over Plasti Dip?” but also unveil a masterpiece that reflects your attention to detail and commitment to excellence.
Frequently Asked Questions About Painting Over Plasti Dip
Embarking on the journey of painting over Plasti Dip may raise a myriad of questions. Let’s address some of the most common queries to guide you through this transformative process.
1. Can I Paint Over Plasti Dip Multiple Times?
Absolutely! Plasti Dip is peelable and allows for multiple repaints. Ensure proper surface preparation for each new paint application to achieve the best results. (See Also: How Many Spray Cans to Paint a Car Hood: A Comprehensive Guide)
2. Is Plasti Dip Compatible with Acrylic Paint?
Yes, Plasti Dip and acrylic paint work harmoniously. Acrylic-based paints offer vibrant colors and adhere well to the rubberized surface, ensuring a lasting and attractive finish.
3. Do I Need to Use a Primer Before Painting Over Plasti Dip?
Yes, using a primer is essential. Choose a primer designed for rubberized surfaces to enhance paint adhesion and create a solid foundation for your new color.
4. How Do I Address Peeling Concerns After Painting Over Plasti Dip?
Prevent peeling by investing time in proper surface preparation. Thoroughly clean, lightly sand, and use high-quality paints and primers to minimize the risk of peeling over time.
5. Can I Paint Over Plasti Dip on Outdoor Surfaces?
Yes, you can paint over Plasti Dip on outdoor surfaces. Ensure you choose weather-resistant paints and topcoats to protect the finish from the elements.
6. How Long Should I Wait Between Each Coat of Paint?
Patience is key. Allow each coat to dry completely before applying the next. This ensures an even finish and prevents smudging or imperfections.
7. What Type of Clear Coat Should I Use as a Protective Topcoat?
Opt for a clear protective topcoat designed for use on painted surfaces. This extra layer acts as a shield against scratches, UV rays, and environmental factors.
8. Can I Paint Over Plasti Dip Without Sanding?
While sanding is recommended for optimal adhesion, you can paint over Plasti Dip without sanding. However, be aware that the surface may be less textured, affecting the paint’s grip. (See Also: Bondo vs. Fiberglass: Choosing the Best Auto Repair Solution)
9. Is Professional Assistance Necessary for Painting Over Plasti Dip?
While a DIY approach is feasible, seeking professional advice, especially for intricate projects, can provide valuable insights and enhance the overall outcome.
10. Can I Change the Finish of the Painted Plasti Dip Surface?
Certainly! Experiment with different finishes such as matte, satin, or gloss. Test a small area before committing to ensure compatibility and achieve the desired aesthetic effect.
Navigating the world of painting over Plasti Dip is an exciting venture. These FAQs aim to address your concerns and pave the way for a successful and satisfying transformation.
Conclusion
In conclusion, the question “Can you paint over Plasti Dip?” opens the door to a world of creative possibilities. With careful preparation, the right materials, and a dash of creativity, you can transform your Plasti Dip-coated surfaces into personalized masterpieces. Embrace the artistic journey, experiment with colors and finishes, and breathe new life into your creations. Painting over Plasti Dip is not just a process; it’s an art form that allows you to express your unique style and vision.