Are you eyeing a transformation for your vehicle’s suspension but wondering, Can You Paint Suspension Parts? Absolutely! Welcome to this in-depth guide, where we’ll not only answer that question but also provide you with a wealth of information to ensure your DIY suspension makeover is not just a success but a rewarding experience.
Understanding the Basics
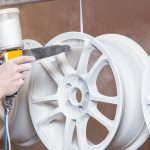
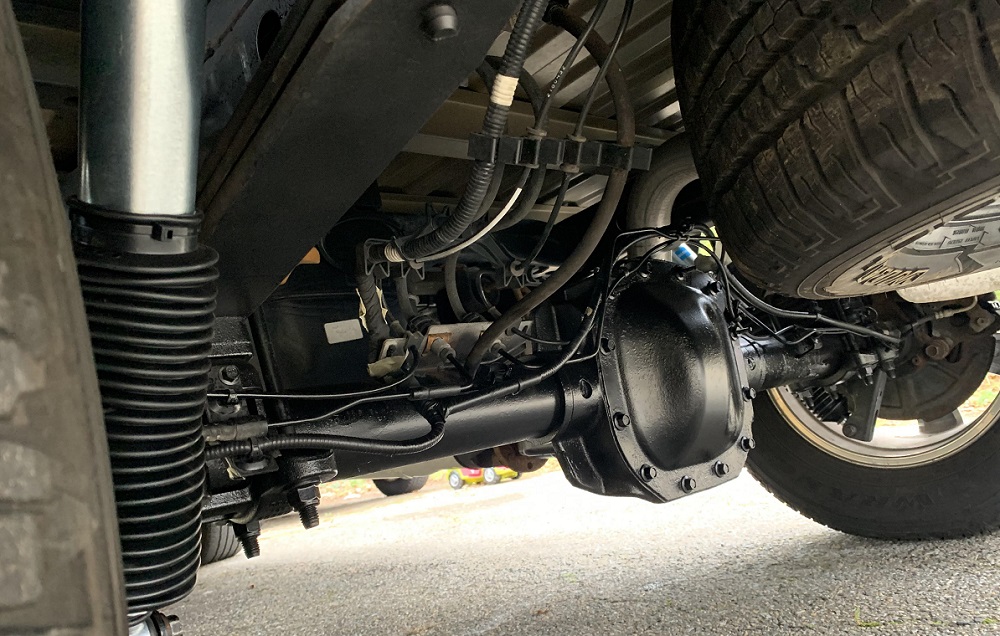
1. What Suspension Parts Can You Paint?
Let’s start by demystifying the world of suspension components. Beyond the obvious like control arms and sway bars, there are various other parts that can benefit from a fresh coat of paint. Think about bushings, brackets, and even coil springs. We’ll guide you on what to consider when deciding which parts to paint for maximum impact.
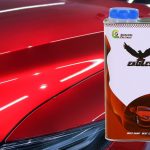
2. Choosing the Right Paint
Selecting the right paint is crucial for a durable and aesthetically pleasing finish. We’ll delve into the types of paint suitable for suspension parts, considering factors like resistance to road elements, UV rays, and heat. Understanding these aspects ensures your paint job not only looks good initially but stands the test of time.
Preparing for the Paint Job
3. Disassembly Tips and Tricks
Before you break out the paintbrush, proper disassembly is key. We’ll provide expert tips on dismantling components without causing unintended damage. From marking parts for reassembly to using the right tools, we’ve got your back.
4. Surface Preparation Techniques
A flawless paint job starts with meticulous surface preparation. We’ll take a deep dive into the steps involved – from cleaning and sanding to applying the right primer. This section is a crucial foundation for achieving a professional finish.
The Painting Process
5. Applying the Paint: Step-by-Step Guide
Now, let’s get into the nitty-gritty of applying paint to suspension parts. Our step-by-step guide ensures you cover all bases, from the initial coat to the finishing touches. We’ll discuss techniques to achieve an even coat, prevent common issues like drips and streaks, and share insider tips to make your job easier.
6. Tips for Achieving a Professional Finish
Painting suspension parts is an art, and we want your creation to be a masterpiece. Discover additional tips for taking your DIY project to the next level. Whether it’s about drying times, the right application tools, or avoiding common pitfalls, this section is your go-to resource for a polished outcome.
Common Challenges and Solutions
7. Dealing with Rust and Corrosion
Many suspension parts battle the elements and succumb to rust. Learn effective strategies to address rust before painting and prevent its return. This section is a must-read for anyone dealing with older vehicles or those in regions with harsh weather conditions.
8. Troubleshooting Paint Problems
Even with the best intentions, sometimes things don’t go as planned. If you encounter issues like bubbling or uneven coverage, fear not. We’ve compiled a troubleshooting guide to help you identify and rectify common paint problems, ensuring your final result is flawless.
Wrapping It Up
9. Reassembly and Final Touches
With the paint job complete, it’s time to put everything back together. Our detailed guide on reassembly ensures that everything fits snugly, and you’re not left with spare parts or overlooked details. This step is crucial for the overall functionality and safety of your vehicle.
10. Maintenance Tips for Longevity
Congratulations, you’ve successfully painted your suspension parts! Now, learn how to maintain that fresh look for the long term. We’ll provide practical tips for cleaning, touch-ups, and addressing wear and tear over time.
Expert Tips for a Flawless Suspension Parts Paint Job
Embarking on a journey to paint your suspension parts? Fantastic! As you delve into this DIY adventure, consider these expert tips to ensure your paint job not only looks great but stands the test of time.
1. Choose High-Quality Paint:
Opt for automotive-grade paint designed for durability and resistance to the elements. This ensures a long-lasting finish that can withstand the rigors of the road. (See Also: Can You Spray Raptor Liner Over Chrome? Expert Tips and Guidelines)
2. Thorough Surface Prep is Non-Negotiable:
A flawless paint job begins with meticulous surface preparation. Clean, sand, and prime your suspension parts diligently to create a smooth canvas for the paint.
3. Disassemble with Precision:
Take your time during the disassembly process. Label parts, use the right tools, and document the removal sequence. It makes reassembly smoother and ensures no part is overlooked.
4. Consider Temperature and Humidity:
Paint adheres best under specific conditions. Choose a day with moderate temperatures and low humidity to avoid issues like slow drying or paint not adhering properly.
5. Apply Thin, Even Coats:
The key to a professional-looking finish is applying thin, even coats of paint. Resist the temptation to apply a thick layer, as it can lead to drips and uneven coverage.
6. Mind Your Drying Times:
Patience is crucial. Allow each coat of paint to dry thoroughly before applying the next. Rushing this step can compromise the finish and lead to imperfections.
7. Invest in Quality Brushes and Sprayers:
The tools you use matter. Invest in high-quality brushes or sprayers to ensure a smooth application. Good tools contribute significantly to the overall outcome.
8. Protect Adjacent Areas:
Don’t overlook nearby components. Use masking tape and plastic sheeting to protect adjacent areas from overspray. It’s a small step that prevents a lot of cleanup later.
9. Address Rust Issues Promptly:
If you spot rust during disassembly, address it before painting. Rust compromises the integrity of the paint job, so tackle it head-on with appropriate treatments.
10. Double-Check for Imperfections:
Before reassembly, inspect the painted parts meticulously. Look for imperfections like bubbles or uneven spots. Address any issues before putting everything back together.
11. Consider a Clear Coat for Extra Protection:
For added protection and a glossy finish, consider applying a clear coat. This acts as a shield, enhancing the durability of your paint job.
12. Mind Your Safety Gear:
Always prioritize safety. Wear appropriate protective gear, including a mask and gloves, to shield yourself from paint fumes and potential skin irritation.
13. Test Spray on a Scrap Surface:
If you’re using a new type of paint, do a test spray on a scrap surface first. This allows you to gauge the consistency and adjust your technique before applying it to your suspension parts.
14. Follow Manufacturer Recommendations:
Different paints may have specific application guidelines. Always follow the manufacturer’s recommendations to achieve the best results. (See Also: Do Valve Covers Need High Temp Paint? Unveiling the Importance and Best Practices)
15. Document Your Process:
Take photos or make notes throughout the process. This documentation can be valuable for future touch-ups or if you decide to tackle a similar project on another vehicle.
Armed with these expert tips, you’re well-equipped to transform your suspension parts into a work of art. Enjoy the journey, and happy painting!
Suspension Parts Painting FAQs: Your Ultimate Guide
Embarking on the journey to paint your suspension parts inevitably brings forth questions. Fear not! We’ve compiled a list of frequently asked questions to address your concerns and ensure a smooth and successful DIY painting experience.
1. Can You Paint Suspension Parts Without Disassembling Them?
While it’s technically possible, disassembling allows for a more thorough and professional paint job. It ensures every nook and cranny is coated, and the finish is uniform.
2. What Type of Paint Is Best for Suspension Parts?
Choose automotive-grade enamel or epoxy paint for durability. These types of paint offer resistance to corrosion, UV rays, and other environmental factors.
3. Is Primer Necessary for Painting Suspension Parts?
Absolutely. Primer promotes paint adhesion and provides a smooth surface. It’s a crucial step in the preparation process.
4. How Do I Prevent Overspray on Nearby Components?
Use masking tape and plastic sheeting to cover adjacent areas. This simple step protects other components from unintentional paint application.
5. Can I Paint Suspension Parts in Cold Weather?
While it’s possible, painting in colder temperatures can affect drying times. Aim for temperatures above 50°F (10°C) for optimal results.
6. What Should I Do If I Encounter Rust During Disassembly?
Tackle rust promptly with a rust converter or remover. Addressing rust before painting ensures a solid foundation for the paint to adhere.
7. How Long Should I Wait Between Coats?
Drying times vary based on the type of paint used. As a general rule, wait at least 24 hours between coats to ensure each layer sets properly.
8. Can I Paint Suspension Parts with a Brush Instead of a Spray Gun?
While spray guns provide a more even finish, using a brush is possible. Ensure the brush is high-quality and apply thin, even coats for the best results.
9. Do I Need to Sand Between Coats of Paint?
Lightly sanding between coats promotes adhesion and smooths out any imperfections. Use fine-grit sandpaper for this purpose. (See Also: Can You Paint Lug Nuts? Tips for Stylish Wheels and DIY Lug Nut Painting)
10. Can I Paint Over Old Paint on Suspension Parts?
Yes, but it’s essential to remove loose or peeling paint first. Sand the surface and ensure it’s clean before applying the new coat of paint.
11. Should I Apply a Clear Coat After Painting?
Applying a clear coat is optional but recommended for added protection. It enhances durability and provides a glossy finish.
12. How Do I Prevent Paint Drips and Runs?
Apply thin coats, and avoid overloading the brush or spray gun. Drips and runs are more likely to occur with thick applications.
13. Can I Paint Suspension Parts in a Garage?
Yes, you can paint in a garage, but ensure proper ventilation. Consider using a respirator, and if possible, set up fans to circulate air.
14. What’s the Best Way to Remove Paint Overspray?
If overspray occurs, address it promptly with a suitable paint thinner or remover. Follow the product instructions for safe and effective use.
15. How Long Should I Wait Before Reassembling the Suspension?
Wait until the paint is fully cured, usually around 72 hours. Rushing reassembly may lead to scratches or damage to the freshly painted surface.
These FAQs cover the essential aspects of painting suspension parts. Armed with this knowledge, you’re ready to tackle your project with confidence. Happy painting!
Conclusion
In conclusion, the journey of Can You Paint Suspension Parts? has brought us to a resounding yes! Armed with this extensive guide, you’re not just equipped to enhance the aesthetics of your vehicle; you’re ready for a DIY adventure that will leave you with a sense of accomplishment.
Remember, this is more than just a paint job; it’s a reflection of your craftsmanship. So, take your time, enjoy the process, and let’s give your suspension the makeover it truly deserves. Now, roll up your sleeves, grab your paintbrush, and let’s turn your vision into reality!