
Embarking on the journey of painting your car roof can be a fulfilling and transformative DIY project. However, the burning question on the minds of many enthusiasts is: how many spray cans are needed to achieve a flawless finish? Fear not, as we delve deeper into this process, providing comprehensive insights and expert tips to ensure your car roof gets the attention it deserves.
Table of Contents
- Understanding Surface Area
- Choosing the Right Spray Paint
- Calculating Paint Coverage
- Considering the Color and Existing Finish
- Environmental Factors
- Step-by-Step Painting Process
- Troubleshooting and Tips
- Additional Considerations
- Expert Tips for Perfect Car Roof Spray Painting
- 1. Temperature Matters
- 2. Mind the Humidity
- 3. Quality Over Quantity
- 4. Light Coats for Success
- 5. Preparation is Key
- 6. Clear Coat Magic
- 7. Ventilation is Non-Negotiable
- 8. Store Paint Properly
- 9. Test Before Committing
- 10. Mind the Wind
- 11. Patience Pays Off
- 12. Consistency is Key
- 13. Address Imperfections Gracefully
- 14. Protect Surrounding Areas
- 15. Plan for Touch-Ups
- FAQs About Spray Painting Your Car Roof
- 1. How Many Spray Cans Do I Need for My Car Roof?
- 2. Can I Use Regular Spray Paint for My Car Roof?
- 3. Do I Need to Sand Before Painting?
- 4. What’s the Purpose of a Primer?
- 5. How Long Should I Wait Between Coats?
- 6. Can I Paint My Car Roof in High Humidity?
- 7. What Should I Do If I Run Out of Paint Midway?
- 8. Is a Clear Coat Necessary?
- 9. Can I Paint My Car Roof Indoors?
- 10. How Can I Address Imperfections in the Paint?
- 11. Should I Paint My Car Roof in Sections?
- 12. Can I Mix Different Brands of Spray Paint?
- 13. What Safety Precautions Should I Take?
- 14. How Long Does a Spray Painted Car Roof Last?
- 15. Can I Paint Over an Existing Paint Job?
- Conclusion
Understanding Surface Area
Let’s start at the beginning with the crucial consideration of surface area. Accurate measurements of your car roof’s length and width are paramount. This information serves as the foundation for calculating the surface area, which, in turn, determines the amount of paint required for proper coverage.
Choosing the Right Spray Paint
Not all spray paints are created equal, and selecting the right one is pivotal to the success of your project. Opt for automotive-grade spray paint designed explicitly for exterior surfaces. Quality paints often offer superior coverage, meaning you may need fewer cans overall.
Consider the finish you desire as well. Matte, satin, and glossy finishes can impact the aesthetic appeal of your car roof. Take the time to explore options and choose a paint that aligns with your vision for the final result.
Calculating Paint Coverage
Now, armed with the surface area of your car roof and the chosen spray paint, it’s time to calculate the paint coverage. Check the label on the spray paint cans for information on coverage per square foot. This crucial detail allows you to estimate the total number of cans required with greater accuracy.
Always purchase a bit more paint than your calculations dictate. Having some extra on hand proves beneficial for touch-ups or addressing any discrepancies that may arise during the painting process.
Considering the Color and Existing Finish
The color of your car roof and its existing finish play pivotal roles in determining the quantity of paint needed. Lighter colors may require additional coats to achieve full coverage, while darker hues might offer better hiding capabilities. If your car roof has existing paint or damage, be prepared to apply additional coats to ensure a seamless and polished look.
Environmental Factors
Before you dive into the painting process, consider the environmental conditions in your area. Humidity, temperature, and wind speed can significantly impact the drying times and overall application of the paint. Planning accordingly will help you avoid potential complications and ensure a smooth and successful painting experience.
Step-by-Step Painting Process
- Preparation is Key Before even thinking about spray paint, ensure your car roof is free of contaminants. A clean surface is essential for proper adhesion. Lightly sand the surface to promote better paint adherence.
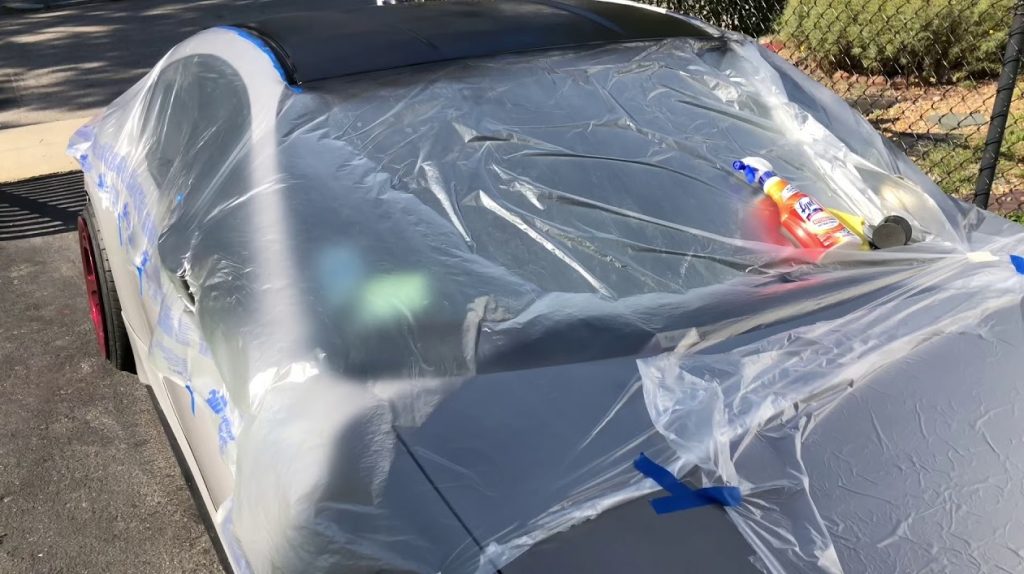
- Masking and Protecting Use painter’s tape and plastic sheets to mask off areas you don’t want to paint. Cover windows, trim, and other car parts to prevent overspray.
- Priming the Surface Applying a thin coat of primer is crucial for creating a smooth base. Allow the primer to dry completely before moving on to the next step.
- Applying the Base Coat Begin with a light and even application of the base coat. Hold the spray can about 8-12 inches away from the surface for optimal coverage. Multiple thin layers are preferable to a single thick coat.
- Building Up Layers Apply subsequent coats, ensuring each layer dries thoroughly before adding the next. Patience is key to achieving a professional-looking finish.
- Adding Clear Coat Finish the process with a clear coat to protect the paint and provide a glossy finish. Follow the same layering process for the clear coat.
Troubleshooting and Tips
- Run Out of Paint Midway? If you find yourself running out of spray paint midway, try to use the same brand and color to maintain consistency. Always check for compatibility before switching brands.
- Dealing with Imperfections Imperfections are a part of any DIY project. If you encounter them, don’t panic. Lightly sand the affected area and apply additional coats as needed to achieve the desired result.
- Storing Leftover Paint Should you have leftover paint, store it properly for future touch-ups. Seal the can tightly and store it in a cool, dry place to ensure its longevity.
Additional Considerations
Ventilation is Key
Ensure proper ventilation when painting your car roof. Choose a well-ventilated area or, if possible, work outdoors to minimize exposure to fumes. Using a mask and protective eyewear is also recommended.
Temperature and Humidity Control
Extreme temperatures and high humidity can affect the drying time of the paint. Aim to paint your car roof on a day with moderate temperatures and humidity levels for optimal results.
Quality of Surface Preparation
The success of your paint job lies in the quality of surface preparation. Take the time to sand, prime, and clean your car roof thoroughly before applying any paint. A well-prepared surface ensures better adhesion and a smoother finish.
The Impact of Paint Thickness
While it’s tempting to apply a thick coat for quicker results, this can lead to uneven drying and an unprofessional finish. Stick to thin, even coats, and allow each layer to dry completely before adding the next.
Expert Tips for Perfect Car Roof Spray Painting
Achieving a flawless finish when spray painting your car roof requires more than just the right number of cans. Let’s delve into some expert tips to elevate your DIY project to professional levels. (See Also: Rust-Oleum Peel Coat vs. Plasti Dip: Unveiling the Best DIY Automotive Finish)
1. Temperature Matters
Ensure the ambient temperature is ideal for painting. Aim for a range between 60-75°F (15-24°C) to facilitate proper drying and adhesion.
2. Mind the Humidity
High humidity can lead to slower drying times and potential paint imperfections. Choose a day with moderate humidity for optimal results.
3. Quality Over Quantity
Invest in high-quality automotive-grade spray paint. While it may cost a bit more, the superior coverage and finish are worth the investment.
4. Light Coats for Success
Opt for multiple thin coats rather than a single thick one. This approach minimizes drips, ensures even coverage, and promotes better adhesion.
5. Preparation is Key
Thoroughly clean and sand the surface before starting. A well-prepared surface enhances paint adhesion and contributes to a smoother finish.
6. Clear Coat Magic
Don’t skip the clear coat. It not only protects the paint but also adds a professional glossy finish. Apply it in the same thin, even layers as the base coat.
7. Ventilation is Non-Negotiable
Work in a well-ventilated area or outdoors to minimize exposure to fumes. A mask and protective eyewear are essential for your safety.
8. Store Paint Properly
If you have leftover paint, seal the can tightly and store it in a cool, dry place. Proper storage ensures the paint’s longevity for future touch-ups.
9. Test Before Committing
Before spraying the entire roof, do a test spray on a small, inconspicuous area. This ensures compatibility with the surface and lets you adjust your technique if needed.
10. Mind the Wind
If working outdoors, pay attention to wind speed. High winds can lead to overspray and uneven application. Consider windbreaks if necessary.
11. Patience Pays Off
Allow each coat to dry thoroughly before applying the next. Rushing the process can lead to uneven drying and compromise the overall finish.
12. Consistency is Key
If you run out of spray paint and need more, stick to the same brand and color for consistency. Mixing different brands may result in noticeable variations.
13. Address Imperfections Gracefully
Imperfections happen. If you encounter any, don’t panic. Lightly sand the affected area and apply additional coats as needed for a seamless look. (See Also: How Much Does It Cost to Paint a Camper Shell? Your Guide to Camper Shell Painting Expenses)
14. Protect Surrounding Areas
Use painter’s tape and plastic sheets to protect windows, trim, and other parts of your car. Preventing overspray ensures a clean and professional result.
15. Plan for Touch-Ups
Even with meticulous care, touch-ups may be required over time. Keep track of your paint color and store a small amount for future touch-ups.
By incorporating these expert tips into your car roof spray painting project, you’re not just ensuring a successful endeavor, but you’re elevating it to a level of craftsmanship that will leave your vehicle looking professionally done. So, gear up, follow these guidelines, and turn your DIY project into a masterpiece on wheels!
FAQs About Spray Painting Your Car Roof
Embarking on the journey of spray painting your car roof comes with questions. We’ve compiled a list of frequently asked questions to guide you through the process and address any uncertainties you may have.
1. How Many Spray Cans Do I Need for My Car Roof?
The number of spray cans depends on the surface area of your car roof. Measure the length and width, check the paint can label for coverage information, and calculate accordingly.
2. Can I Use Regular Spray Paint for My Car Roof?
It’s advisable to use automotive-grade spray paint designed for exterior surfaces. Regular spray paint may lack the durability and finish required for a car’s exterior.
3. Do I Need to Sand Before Painting?
Yes, sanding is essential. It promotes better paint adhesion by creating a smooth surface. Lightly sand the car roof before applying primer for optimal results.
4. What’s the Purpose of a Primer?
Primer provides a base for the paint, ensuring better adhesion and a smoother finish. It also helps protect the surface and enhances the longevity of the paint job.
5. How Long Should I Wait Between Coats?
Allow each coat to dry completely before applying the next. The recommended drying time is usually specified on the paint can label. Patience ensures a professional finish.
6. Can I Paint My Car Roof in High Humidity?
It’s best to avoid high humidity when painting. High humidity can lead to slower drying times and potential imperfections in the paint finish.
7. What Should I Do If I Run Out of Paint Midway?
If you run out of spray paint, try to use the same brand and color to maintain consistency. Always check for compatibility before switching brands.
8. Is a Clear Coat Necessary?
Yes, a clear coat is crucial. It protects the paint and adds a glossy finish. Apply it in the same thin, even layers as the base coat for optimal results. (See Also: Can Primer Filler Go on Bare Metal? Tips for Proper Application)
9. Can I Paint My Car Roof Indoors?
While it’s possible, proper ventilation is essential. It’s advisable to paint in a well-ventilated area or outdoors to minimize exposure to fumes.
10. How Can I Address Imperfections in the Paint?
If you encounter imperfections, lightly sand the affected area and apply additional coats as needed. Patience and attention to detail are key.
11. Should I Paint My Car Roof in Sections?
Painting in sections is a valid approach. Ensure seamless blending between sections by feathering the edges where they meet to avoid visible lines.
12. Can I Mix Different Brands of Spray Paint?
It’s best to stick to the same brand and color for consistency. Mixing different brands may result in noticeable variations in color and finish.
13. What Safety Precautions Should I Take?
Wear a mask and protective eyewear to minimize exposure to fumes. Work in a well-ventilated area or outdoors to ensure proper air circulation.
14. How Long Does a Spray Painted Car Roof Last?
The longevity of a spray-painted car roof depends on factors like paint quality, preparation, and environmental conditions. With proper care, it can last for years.
15. Can I Paint Over an Existing Paint Job?
Yes, you can paint over an existing paint job. Ensure the surface is clean, smooth, and in good condition. Additional coats may be needed for proper coverage.
Navigating the world of spray painting your car roof can be daunting, but armed with these frequently asked questions and answers, you’re well-equipped to embark on your DIY journey. So, get ready to transform your car and enjoy the satisfaction of a professionally painted roof!
Conclusion
Embarking on the journey of painting your car roof with spray cans is not just a task; it’s a creative endeavor that allows you to transform and personalize your vehicle. By understanding the intricate factors influencing the quantity of spray cans needed, you’re not only ensuring a successful project but also creating a unique expression of your style. Patience, attention to detail, and the right materials are the keys to achieving a stunning finish that will turn heads on the road. So, gear up, get creative, and let the transformation begin!