
Embarking on a journey to revamp your car’s interior can be an exciting venture, especially when considering the often-overlooked yet significant component—the headliner board. In this extensive guide, we’ll delve deeper into the art of creating your own headliner board. This endeavor isn’t merely about aesthetics; it’s an opportunity to infuse your vehicle with a personalized touch, turning it into a unique statement of your style and creativity.
Table of Contents
- Understanding the Basics
- Step-by-Step Guide
- Tips for a Successful DIY Project
- Benefits of Crafting Your Own Headliner
- Troubleshooting Common Issues
- Expert Tips for Crafting the Perfect DIY Headliner Board
- 1. Fabric Selection Matters
- 2. Precision in Cutting is Non-Negotiable
- 3. Mind the Adhesive Application
- 4. Consider Lighting for Detail Work
- 5. Temperature and Humidity Control
- 6. Test Fit Before Final Application
- 7. Invest in Professional-Grade Adhesive
- 8. Seamless Edge Wrapping Technique
- 9. Patience is a Virtue
- 10. Post-Installation Inspection
- Frequently Asked Questions About Crafting Your Own Headliner Board
- Q1: What is the Purpose of a Headliner Board?
- Q2: Do I Need Special Skills to Create a Headliner Board?
- Q3: Can I Use Any Fabric for the Headliner?
- Q4: How Long Does the DIY Process Take?
- Q5: What Tools Do I Need for the Project?
- Q6: Can I Install a Headliner Board Over the Existing One?
- Q7: How Do I Deal with Wrinkles and Bubbles in the Fabric?
- Q8: What is the Best Adhesive for Attaching the Fabric?
- Q9: Can I Customize the Headliner Board for a Unique Look?
- Q10: How Can I Maintain the Headliner Board Over Time?
- Conclusion
Understanding the Basics
What is a Headliner Board?
Your car’s headliner board is more than just a visual element. It plays a crucial role in the interior, serving as the material attached to the roof. Beyond providing a sleek appearance, it contributes to insulation and sound absorption. Understanding its significance is the first step towards embarking on an informed DIY journey.
Materials You’ll Need
Before immersing yourself in this creative process, gather essential supplies. In addition to the previously mentioned materials, consider adding a trim tool, a straight edge ruler, and extra fabric for unforeseen adjustments. The thickness of the board is also a critical consideration, balancing durability and flexibility for optimal results.
Step-by-Step Guide
1. Removing the Old Headliner
Take your time during this step; patience ensures that you won’t inadvertently cause damage. Use a trim tool delicately to detach the old headliner, paying close attention to how it’s secured around the edges. This observation becomes your roadmap during the reassembly process.
2. Measuring and Cutting
Precision is the cornerstone of a successful DIY project. Meticulously measure your car’s roof dimensions and transfer them onto the new board. Utilize a straight edge ruler and a sharp utility knife to achieve accurate cuts. This isn’t a step to rush; accuracy ensures a snug fit and a polished outcome.
3. Applying the Fabric
The fabric you choose can make or break the aesthetic appeal of your headliner. Opt for foam-backed fabric due to its durability and ease of application. Lay out the fabric, position the board, and trim the excess, leaving ample fabric to wrap around the edges. Adhesive spray becomes your ally, ensuring a seamless and wrinkle-free finish.
4. Attaching the Board
Once your fabric is flawlessly applied, carefully position the board back onto the car’s roof. Secure it following the method observed during the removal of the old headliner. Pay special attention to corners and edges for a finish that seamlessly integrates with your car’s interior.
Tips for a Successful DIY Project
Choose the Right Fabric
The fabric you choose isn’t just about aesthetics. Consider factors such as durability, resistance to sagging, and ease of cleaning. Opt for a fabric that not only complements your car’s interior color scheme and material but also stands the test of time.
Work in Sections
Breaking down the project into manageable sections is a practical approach. This ensures you maintain control over the process, allowing for a neater and more professional end result. Working in sections also facilitates a smoother workflow, preventing the feeling of being overwhelmed.
Plan for Future Maintenance
Thinking ahead is key to a lasting DIY headliner. Consider how the fabric will fare over time and choose a material that’s easy to clean and maintain. This foresight ensures that your DIY project remains a source of pride well into the future.
Benefits of Crafting Your Own Headliner
Personalization
Beyond the functional aspects, crafting your headliner allows for unparalleled personalization. Infuse your personality into your car’s interior, creating a unique space that reflects your style. From color choices to fabric patterns, the possibilities are endless.
Cost-Effective Solution
Apart from the satisfaction of a job well done, DIY headliner projects are often more budget-friendly than purchasing pre-made options. You not only save money but also gain a sense of accomplishment from creating something tailored to your preferences. (See Also: How to Change Car Interior Color to Black? Transform Your Vehicle)
Sense of Accomplishment
Completing a DIY project brings a unique sense of accomplishment. Every time you step into your car, you’ll be reminded of the effort and creativity invested in making it truly yours. This emotional connection with your vehicle enhances the overall driving experience.
Troubleshooting Common Issues
Wrinkles and Bubbles
Even with meticulous planning, wrinkles or bubbles may appear during the application. Don’t be disheartened; lifting the fabric carefully and reapplying, smoothing out any imperfections, is part of the learning process. Embrace the trial-and-error aspect and enjoy the journey of perfecting your craft.
Uneven Edges
Perfecting the edges is an art in itself. Use a trim tool to refine the corners and ensure a polished finish. Take your time; the devil is in the details. Each adjustment contributes to the overall quality of your DIY headliner.
Future Adjustments
Understand that perfection may take practice. If you notice any imperfections after completion, don’t hesitate to make adjustments. It’s a learning process, and each project contributes to your skillset. Your DIY headliner is a canvas for continuous improvement.
Expert Tips for Crafting the Perfect DIY Headliner Board
Embarking on the journey to create your own headliner board is a rewarding endeavor, but it comes with its challenges. To ensure a seamless and professional outcome, consider these expert tips that go beyond the basics.
1. Fabric Selection Matters
Choosing the right fabric is a pivotal decision in your headliner board project. Beyond merely enhancing the aesthetics, the fabric plays a crucial role in the longevity and overall quality of your DIY creation. Opt for materials that not only look good but also stand up to the rigors of daily use. Consider factors such as durability, resistance to sagging, and ease of cleaning. This meticulous approach ensures your headliner board not only looks fantastic initially but maintains its appeal over the long haul.
2. Precision in Cutting is Non-Negotiable
The precision of your cuts significantly impacts the final fit and finish of your headliner board. Use a straight edge ruler and a sharp utility knife to ensure clean and accurate cuts. Taking your time during this step pays dividends in the overall aesthetic and professionalism of the project. Remember, precision isn’t just about measurements; it’s about creating a snug fit that transforms your car’s interior into a tailored masterpiece.
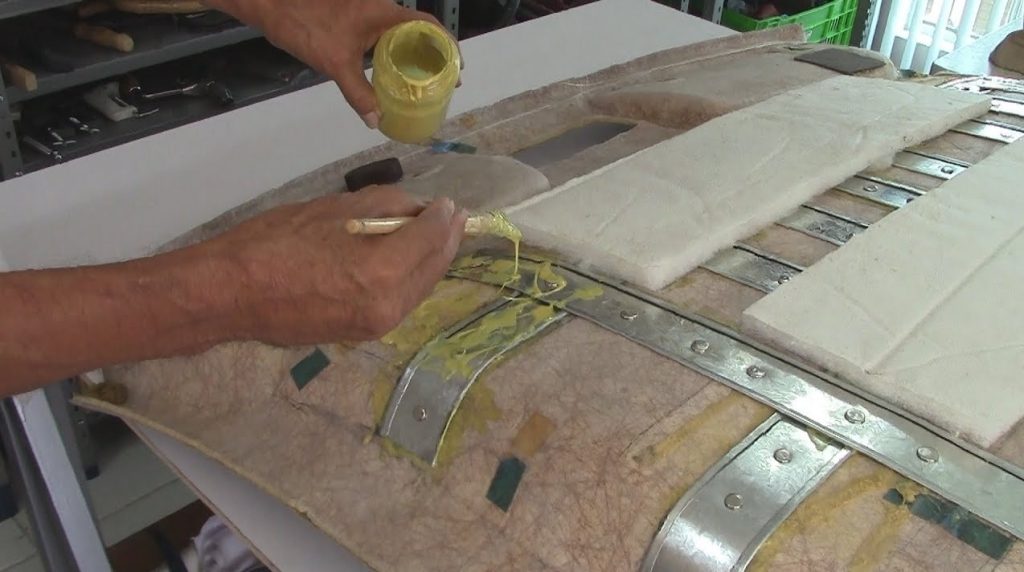
3. Mind the Adhesive Application
Applying adhesive spray is a crucial step that demands a delicate touch. The mantra here is often “less is more.” A light, even application prevents excess glue from seeping through the fabric, preserving the clean look of your headliner. Choosing the right adhesive designed for automotive interiors is paramount, ensuring a secure and long-lasting bond. Paying attention to this detail adds a level of finesse to your DIY project.
4. Consider Lighting for Detail Work
Detail-oriented work requires optimal visibility. Ensure your workspace is well-lit to spot imperfections during the installation process. Adequate lighting not only aids in precision but also allows you to catch any wrinkles, bubbles, or uneven areas before they become permanent. This expert tip ensures a meticulous and flawless finish, even in the most intricate corners.
5. Temperature and Humidity Control
Ideal conditions play a significant role in the success of your headliner board project. Aim for moderate temperatures and low humidity levels during installation. Extreme conditions can affect the adhesive and fabric, potentially leading to complications. This consideration ensures that your DIY effort withstands the test of time and environmental variations.
6. Test Fit Before Final Application
Before committing to the final application of your headliner board, conduct a thorough test fit. This trial run allows you to identify any potential issues, make necessary adjustments, and ensure a seamless fit. Testing before the final application is a precautionary measure that pays off, preventing costly mistakes and ensuring a polished outcome. (See Also: What Are Toyota Softex Problems? Common Issues & Solutions)
7. Invest in Professional-Grade Adhesive
The adhesive you choose can make or break the longevity of your headliner. Investing in a high-quality, automotive-grade adhesive is essential. These adhesives are designed to withstand the unique conditions of car interiors, providing a secure bond that endures temperature fluctuations and daily wear. Opting for professional-grade products contributes to the overall durability and reliability of your DIY creation.
8. Seamless Edge Wrapping Technique
Achieving smooth edges requires a meticulous approach to wrapping. Use a trim tool to refine corners and edges, ensuring a polished finish. Practice a seamless wrapping technique that minimizes wrinkles and maintains a clean appearance. The attention to detail in this step elevates the overall aesthetic and gives your headliner board a professional, custom-crafted look.
9. Patience is a Virtue
Rushing through any step of your DIY headliner board project is a recipe for potential issues. Patience is a virtue, especially during critical stages such as fabric application and cutting. Taking your time ensures accuracy, minimizes errors, and contributes to a result that reflects dedication to craftsmanship. Remember, the process is as important as the outcome, and a patient approach pays off in the final product’s quality.
10. Post-Installation Inspection
Even after completing the installation, the process isn’t quite over. Conduct a thorough post-installation inspection. Look for any wrinkles, bubbles, or uneven areas. Addressing these issues promptly ensures a pristine final product. This inspection stage is an opportunity to catch any imperfections and make necessary adjustments, guaranteeing that your DIY headliner board meets the highest standards of craftsmanship.
Crafting your own headliner board is not just a task; it’s an art. Incorporating these expert tips into your DIY project will not only enhance the aesthetics but also contribute to the longevity and overall success of your customized car interior. Happy crafting!
Frequently Asked Questions About Crafting Your Own Headliner Board
Embarking on a DIY project to create your own headliner board is an exciting venture, but it’s natural to have questions along the way. Explore these frequently asked questions to navigate your journey with confidence.
Q1: What is the Purpose of a Headliner Board?
The headliner board serves both functional and aesthetic purposes. Functionally, it provides insulation and sound absorption, contributing to a comfortable driving experience. Aesthetically, it enhances the interior of your car, providing a sleek and finished look.
Q2: Do I Need Special Skills to Create a Headliner Board?
While some DIY skills are beneficial, creating a headliner board is manageable for enthusiasts of varying skill levels. Follow comprehensive guides, take your time, and don’t hesitate to seek advice if needed.
Q3: Can I Use Any Fabric for the Headliner?
It’s essential to choose the right fabric for durability and aesthetics. Foam-backed fabric is a popular choice, offering durability, ease of application, and a polished finish. Consider factors like color, texture, and cleaning requirements.
Q4: How Long Does the DIY Process Take?
The timeline varies based on factors like your experience level, the complexity of your car’s interior, and the materials used. On average, plan for a weekend or a couple of days to ensure a thorough and thoughtful process. (See Also: Discover Which Cars Have Nappa Leather: A Guide to Luxurious Interiors)
Q5: What Tools Do I Need for the Project?
Basic tools include a trim tool, a straight edge ruler, a utility knife, adhesive spray, and a sturdy board. Additional items like extra fabric for adjustments and proper lighting can enhance the quality of your work.
Q6: Can I Install a Headliner Board Over the Existing One?
It’s generally recommended to remove the old headliner before installing a new one. This allows for a cleaner fit and ensures the new fabric adheres properly.
Q7: How Do I Deal with Wrinkles and Bubbles in the Fabric?
Wrinkles and bubbles are common challenges. If they appear during installation, carefully lift the fabric, reapply adhesive, and smooth out the imperfections. Patience and precision are key.
Q8: What is the Best Adhesive for Attaching the Fabric?
Invest in a professional-grade adhesive specifically designed for automotive interiors. These adhesives provide a secure bond that withstands temperature variations and ensures long-term durability.
Q9: Can I Customize the Headliner Board for a Unique Look?
Absolutely! DIY headliner projects offer endless customization possibilities. Choose a fabric that reflects your style, consider patterns or textures, and make it uniquely yours.
Q10: How Can I Maintain the Headliner Board Over Time?
Regular cleaning with a mild fabric cleaner is usually sufficient for maintenance. Avoid harsh chemicals, and promptly address any spills or stains to preserve the appearance of your customized headliner.
Navigating the creation of your own headliner board is an exciting journey, and these frequently asked questions aim to provide clarity and guidance throughout the process. Remember, each project is unique, so feel free to adapt these insights to suit your specific needs. Happy crafting!
Conclusion
Crafting your own headliner board is not just a DIY project; it’s an opportunity to transform your vehicle into a unique expression of your style and personality. With patience, attention to detail, and a touch of creativity, you can revamp your car’s interior without breaking the bank. So, why settle for the ordinary when you can cruise in style with a custom-made headliner board? Get started on your DIY project today, and watch your car’s interior come to life!