
Welcome to the ultimate guide on how to paint a front lip—a process that allows you to express your unique style and elevate your vehicle’s overall aesthetics. Whether you’re a seasoned DIY enthusiast or a beginner looking to embark on your first automotive customization project, this step-by-step guide will walk you through the entire process, ensuring a professional-looking finish that reflects your personal touch.
Table of Contents
- Understanding the Importance of a Front Lip Paint Job
- Materials You’ll Need
- Step 1: Preparing the Front Lip Surface
- Step 2: Sanding for a Smooth Canvas
- Step 3: Applying the Primer for a Solid Foundation
- Step 4: Choosing the Right Paint Color
- Step 5: The Art of Painting the Front Lip
- Step 6: Adding a Protective Clear Coat
- Step 7: Unveiling the Final Look
- Step 8: Fine-Tuning and Inspection
- Maintaining Your Automotive Artwork
- Expert Tips for Perfectly Painted Front Lips
- 1. Color Choice Matters: Harmonize or Contrast
- 2. Patience is a Virtue: Thin Coats for Precision
- 3. Weather Wisely: Ideal Conditions for Painting
- 4. Prep Like a Pro: Thorough Cleaning Is Key
- 5. Embrace the Sandpaper Ballet: Smooth Transitions
- 6. Master the Art of Masking: Precision is Everything
- 7. Quality Over Quantity: Choose Premium Products
- 8. Test Your Technique: Practice on a Small Surface
- 9. The Power of Post-Paint Care: Wax and Shine
- 10. Learn from Mistakes: Every Paint Job is a Lesson
- FAQs: Painting Your Front Lip Like a Pro
- 1. What Type of Paint Should I Use for My Front Lip?
- 2. Can I Paint My Front Lip a Different Color Than My Car?
- 3. Do I Need to Remove My Front Lip for Painting?
- 4. How Many Coats of Paint Should I Apply?
- 5. Can I Paint My Front Lip Indoors?
- 6. What Grit Sandpaper Should I Use?
- 7. How Long Should I Wait Between Coats?
- 8. Can I Paint Over an Existing Front Lip Color?
- 9. What Should I Do if I Notice Imperfections After Painting?
- 10. How Do I Protect My Painted Front Lip?
- Conclusion: Your Personalized Front Lip
Understanding the Importance of a Front Lip Paint Job
Your car’s front lip is more than just a functional component; it’s a canvas waiting to be customized. A well-painted front lip not only enhances the visual appeal of your vehicle but also adds a touch of individuality. Imagine turning heads as you drive by with a front lip that complements your car’s color or contrasts with it for a bold statement.
Materials You’ll Need
Let’s start with the essentials. Before you dive into the painting process, make sure you have the following materials ready:
- Sandpaper (various grits): Prepare your front lip surface by smoothing out imperfections.
- Primer: Enhances paint adhesion and provides a smooth base for the color coat.
- Paint (color of your choice): The star of the show, so choose wisely to reflect your style.
- Clear coat: Adds a protective layer, ensuring longevity and a glossy finish.
- Painter’s tape and masking paper: Essential for creating clean lines and protecting surrounding areas.
- Microfiber cloths: For cleaning and wiping surfaces.
- Plastic sheets or drop cloths: Protect the surrounding environment from overspray.
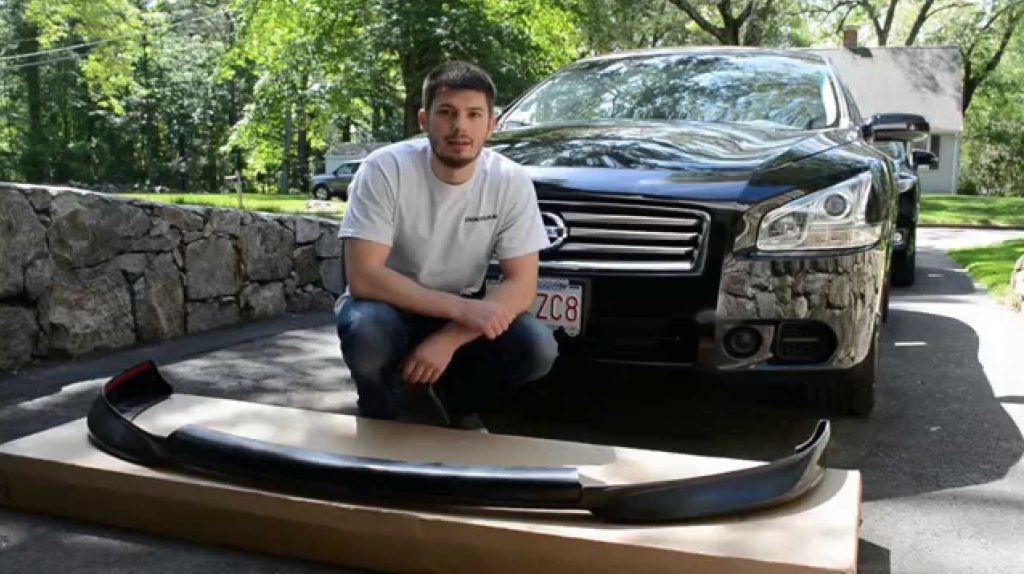
Step 1: Preparing the Front Lip Surface
Before picking up that paint can, start by giving your front lip a thorough cleaning. Use a mild detergent to remove any dirt, grime, or remnants of old paint. Once cleaned, let it dry completely to ensure optimal paint adhesion.
Step 2: Sanding for a Smooth Canvas
Now, let’s smooth things out. Use a fine-grit sandpaper to address any rough or uneven areas on the front lip. Sanding not only creates a smooth canvas for your paint but also promotes better adhesion. Begin with a coarser grit and gradually move to a finer one for a polished result.
Step 3: Applying the Primer for a Solid Foundation
Primer is the unsung hero of any paint job. Apply an even coat of automotive primer across the front lip. This step not only enhances adhesion but also ensures that the final color coat appears vibrant and lasts longer. Allow the primer to dry completely before moving on to the next step.
Step 4: Choosing the Right Paint Color
Here’s where your personal style comes into play. Select a high-quality automotive paint in the color that resonates with you. Consider the existing color of your vehicle and choose a complementary or contrasting shade. Shake the paint can thoroughly to achieve a consistent color.
Step 5: The Art of Painting the Front Lip
Hold the paint can approximately 6 to 8 inches away from the front lip, and with a steady hand, spray in even, overlapping strokes. Patience is key here. Instead of applying one thick coat, opt for multiple thin coats to prevent drips and ensure an even finish. Allow each coat to dry completely before applying the next.
Step 6: Adding a Protective Clear Coat
Protect your masterpiece with a clear coat. This not only adds a glossy finish but also acts as a shield against the elements. The clear coat enhances the durability of your paint job, ensuring it withstands the test of time.
Step 7: Unveiling the Final Look
Once the paint and clear coat are dry to the touch, it’s time to unveil your work. Carefully remove the painter’s tape and masking paper, revealing clean lines and a professional finish. This step is like unwrapping a gift—anticipation meets satisfaction.
Step 8: Fine-Tuning and Inspection
Take a moment to inspect your freshly painted front lip. Look for any imperfections or areas that may need touch-ups. This is your opportunity to make any necessary corrections before the final coat cures completely. (See Also: How to Paint Fiberglass Camper Shell: A Step-by-Step Guide)
Maintaining Your Automotive Artwork
Congratulations! You’ve successfully painted your front lip, but the journey doesn’t end here. To ensure the longevity of your paint job, establish a routine for car maintenance. Regularly wash your vehicle with a mild detergent, and apply a quality automotive wax to protect the paint from environmental factors.
Expert Tips for Perfectly Painted Front Lips
Achieving a flawless finish on your front lip requires more than just the right materials and steps. Let’s delve into some expert tips that will elevate your painting game and ensure your front lip stands out on the road.
1. Color Choice Matters: Harmonize or Contrast
Your front lip’s color sets the tone for your vehicle’s overall appearance. Harmonize with your car’s existing color for a sleek look, or choose a contrasting shade for a bold statement. Consider the aesthetics you want to achieve before committing to a color.
2. Patience is a Virtue: Thin Coats for Precision
Resist the temptation to rush through the painting process. Applying thin coats allows for better control, prevents drips, and ensures an even distribution of color. The patience you invest in this step will pay off in the final, polished result.
3. Weather Wisely: Ideal Conditions for Painting
Pick a day with mild temperatures and low humidity for your painting endeavor. Extreme heat or cold can affect the drying time and quality of your paint job. Choose a well-ventilated space if you’re indoors, or a day with calm winds if you’re painting outdoors.
4. Prep Like a Pro: Thorough Cleaning Is Key
Before reaching for the primer, invest time in thorough cleaning. Remove every bit of dirt, debris, or old paint from your front lip. A clean surface ensures better adhesion, making your paint job last longer and look more professional.
5. Embrace the Sandpaper Ballet: Smooth Transitions
Sanding isn’t just a chore; it’s a dance. Use different grits strategically to smooth transitions between surfaces. Pay extra attention to edges and curves, creating a canvas that welcomes the paint and enhances the final result.
6. Master the Art of Masking: Precision is Everything
Masking is more than just covering areas you don’t want to paint. It’s an art form that requires precision. Take your time to mask off edges and contours carefully. This attention to detail will result in clean lines and a polished finish.
7. Quality Over Quantity: Choose Premium Products
Invest in high-quality paint, primer, and clear coat. The difference in results between budget and premium products is often substantial. Premium options provide better coverage, durability, and a more professional appearance. (See Also: How Many Spray Cans to Paint a Bumper: Your Comprehensive Guide)
8. Test Your Technique: Practice on a Small Surface
If you’re unsure about your technique or the color choice, practice on a small, inconspicuous area before tackling the entire front lip. This allows you to fine-tune your approach and ensures you’re satisfied with the results.
9. The Power of Post-Paint Care: Wax and Shine
Once your front lip is a work of art, maintain its beauty with regular care. Apply automotive wax to protect the paint from harsh elements and keep it looking vibrant. Regular upkeep ensures your front lip continues to turn heads.
10. Learn from Mistakes: Every Paint Job is a Lesson
Not every paint job will be perfect, and that’s okay. Learn from any mistakes or imperfections. Each project is an opportunity to refine your skills and apply newfound knowledge to future endeavors.
Incorporating these expert tips into your front lip painting process will not only enhance the final result but also turn this DIY project into a true reflection of your automotive passion. Happy painting!
FAQs: Painting Your Front Lip Like a Pro
Embarking on the journey of painting your front lip can raise a multitude of questions. From choosing the right paint to ensuring a lasting finish, these frequently asked questions will guide you through the intricacies of this DIY project.
1. What Type of Paint Should I Use for My Front Lip?
Choosing the right paint is crucial for a successful front lip painting project. Opt for high-quality automotive paint specifically designed for exterior use. Ensure compatibility with the primer you’ve selected for optimal adhesion.
2. Can I Paint My Front Lip a Different Color Than My Car?
Absolutely! Painting your front lip a different color can create a striking contrast and add a personalized touch to your vehicle. Consider color harmony or deliberate contrast for a unique aesthetic.
3. Do I Need to Remove My Front Lip for Painting?
While it’s not mandatory, removing the front lip for painting allows for easier and more thorough coverage. If removal is impractical, masking and careful preparation are essential to achieve professional results.
4. How Many Coats of Paint Should I Apply?
Applying multiple thin coats is preferable to one thick coat. This prevents drips, ensures even coverage, and allows for better control. Typically, three to four coats provide a balanced and vibrant finish.
5. Can I Paint My Front Lip Indoors?
Painting your front lip indoors is possible, but proper ventilation is crucial. Ensure the area is well-ventilated, and consider using a respirator to minimize inhalation of fumes. Outdoor painting is generally recommended for better ventilation. (See Also: Undercoating vs. Bedliner: Choosing the Best Protection for Your Vehicle)
6. What Grit Sandpaper Should I Use?
Start with a coarser grit, such as 320, to address any rough areas or imperfections. Gradually move to finer grits, like 600 or 800, for a polished surface. This ensures proper adhesion and a smooth finish.
7. How Long Should I Wait Between Coats?
Allow each coat to dry completely before applying the next. Depending on the paint and environmental conditions, this may take anywhere from 15 minutes to a few hours. Patience is key for a flawless finish.
8. Can I Paint Over an Existing Front Lip Color?
Yes, you can paint over an existing front lip color. However, proper preparation is crucial. Clean the surface thoroughly, sand to create adhesion, and apply a primer before the new paint to ensure longevity.
9. What Should I Do if I Notice Imperfections After Painting?
If you spot imperfections, such as drips or uneven coverage, don’t panic. Allow the paint to dry completely, lightly sand the affected areas, and apply a touch-up coat. Attention to detail during touch-ups ensures a professional look.
10. How Do I Protect My Painted Front Lip?
Regular maintenance is key to protecting your painted front lip. Wash your car regularly with a mild detergent, and apply automotive wax to shield the paint from environmental elements and maintain its vibrancy.
Navigating the nuances of painting your front lip becomes smoother with these frequently asked questions and expert answers. Feel confident in your DIY skills, and turn your front lip into a canvas for automotive expression!
Conclusion: Your Personalized Front Lip
In conclusion, painting your front lip is not just a DIY project; it’s a creative expression of your automotive passion. By following this comprehensive guide, you’ve added a personalized touch to your vehicle, turning it into a true reflection of your style. Take pride in your accomplishment, and let your painted front lip be a conversation starter on the road. Happy driving!