
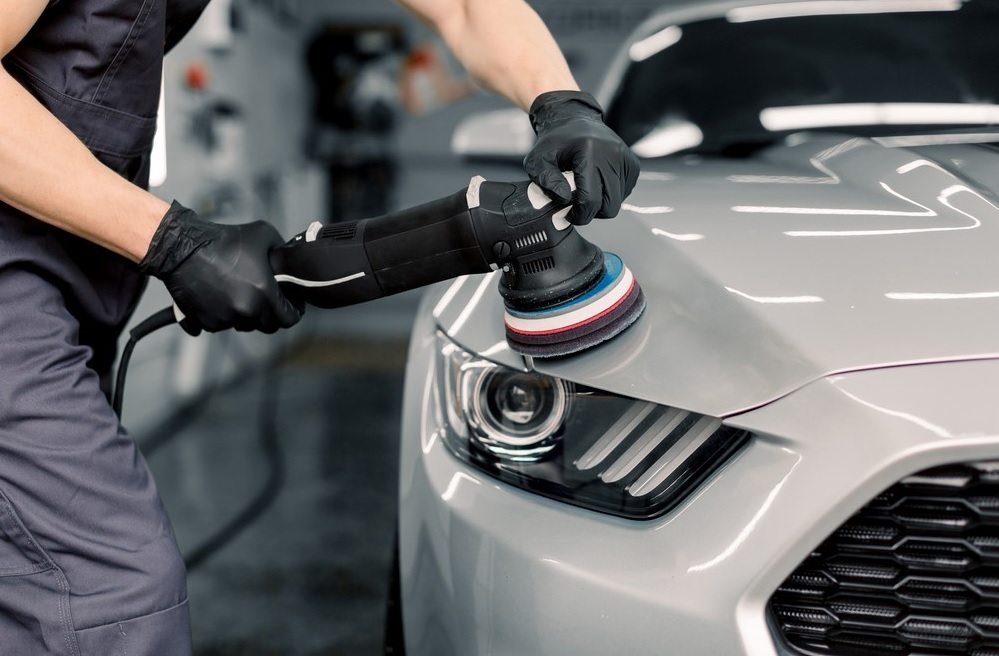
Buffing compounds are a fantastic tool for enhancing the aesthetic appeal of various surfaces, from cars to furniture. However, the aftermath of a buffing session often includes the challenge of dealing with dried buffing compound residues. Whether you’re a seasoned professional or a DIY enthusiast, understanding how to effectively remove dried buffing compound is crucial for achieving and maintaining a perfect finish. In this comprehensive guide, we’ll delve deeper into the nuances of buffing compounds, explore additional tools and techniques for removal, and provide practical tips to prevent dried residues in the first place.
Table of Contents
- Understanding Dried Buffing Compound
- Tools and Materials You’ll Need
- Step-by-Step Removal Process
- Preventive Measures for Future Buffing Sessions
- Choosing the Right Buffing Compound
- The Role of Temperature and Humidity
- Seeking Professional Advice
- Expert Tips for Effortless Dried Buffing Compound Removal
- 1. Choose the Right Buffing Compound from the Start
- 2. Control Your Working Environment
- 3. Work in Manageable Sections
- 4. Regularly Inspect and Address Drying Compound
- 5. Optimize the Plastic Scraper Technique
- 6. Precision with Rubbing Alcohol Application
- 7. Employ Soft Bristle Brushes Wisely
- 8. Consider Professional Advice for Intricate Surfaces
- 9. Post-Removal Cleaning with Mild Detergent
- 10. Document and Learn for Future Sessions
- FAQs: Mastering Dried Buffing Compound Removal
- 1. What Causes Buffing Compound to Dry and Harden?
- 2. Can I Use Any Plastic Scraper for Removal?
- 3. How Does Rubbing Alcohol Help in Removal?
- 4. Are Water-Based Buffing Compounds Easier to Remove?
- 5. Can I Remove Dried Buffing Compound from Automotive Surfaces?
- 6. Should I Use a Soft Bristle Brush on All Surfaces?
- 7. What Preventive Measures Can I Take During Buffing?
- 8. Can I Buff Over Previously Dried Compound Residues?
- 9. Is Professional Help Necessary for Dried Compound Removal?
- 10. How Can I Learn from Past Challenges with Dried Residues?
- Conclusion
Understanding Dried Buffing Compound
Before jumping into removal methods, let’s take a moment to understand why dried buffing compound can pose a significant challenge. Buffing compounds typically consist of a combination of waxes, abrasives, and polishing agents. When applied during the buffing process, these elements create a glossy and polished finish. However, when the compound dries, it forms a tenacious layer that adheres firmly to surfaces, making it resistant to conventional cleaning methods.
Tools and Materials You’ll Need
Expanding on the tools and materials needed for the removal process:
- Soft Cleaning Cloths: Choose high-quality, lint-free cloths to avoid leaving behind fibers.
- Plastic Scraper: Ensure the scraper has a smooth edge to prevent scratches on delicate surfaces.
- Rubbing Alcohol: Opt for a high-percentage isopropyl alcohol for effective compound breakdown.
- Mild Detergent: Consider using a pH-neutral detergent to prevent damage to surfaces.
- Soft Bristle Brush: Depending on the surface type, select a brush with bristles that won’t cause abrasions.
Step-by-Step Removal Process
1. Initial Inspection:
Begin by conducting a thorough inspection of the affected area. Take note of the surface type and the extent of the dried buffing compound.
2. Gentle Scraping:
Use a plastic scraper to delicately remove the surface layer of the dried compound. Employing gentle pressure is crucial to avoid unintended damage.
3. Applying Rubbing Alcohol:
Dampen a soft cloth with rubbing alcohol and gently rub the affected area. The alcohol serves a dual purpose, breaking down the compounds and evaporating quickly.
4. Persistent Residues:
For stubborn spots, a targeted approach is necessary. Apply a small amount of rubbing alcohol directly to the residue, allowing it to sit for a few minutes before carefully scraping off the softened compound.
5. Cleaning with Mild Detergent:
After removing the compound, mix a mild detergent with water. Utilize a soft bristle brush to clean the surface thoroughly, ensuring all residue is eliminated for a polished finish.
Preventive Measures for Future Buffing Sessions
In addition to the removal process, incorporating preventive measures is key to avoiding the hassle of dealing with dried buffing compound residues:
- Work in Sections: Buff small sections at a time, allowing you to manage the compound before it has the chance to dry.
- Regular Inspections: Periodically inspect surfaces during the buffing process to identify and address any drying compound promptly.
- Use Quality Buffing Compounds: Investing in high-quality compounds can significantly reduce the likelihood of stubborn residues.
Choosing the Right Buffing Compound
The type of buffing compound you use plays a crucial role in the ease of removal. Opt for compounds designed for your specific surface type, and consider water-based compounds, as they often leave fewer residues compared to oil-based alternatives.
The Role of Temperature and Humidity
Temperature and humidity levels can impact the drying time of buffing compounds. Working in controlled conditions, such as a well-ventilated and moderately humid space, can give you more control over the drying process and make compound removal more manageable. (See Also: How to Remove Rubbing Compound Haze: A Step-by-Step Guide for Flawless Finish)
Seeking Professional Advice
For intricate surfaces or situations where DIY methods may not be sufficient, consider seeking advice from professionals. Automotive detailers, furniture restoration experts, or surface-specific specialists can provide valuable insights tailored to your unique needs.
Expert Tips for Effortless Dried Buffing Compound Removal
Dealing with dried buffing compound residues doesn’t have to be a daunting task. In fact, with a few expert tips, you can streamline the removal process and ensure a flawless finish. Let’s explore some invaluable insights from seasoned professionals in the field.
1. Choose the Right Buffing Compound from the Start
Selecting a high-quality buffing compound that suits your specific surface is the first line of defense against stubborn residues. Water-based compounds are often preferable, as they tend to leave fewer challenging residues compared to their oil-based counterparts.
2. Control Your Working Environment
Maintaining optimal temperature and humidity levels during the buffing process can influence how quickly the compound dries. Aim for a well-ventilated space with moderate humidity to gain better control over the drying time and make removal more manageable.
3. Work in Manageable Sections
Buffing small sections at a time allows you to stay ahead of the drying process. This proactive approach minimizes the chances of encountering dried buffing compound and makes removal significantly easier.
4. Regularly Inspect and Address Drying Compound
Periodically inspect the surfaces you are buffing to identify and address any drying compound promptly. Catching the issue early on allows for swift action, preventing the compound from becoming stubborn and challenging to remove.
5. Optimize the Plastic Scraper Technique
When using a plastic scraper, employ a gentle but persistent technique. Start with light pressure and gradually increase as needed. A smooth-edged plastic scraper minimizes the risk of scratching surfaces while effectively removing dried compound.
6. Precision with Rubbing Alcohol Application
When applying rubbing alcohol, precision is key. Use a soft cloth dampened with rubbing alcohol and focus on the affected areas. Allow the alcohol to sit for a few minutes on stubborn residues before gently scraping them off.
7. Employ Soft Bristle Brushes Wisely
Soft bristle brushes are excellent for cleaning surfaces after compound removal. However, use them wisely, ensuring they match the surface texture. Avoid excessive pressure to prevent any unintended damage.
8. Consider Professional Advice for Intricate Surfaces
For intricate surfaces or instances where DIY methods may fall short, seeking advice from professionals is a wise choice. Experts in automotive detailing, furniture restoration, or surface-specific fields can provide tailored solutions to your unique challenges. (See Also: How Much Does Fixing a Scratch on a Car Cost? Your Guide to Car Scratch Repair Expenses)
9. Post-Removal Cleaning with Mild Detergent
After successfully removing the dried buffing compound, give your surface a final touch with a mixture of mild detergent and water. This ensures all residues are eliminated, leaving you with a polished and pristine finish.
10. Document and Learn for Future Sessions
Keep a record of your buffing sessions, especially if you encounter challenges with dried compound residues. Documenting the type of compound used, environmental conditions, and specific removal techniques employed can serve as a valuable reference for future sessions.
With these expert tips in your arsenal, you’re well-equipped to tackle dried buffing compound removal with confidence and finesse. Happy buffing!
FAQs: Mastering Dried Buffing Compound Removal
Buffing compounds add a brilliant shine to surfaces, but when residues dry up, it can be a challenge. Here are some frequently asked questions to guide you through the intricacies of removing dried buffing compound.
1. What Causes Buffing Compound to Dry and Harden?
Buffing compounds contain waxes and abrasives that harden when exposed to air. Factors like temperature, humidity, and prolonged exposure contribute to the drying process.
2. Can I Use Any Plastic Scraper for Removal?
Opt for a plastic scraper with a smooth edge to prevent scratches. Ensure it’s suitable for your surface type and apply gentle pressure during the removal process.
3. How Does Rubbing Alcohol Help in Removal?
Rubbing alcohol breaks down the compounds, softening them for easier removal. It also evaporates quickly, making it an efficient and effective solution.
4. Are Water-Based Buffing Compounds Easier to Remove?
Yes, water-based compounds often leave fewer stubborn residues compared to oil-based alternatives. Choosing the right compound initially can significantly ease the removal process.
5. Can I Remove Dried Buffing Compound from Automotive Surfaces?
Absolutely. Use caution and select suitable tools to prevent damage. Follow the recommended removal steps, including gentle scraping and the use of rubbing alcohol.
6. Should I Use a Soft Bristle Brush on All Surfaces?
Tailor your brush choice to the surface texture. Soft bristle brushes work well, but ensure they match the surface to avoid unintended damage. (See Also: How to Clean Oxidized Chrome Rims: Ultimate Guide for Sparkling Wheels)
7. What Preventive Measures Can I Take During Buffing?
Work in manageable sections, regularly inspect for drying compound, and control environmental factors like temperature and humidity to prevent compounds from drying prematurely.
8. Can I Buff Over Previously Dried Compound Residues?
It’s not advisable. Buffing over dried residues can lead to uneven finishes and may embed the residues further. Ensure surfaces are clean before starting a new buffing session.
9. Is Professional Help Necessary for Dried Compound Removal?
While many DIY methods exist, seeking professional advice is wise for intricate surfaces or persistent issues. Professionals can provide tailored solutions based on their expertise.
10. How Can I Learn from Past Challenges with Dried Residues?
Document your buffing sessions, noting the type of compound used, environmental conditions, and removal techniques applied. This documentation becomes a valuable reference for future sessions.
Navigating the removal of dried buffing compound requires knowledge and patience. These FAQs aim to address common concerns and provide guidance for achieving a flawless finish. Happy buffing!
Conclusion
Successfully removing dried buffing compound is both an art and a science. Armed with the right knowledge, tools, and preventive measures, you can navigate the challenges posed by dried residues with confidence. Take your time, work methodically, and enjoy the rewarding experience of achieving a flawless finish on your surfaces.
Now, armed with a deeper understanding of buffing compounds and enhanced removal techniques, you’re ready to elevate the brilliance of your surfaces to new heights. Happy buffing!