
Metal repairs can be daunting, but with the right knowledge and tools, you can transform damaged surfaces into seamless works of art. In this in-depth guide, we’ll take a closer look at using Bondo on metal, providing you with a step-by-step walkthrough, additional tips, and essential insights for a successful repair project.
Table of Contents
- Understanding the Power of Bondo
- Preparing for the Bondo Adventure
- The Step-by-Step Guide to Bondo Magic
- Pro Tips for Success
- Common Mistakes to Avoid
- Expert Tips for Mastering Bondo on Metal Repairs
- 1. Precision in Surface Preparation
- 2. Master the Mixing Process
- 3. Feathering for Seamless Blends
- 4. Gradual Shaping with Sandpaper
- 5. Harness the Power of Glazing Putty
- 6. Priming: The Unsung Hero
- 7. Layered Approach to Painting
- 8. Experiment on Scrap Material
- 9. Rust Prevention for Longevity
- 10. Ventilate for Safety
- 11. Mind the Curing Times
- 12. Inspect, Inspect, Inspect
- 13. Blend with Surroundings
- 14. Personal Safety Gear is Non-Negotiable
- 15. Document Your Process
- Frequently Asked Questions About Using Bondo on Metal
- 1. Is Bondo suitable for all types of metal surfaces?
- 2. How do I know if my metal surface needs Bondo?
- 3. Can Bondo be used on rusted metal?
- 4. What safety precautions should I take when working with Bondo?
- 5. How long does Bondo take to dry and cure?
- 6. Can I sand Bondo by hand, or do I need a power sander?
- 7. Is it necessary to use a primer before painting over Bondo?
- 8. Can Bondo be used for structural repairs on metal objects?
- 9. Can I paint over Bondo with any type of paint?
- 10. How long should I wait before applying the next layer of Bondo or moving to the next step in the process?
- Conclusion: Mastering Metal Repairs with Bondo
Understanding the Power of Bondo
What is Bondo?
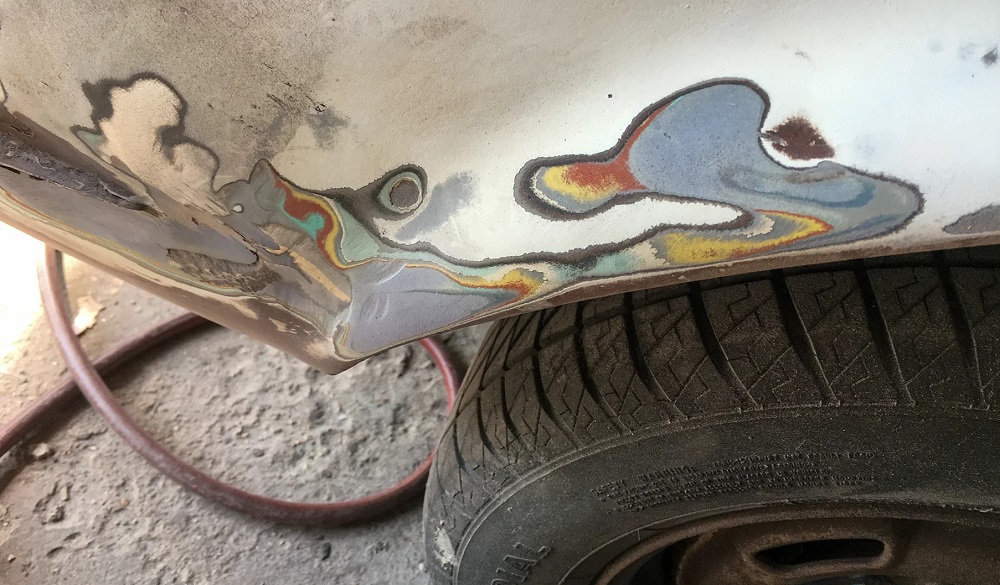
Bondo, officially known as automotive body filler, is a versatile substance comprising a resin and hardener. Originally designed for automotive repairs, Bondo has become a go-to solution for fixing metal objects in various settings. Its impressive adhesive properties and ability to mold into various shapes make it ideal for repairing dents, dings, and even rust damage.
Where Can You Use Bondo?
While Bondo is synonymous with auto body repairs, its applications extend far beyond. From repairing metal furniture to fixing outdoor equipment, Bondo can be a DIYer’s best friend. Its versatility and ease of use make it a valuable addition to any toolkit.
Preparing for the Bondo Adventure
Materials You’ll Need
To ensure a smooth Bondo application, gather the following materials:
- Bondo Kit: This typically includes both the resin and hardener.
- Sandpaper: Multiple grits for shaping and smoothing surfaces.
- Putty Knife: An essential tool for applying Bondo evenly.
- Masking Tape: To protect surrounding areas from accidental Bondo application.
- Rust Converter: If dealing with rusted metal.
- Primer and Paint: For the finishing touches.
Safety First
Before diving into the repairs, remember to prioritize safety:
- Work in a Well-Ventilated Area: Bondo emits strong fumes, so ensure adequate ventilation.
- Wear Protective Gear: A mask and gloves protect you from Bondo and associated chemicals.
The Step-by-Step Guide to Bondo Magic
1. Surface Preparation
Proper preparation is the foundation of a successful Bondo repair. Start by cleaning the metal surface thoroughly. For rusted areas, use a rust converter to halt corrosion. Then, sand the surface to create a rough texture, allowing the Bondo to adhere effectively.
2. Mixing Bondo
Follow the instructions on the Bondo kit for mixing the resin and hardener. Work swiftly, as Bondo sets quickly. A consistent color indicates a well-mixed solution.
3. Applying Bondo
Armed with your putty knife, apply the Bondo to the damaged area. Ensure an even spread, slightly overfilling the damaged space to account for sanding down in later steps.
4. Shaping and Sanding
Once the Bondo has cured, the shaping process begins. Use coarse grit sandpaper to sculpt the repair, gradually progressing to finer grits for a smooth finish.
5. Fine-Tuning with Glazing Putty
For minor imperfections, introduce glazing putty. This finer filler provides an extra layer of smoothness. Sand it down for a flawlessly blended look.
6. Priming the Repaired Area
Before applying paint, prime the repaired area. This step ensures the paint adheres properly and provides an additional layer of protection for the repair.
7. Painting the Surface
Choose a high-quality paint that matches the surrounding area. Apply thin, even coats, allowing each layer to dry thoroughly before adding the next. (See Also: Can You Paint Rustoleum Over Ospho? A Comprehensive Guide)
Pro Tips for Success
- Patience is a Virtue: Rushing any step can compromise the quality of your repair. Take your time for the best results.
- Feather the Edges: When applying Bondo, feather the edges for a seamless transition between the repair and the original surface.
- Experiment on Scrap: If you’re new to using Bondo, practice on a scrap piece of metal to get a feel for its application and drying times.
Common Mistakes to Avoid
- Skipping Surface Preparation: Neglecting proper cleaning and sanding hinders Bondo’s effectiveness.
- Neglecting Safety Gear: Failing to wear a mask and gloves exposes you to potentially harmful chemicals.
- Ignoring Curing Times: Rushing through curing times can lead to a subpar repair.
Expert Tips for Mastering Bondo on Metal Repairs
Embarking on a Bondo adventure? Elevate your skills with these expert tips to ensure your metal repairs stand out for all the right reasons. From surface preparation to finishing touches, these insights will guide you through the nuances of working with Bondo, helping you achieve professional-grade results.
1. Precision in Surface Preparation
Before diving into Bondo application, meticulous surface preparation is paramount. Remove rust, clean the metal thoroughly, and create a textured surface for optimal Bondo adhesion.
2. Master the Mixing Process
Bondo is a team player, and getting the resin and hardener mix just right is crucial. Follow the manufacturer’s instructions meticulously for a well-balanced concoction.
3. Feathering for Seamless Blends
When applying Bondo, feather the edges of the repair area. This technique ensures a smooth transition between the repaired section and the original surface, creating a flawless finish.
4. Gradual Shaping with Sandpaper
Patience pays off when shaping the Bondo repair. Start with coarse grit sandpaper and gradually move to finer grits for a polished and professional result.
5. Harness the Power of Glazing Putty
For those tiny imperfections that escape notice, glazing putty is your secret weapon. It provides an extra layer of finesse, leaving your repair looking impeccable.
6. Priming: The Unsung Hero
Don’t underestimate the importance of priming. It not only enhances paint adhesion but also provides an additional layer of protection to your repaired metal surface.
7. Layered Approach to Painting
When it’s time to paint, adopt a layered approach. Thin, even coats of high-quality paint ensure a vibrant finish and reduce the risk of paint drips or bubbles.
8. Experiment on Scrap Material
If you’re new to Bondo, practice on a scrap piece of metal before tackling your main project. Familiarize yourself with the material and perfect your technique in a risk-free environment.
9. Rust Prevention for Longevity
Address rust issues promptly and use a rust converter before applying Bondo. This not only ensures a durable repair but also prevents the recurrence of rust in the future.
10. Ventilate for Safety
Bondo emits potent fumes, so always work in a well-ventilated area. Prioritize your safety by wearing a mask and gloves to protect yourself from any potential hazards. (See Also: Can You Bondo Over POR 15? Expert Tips and Best Practices)
11. Mind the Curing Times
Resist the urge to rush through curing times. Each layer—Bondo, primer, and paint—requires sufficient time to dry for a sturdy and long-lasting repair.
12. Inspect, Inspect, Inspect
Before declaring your project complete, scrutinize the repair under different lighting conditions. Identifying any imperfections early allows for timely adjustments.
13. Blend with Surroundings
When choosing paint, opt for a color that seamlessly blends with the surrounding area. A well-matched paint color contributes significantly to the overall aesthetic.
14. Personal Safety Gear is Non-Negotiable
From masks to gloves, make personal safety gear a non-negotiable part of your Bondo toolkit. Prioritize your well-being while crafting impeccable repairs.
15. Document Your Process
Consider keeping a photo log of your Bondo projects. This not only serves as a personal record but also helps troubleshoot any issues that may arise in future endeavors.
Implementing these expert tips will not only enhance your Bondo skills but also elevate your metal repair projects to a professional level. Happy repairing!
Frequently Asked Questions About Using Bondo on Metal
Navigating the world of metal repairs with Bondo can raise a myriad of questions. Let’s address some common queries to ensure your journey with Bondo is smooth and successful. If you’re delving into metal restoration, these FAQs and answers will provide valuable insights.
1. Is Bondo suitable for all types of metal surfaces?
Absolutely. Bondo is versatile and can be used on various metal surfaces, including those on cars, furniture, and household items. Its adaptability makes it a go-to solution for many DIY enthusiasts.
2. How do I know if my metal surface needs Bondo?
If your metal surface has dents, dings, or rust damage, Bondo can be a viable solution. It’s particularly effective for repairing minor to moderate damage, providing a smooth finish when applied correctly.
3. Can Bondo be used on rusted metal?
Yes, it can. However, it’s crucial to address the rust before applying Bondo. Use a rust converter to halt corrosion and ensure a durable repair.
4. What safety precautions should I take when working with Bondo?
Always work in a well-ventilated area, as Bondo emits strong fumes. Additionally, wear a mask and gloves to protect yourself from potential exposure to chemicals. (See Also: Can You Ceramic Coat Polished Aluminum Wheels? Ultimate Guide to Wheel Protection)
5. How long does Bondo take to dry and cure?
The drying and curing times depend on factors such as temperature and humidity. Generally, Bondo sets in about 20-30 minutes, but complete curing may take several hours. Follow the manufacturer’s recommendations for the specific product you’re using.
6. Can I sand Bondo by hand, or do I need a power sander?
You can certainly sand Bondo by hand using sandpaper. Start with coarse grit and progress to finer grits for a polished finish. However, a power sander can expedite the process, especially for larger projects.
7. Is it necessary to use a primer before painting over Bondo?
Yes, it is highly recommended. Applying a primer not only enhances paint adhesion but also provides an additional layer of protection to the repaired metal surface.
8. Can Bondo be used for structural repairs on metal objects?
While Bondo is excellent for cosmetic repairs, it’s not intended for structural fixes. It’s best suited for addressing surface imperfections and enhancing the appearance of the metal.
9. Can I paint over Bondo with any type of paint?
Yes, you can paint over Bondo with most types of paint. Choose a high-quality paint that matches the surrounding area, and apply it in thin, even coats for the best results.
10. How long should I wait before applying the next layer of Bondo or moving to the next step in the process?
Follow the recommended curing times for each layer—Bondo, primer, and paint. Rushing through the process can compromise the quality of your repair.
These FAQs cover key aspects of using Bondo on metal surfaces. If you have additional questions, feel free to explore further or consult with a professional for personalized guidance. Happy repairing!
Conclusion: Mastering Metal Repairs with Bondo
Bondo opens up a world of possibilities for DIY enthusiasts and those looking to tackle metal repairs without breaking the bank. By following this comprehensive guide, you’ll not only learn the practical steps but also gain insights into the nuances of working with Bondo. Remember, precision, patience, and a touch of creativity can turn a seemingly damaged metal surface into a work of art. Happy repairing!