
If you’ve recently coated a surface with Raptor Liner, you’re likely eagerly awaiting the moment when it’s fully dry and ready for action. Understanding the nuances of the drying process is crucial for achieving optimal results. In this comprehensive guide, we’ll not only answer the burning question, “How long does it take for Raptor Liner to dry?” but also explore related factors, tips for acceleration, and troubleshooting measures.
Table of Contents
- Unveiling the World of Raptor Liner
- The Dance of Variables: Factors Influencing Drying Time
- A Glimpse into Average Drying Times
- Techniques for Swift Drying
- Troubleshooting the Time Lag
- Expanding Horizons: Going Beyond Drying Time
- Expert Tips for Optimal Raptor Liner Drying
- FAQs About Raptor Liner Drying Times
- 1. Q: How long does it take for Raptor Liner to dry?
- 2. Q: Can I speed up the drying process?
- 3. Q: Is curing the same as drying?
- 4. Q: What if Raptor Liner is taking longer to dry?
- 5. Q: Can I apply additional coats before the first one is fully dry?
- 6. Q: How does temperature affect drying times?
- 7. Q: Should I consider UV exposure for faster curing?
- 8. Q: Can I use a drying accelerator with Raptor Liner?
- 9. Q: Is it normal for Raptor Liner to feel tacky during the drying process?
- 10. Q: How long should I wait before subjecting the coated surface to heavy use?
- In Conclusion: Mastering Raptor Liner Application
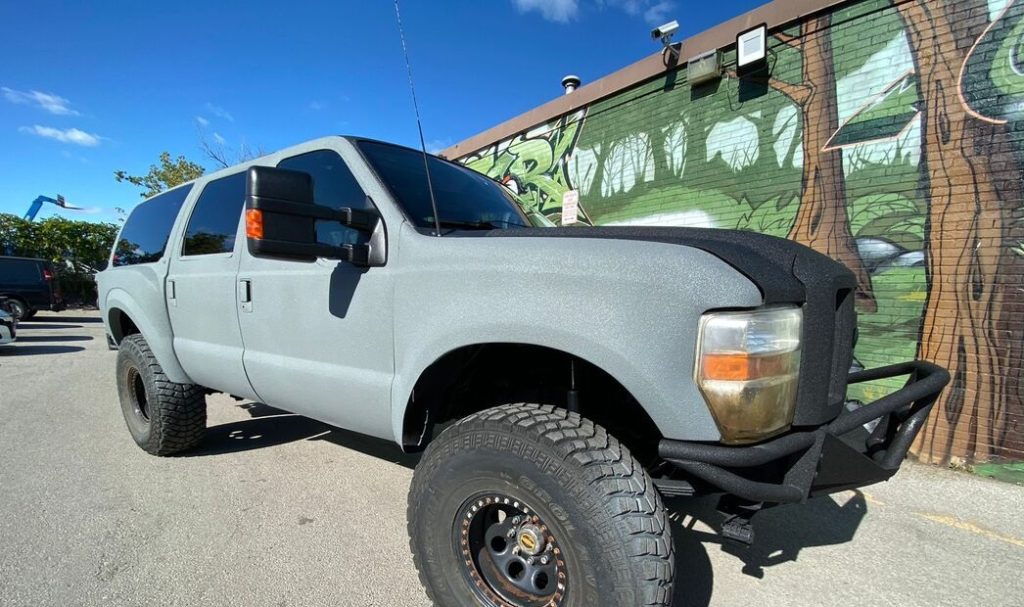
Unveiling the World of Raptor Liner
Before we plunge into the intricacies of drying times, let’s familiarize ourselves with the world of Raptor Liner. This polyurethane coating has gained popularity for its remarkable durability and versatility, making it a preferred choice for a wide array of applications, from safeguarding truck beds to enhancing DIY projects.
The Dance of Variables: Factors Influencing Drying Time
The drying time of Raptor Liner is not a one-size-fits-all scenario; it dances to the tune of several variables. The ambient temperature, humidity levels, and the thickness of the applied coating are all players in this intricate ballet, determining the ultimate duration of the drying process.
A Glimpse into Average Drying Times
As a general rule of thumb, Raptor Liner typically starts to dry within 2 to 4 hours after application. However, achieving full cure may take up to 24 hours. It’s crucial to note that environmental conditions play a pivotal role, either expediting or prolonging this drying duration.
Techniques for Swift Drying
1. Embrace Optimal Environmental Conditions
Ensure the application environment maintains a temperature between 70°F to 100°F with humidity levels below 50%. This creates a Goldilocks zone for a quicker drying process.
2. Master the Art of Thin and Even Coats
Applying thin, even coats not only ensures a smoother finish but also aids in faster drying. Thick layers take longer to cure and may lead to uneven results.
3. Let the Air Flow: Prioritize Proper Ventilation
Adequate ventilation is an unsung hero in expediting the curing process. Consider using fans or opening windows to facilitate air circulation and quicken the drying time.
Troubleshooting the Time Lag
In the event that your Raptor Liner seems to be taking longer than expected to dry, here are some troubleshooting steps to consider:
1. Reevaluate Environmental Conditions
Ensure that the temperature and humidity in your workspace are within the recommended range. Inadequate conditions can significantly prolong drying times.
2. Assess Coating Thickness
If you applied a thicker coating than recommended, patience is key. Thick layers naturally take more time to dry and cure.
3. Verify Proper Mixing
Inadequate mixing can lead to uneven drying. Ensure you follow the manufacturer’s guidelines for thorough mixing before application to avoid hiccups in the drying process.
Expanding Horizons: Going Beyond Drying Time
Understanding the drying time is just the tip of the iceberg. Let’s delve into additional aspects related to Raptor Liner: (See Also: How to Use Bondo on Metal: Step-by-Step Guide for Perfect Repairs)
A. Durability Insights
Raptor Liner isn’t just about aesthetics; it’s a powerhouse in terms of durability. Discover how this coating withstands the test of time and various environmental challenges.
B. Versatility Unleashed
Explore the versatility of Raptor Liner as we uncover the multitude of surfaces and projects that can benefit from its protective embrace.
C. Maintenance Tips for Longevity
Once your Raptor Liner project is dry and ready, learn the best practices for maintenance to ensure its longevity and sustained performance.
Expert Tips for Optimal Raptor Liner Drying
Achieving the perfect finish with Raptor Liner goes beyond the application process. Ensuring optimal drying requires finesse and attention to detail. Here are expert tips to elevate your Raptor Liner experience.
1. Temperature Control is Key
Maintain a controlled environment with temperatures between 70°F to 100°F. Consistent warmth expedites the drying process, resulting in a more efficient and uniform finish.
2. Humidity Management
Keep humidity levels below 50% to prevent moisture interference. High humidity can extend drying times and compromise the quality of the coating.
3. Thin is In
Apply thin, even coats of Raptor Liner. This not only accelerates drying but also ensures a smoother and more professional-looking surface.
4. Ventilate Wisely
Proper ventilation is your ally. Use fans or open windows to encourage airflow, aiding in solvent dissipation and hastening the curing process.
5. Mind the Mixing
Thoroughly mix the Raptor Liner components before application. Inadequate mixing can lead to uneven drying and compromise the overall quality of the coating.
6. Strategic Application Timing
Plan your application timing wisely. Consider weather conditions and choose a time when you can optimize temperature and humidity for the best drying results. (See Also: Can You Powder Coat Lug Nuts? A Guide to Enhancing Durability and Style)
7. Testing, Testing, Testing
Conduct a small test application before tackling the entire project. This allows you to gauge drying times in your specific environment and make adjustments as needed.
8. Consider UV Exposure
If possible, expose the freshly coated surface to UV light. This can expedite the curing process and enhance the overall durability of the Raptor Liner.
9. Patience Pays Off
While we all want quick results, patience is a virtue with Raptor Liner. Rushing the drying process may lead to suboptimal results. Allow ample time for each coat to cure properly.
10. Post-Drying Inspection
Once the Raptor Liner is dry, inspect the surface carefully. Address any imperfections or inconsistencies before moving on to additional coats or finishing touches.
These expert tips, when implemented thoughtfully, will not only reduce drying times but also elevate the quality and longevity of your Raptor Liner application. Happy coating!
FAQs About Raptor Liner Drying Times
Navigating the drying process of Raptor Liner can raise several questions. Let’s address the frequently asked questions to ensure you have all the information you need for a successful coating experience.
1. Q: How long does it take for Raptor Liner to dry?
A: Generally, Raptor Liner starts drying within 2 to 4 hours, with full cure achievable in up to 24 hours. However, environmental conditions and application thickness play crucial roles in determining the exact drying time.
2. Q: Can I speed up the drying process?
A: Yes, optimizing environmental conditions, applying thin coats, and ensuring proper ventilation can expedite the drying of Raptor Liner. However, patience is still key to achieving the best results.
3. Q: Is curing the same as drying?
A: While drying refers to the surface becoming tack-free, curing involves the coating reaching its maximum hardness. Full cure may take up to 24 hours after the initial drying period.
4. Q: What if Raptor Liner is taking longer to dry?
A: Reevaluate environmental conditions, assess coating thickness, and verify proper mixing. These troubleshooting steps can help identify and address factors contributing to extended drying times.
5. Q: Can I apply additional coats before the first one is fully dry?
A: It’s advisable to wait until the initial coat is tack-free before applying additional layers. Rushing the process may lead to uneven drying and compromise the overall quality of the coating. (See Also: Is POR 15 Metal Prep Necessary? Unveiling the Importance for Rust Prevention)
6. Q: How does temperature affect drying times?
A: Warmer temperatures accelerate the drying process, while colder temperatures may slow it down. Maintaining an optimal temperature range of 70°F to 100°F is ideal for efficient drying.
7. Q: Should I consider UV exposure for faster curing?
A: Yes, exposing the freshly coated surface to UV light can expedite the curing process. However, this is optional and may not be feasible for all projects.
8. Q: Can I use a drying accelerator with Raptor Liner?
A: It’s recommended to stick to the manufacturer’s guidelines. Using unauthorized drying accelerators may compromise the quality and durability of the Raptor Liner.
9. Q: Is it normal for Raptor Liner to feel tacky during the drying process?
A: Yes, it’s common for the surface to feel tacky during the initial drying stages. This tackiness diminishes as the coating continues to cure.
10. Q: How long should I wait before subjecting the coated surface to heavy use?
A: While the surface may feel dry after a few hours, it’s advisable to wait at least 24 hours before subjecting it to heavy use to ensure the coating has fully cured.
Feel free to refer to these FAQs to address any uncertainties you may have about the drying process of Raptor Liner. Happy coating!
In Conclusion: Mastering Raptor Liner Application
In this journey through the drying process of Raptor Liner, we’ve not only answered the pressing question but also expanded our knowledge to master the application. By understanding the variables, implementing techniques for swift drying, and exploring additional facets of this remarkable coating, you’re now equipped to tackle your projects with confidence. Happy coating!