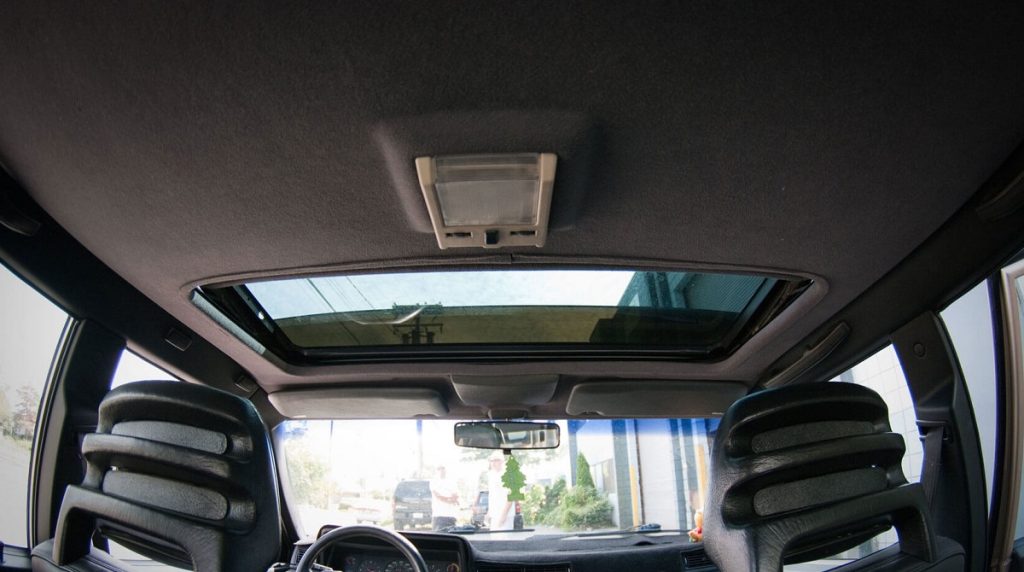
Embarking on the journey of creating a custom headliner for your car is not just a practical solution to worn-out interiors but also an opportunity to showcase your creativity. In this in-depth guide, we’ll delve even deeper into each step of the process, providing you with comprehensive insights and valuable tips.
Table of Contents
- Getting Started: Understanding the Basics
- Stripping the Old Headliner
- Measuring and Cutting: Precision Matters
- Applying Adhesive: Stick It Right
- Installation: Bringing It All Together
- Maintenance Tips: Keeping It Fresh
- Expert Tips for Mastering DIY Car Headliner Creation
- Frequently Asked Questions About DIY Car Headliners
- 1. Can I Use Any Fabric for My DIY Headliner?
- 2. What Tools Do I Need for DIY Headliner Creation?
- 3. How Do I Remove the Old Headliner Without Damaging the Interior?
- 4. Is There a Recommended Adhesive for Attaching the Fabric to the Headliner Board?
- 5. What’s the Best Way to Avoid Wrinkles and Bubbles in the Fabric?
- 6. How Do I Ensure a Snug Fit During Installation?
- 7. Can I Add Personalized Touches to My DIY Headliner?
- 8. How Do I Maintain My DIY Headliner for Longevity?
- Conclusion
Getting Started: Understanding the Basics
Materials Needed
The choice of materials can significantly impact the outcome of your DIY headliner project. Consider not only the aesthetic appeal but also the durability and maintenance requirements of different fabrics. Foam-backed fabric is a popular choice, offering a balance of comfort and sturdiness.
However, if you’re feeling adventurous, explore alternatives like suede or microfiber for a luxurious touch. Understanding the characteristics of each material ensures that your creation aligns seamlessly with your vision.
Tools of the Trade
While a staple gun and adhesive spray are staples in this DIY endeavor, consider the nuances of each tool. Invest in a high-quality staple gun with adjustable settings to cater to different fabric thicknesses. Likewise, opt for an adhesive applicator that ensures a uniform and controlled spray, minimizing the risk of uneven bonding.
Stripping the Old Headliner
Removing the old headliner requires finesse to avoid damaging the vehicle’s interior. Take your time and gently pry off any trim pieces and accessories. Pay attention to electrical components, if any, and disconnect them cautiously. An organized approach during this phase simplifies the later stages of the project.
Measuring and Cutting: Precision Matters
Selecting the Right Fabric
The fabric you choose contributes significantly to the overall aesthetics and comfort of your car’s interior. Beyond the basics, consider factors like UV resistance and ease of cleaning. If you have a penchant for patterns, explore options that complement your vehicle’s color scheme and design.
Cutting Techniques
Perfecting the art of cutting is crucial for achieving a professional finish. Consider creating a template using newspaper or cardboard before cutting the actual fabric. This practice round allows you to identify potential challenges and refine your technique.
Applying Adhesive: Stick It Right
Proper Application Techniques
Achieving a seamless bond between the fabric and headliner board is essential for a polished look. Before applying adhesive, ensure both surfaces are clean and free of dust. Apply the adhesive in a well-ventilated area, and follow the manufacturer’s instructions diligently.
Consider using a rolling tool to smooth out the fabric, eliminating air bubbles and wrinkles. This attention to detail during the adhesive application phase contributes to the longevity of your DIY headliner.
Installation: Bringing It All Together
Securing the Headliner Board
Aligning the headliner board precisely is crucial for a snug fit. Take the time to position it accurately before securing it with staples. Begin at the center and work your way outward to maintain even tension on the fabric. This approach minimizes the risk of sagging or uneven surfaces. (See Also: What Does Hardtop Headliner by Mopar Do? – Your Ultimate Guide)
Finishing Touches
Trimming excess fabric is the final step before admiring your handiwork. A sharp utility knife and a steady hand are your allies in achieving clean, professional edges. Conceal seams by overlapping fabric sections or using decorative trim for a polished appearance.
Maintenance Tips: Keeping It Fresh
Preserving the beauty of your DIY headliner requires occasional maintenance. Vacuum the interior regularly to prevent dust accumulation, and address any spills promptly to avoid stains. Consider applying a fabric protector to enhance resistance against stains and spills.
Expert Tips for Mastering DIY Car Headliner Creation
Embarking on the journey of crafting a headliner for your car opens up a world of possibilities. As you delve into this creative process, consider these expert tips to elevate your DIY skills and achieve a professional finish that transforms your vehicle’s interior.
1. Choose Quality Materials Wisely
Selecting the right fabric is paramount. Opt for high-quality, durable materials that not only suit your style but also withstand the rigors of daily use. Foam-backed fabrics are popular for their balance of comfort and resilience, but explore alternatives for a unique touch.
2. Precision Measuring and Cutting
Measure twice, cut once. Precision in measurements and cutting ensures a snug fit for your DIY headliner. Consider creating a template before working with the actual fabric to refine your technique and avoid costly mistakes.
3. Invest in Professional Tools
A staple gun is your primary tool, and investing in a high-quality, adjustable one pays off in the long run. Likewise, choose an adhesive applicator that provides a controlled and even spray. Professional tools contribute to a seamless and efficient DIY process.
4. Prioritize Adhesive Application
Master the art of adhesive application. Ensure both surfaces are clean, and follow the adhesive manufacturer’s instructions meticulously. A uniform and thorough application is crucial for a strong and lasting bond between the fabric and the headliner board.
5. Take Your Time During Installation
Rushing through the installation can lead to uneven surfaces and a less-than-professional finish. Take the time to align the headliner board precisely before securing it with staples. Starting from the center and moving outward maintains even tension on the fabric.
6. Finishing Touches Matter
Trimming excess fabric requires attention to detail. Use a sharp utility knife for clean and precise cuts. Conceal seams strategically, either by overlapping fabric sections or incorporating decorative trim for a polished and refined appearance. (See Also: What is Anthracite Headlining in BMW? Explore Luxury Features)
7. Regular Maintenance for Longevity
Preserve the beauty of your DIY headliner with regular maintenance. Vacuum the interior to prevent dust buildup, address spills promptly to avoid stains, and consider applying a fabric protector for added resistance against wear and tear.
Embarking on a DIY headliner project is not just about functionality; it’s an artistic endeavor. With these expert tips, you’re well-equipped to navigate the intricacies of the process and create a headliner that not only revitalizes your car’s interior but also showcases your craftsmanship. Happy crafting!
Frequently Asked Questions About DIY Car Headliners
Embarking on a DIY journey to create a headliner for your car can spark a multitude of questions. Here, we address some common queries to guide you through this creative process seamlessly.
1. Can I Use Any Fabric for My DIY Headliner?
Absolutely. While foam-backed fabrics are popular for their balance of comfort and durability, you can explore various options. Suede, microfiber, or even patterned fabrics can add a unique touch to your car’s interior.
2. What Tools Do I Need for DIY Headliner Creation?
Key tools include a staple gun with adjustable settings, an adhesive applicator for controlled spraying, and a sharp utility knife for precise cutting. Investing in quality tools ensures a smoother and more professional DIY experience.
3. How Do I Remove the Old Headliner Without Damaging the Interior?
Carefully pry off trim pieces and accessories. Pay special attention to electrical components, and disconnect them cautiously. An organized disassembly ensures a smoother reconstruction phase.
4. Is There a Recommended Adhesive for Attaching the Fabric to the Headliner Board?
Yes. Choose a high-quality adhesive suitable for automotive applications. Ensure both surfaces are clean before applying, and follow the manufacturer’s instructions diligently for a strong and lasting bond.
5. What’s the Best Way to Avoid Wrinkles and Bubbles in the Fabric?
Proper adhesive application is key. Clean surfaces, an even application, and using a rolling tool to smooth out the fabric can help avoid wrinkles and bubbles, ensuring a polished finish. (See Also: How to Clean Leatherette Car Seats: Ultimate Guide for Pristine Interior Care)
6. How Do I Ensure a Snug Fit During Installation?
Take your time aligning the headliner board before securing it with staples. Starting from the center and moving outward helps maintain even tension on the fabric, reducing the risk of sagging or uneven surfaces.
7. Can I Add Personalized Touches to My DIY Headliner?
Absolutely. Consider adding decorative trim or exploring unique fabric patterns to infuse your personality into the project. The DIY process is not just about functionality but also about self-expression.
8. How Do I Maintain My DIY Headliner for Longevity?
Regular vacuuming to prevent dust accumulation and prompt action on spills are essential. Consider applying a fabric protector to enhance resistance against stains and spills, ensuring your DIY creation stands the test of time.
Embarking on a DIY headliner project is an exciting adventure. By addressing these frequently asked questions, we aim to provide you with the knowledge and confidence to navigate through the intricacies of the process successfully. Happy crafting!
Conclusion
Crafting a headliner for your car is not merely a repair but a creative endeavor that transforms your vehicle’s interior into a personalized space. By dedicating time to understand materials, tools, and techniques, you empower yourself to embark on this journey with confidence.
This comprehensive guide provides you with the knowledge to not only make a headliner but to infuse your personality into your car. Embrace the DIY spirit, relish the process, and revel in the satisfaction of driving a vehicle that reflects your unique style. Say farewell to lackluster interiors and welcome a new era of automotive self-expression!


